2-Week Meal Prep Meal Plan with Grocery List – The Real Food Dietitians

2-Week Meal Prep Meal Plan with Grocery List – The Real Food Dietitians

As a mindfulness-based registered dietitian, I am passionate about the power of mindful eating to transform not only our personal relationship with food but also our impact on the environment — merging mindful eating and sustainability.
Mindful eating involves paying attention to the present moment while listening to our body’s needs and it can include becoming aware of sustainable food choices. In this article, we will explore Mindful Eating and Sustainability and how mindful eating can benefit the environment, reduce our carbon footprint, and promote sustainability.
Mindful eating is the practice of paying attention to your food and your body in a non-judgmental way. It involves being fully present during meals, savoring each bite, and listening to your body’s signals of hunger and fullness. The goal of mindful eating is to bring awareness to your eating habits, reduce stress around food, and increase your enjoyment of eating.
Since choosing to live “off-grid” a few years ago — we’re operating our home entirely off of solar energy — I’ve felt more connected to nature than ever. I experience profound gratitude and motivation to support the land we get to call home, and the earth we all get to call home.
Being more connected to nature, growing my own food, tending to our forest farm animals, and supporting natural resources, has also changed my relationship with food. Mindful eating has another layer of appreciation as I can clearly see and know where my food is coming from, having a greater connection to more local farmers to support their gardens and growing practices while reducing our carbon footprint.
Now, you don’t need to live “off-grid” or in the forest like I choose to, we all can take small steps to engage in more sustainable food choices, and mindfully eat with sustainability in mind.
Reduces Food Waste: Mindful eating can help reduce food waste by encouraging us to pay attention to the amount of food we consume and choose portion sizes that match our appetites. By reducing food waste, we can also reduce greenhouse gas emissions associated with food production, transportation, and disposal.
Supports Local and Sustainable Agriculture: Mindful eating can encourage us to choose locally grown and sustainably sourced foods, which can reduce the environmental impact of food transportation and support local communities.
Reduces Energy Consumption: By choosing whole foods that require minimal processing and plastic packaging, we can reduce energy consumption associated with food processing, transportation, and storage.
Encourages Plant-Based Eating: Mindful eating can encourage us to choose plant-based options, which have a lower carbon footprint than animal products. Plant-based eating can also support biodiversity, reduce deforestation, and reduce water usage.
Supports Ethical Food Practices: Mindful eating can encourage us to choose foods that are produced using ethical and sustainable practices, such as fair trade and organic farming. By supporting ethical food practices, we can promote sustainability and support local communities (and bee populations).
Here are some tips for incorporating mindful eating into your daily life to promote sustainability:
Eat Whole Foods: Choose whole foods that require minimal processing and packaging, such as fruits, vegetables, grains, and legumes.
Choose Locally Grown and Sustainably Sourced Foods: Look for foods that are grown and sourced locally and sustainably, such as seasonal produce and sustainably sourced seafood.
Reduce Meat Consumption: Consider reducing your meat consumption or choosing plant-based alternatives, which have a lower carbon footprint.
Avoid Food Waste: Pay attention to your body’s signals of hunger and fullness, and choose portion sizes that match your appetite. Store food properly to reduce spoilage and waste.
Support Ethical Food Practices: Choose foods that are produced using ethical and sustainable practices, such as fair trade and organic farming.
Several studies have shown the potential benefits of mindful eating and making more sustainable food choices for promoting sustainability. One study found that participants who received a mindful eating intervention reduced their food waste by 30%, while another study found that mindful eating interventions were associated with a reduction in carbon footprint. A review of 12 studies found that mindful eating interventions were effective in promoting sustainable food choices and reducing food waste.
Mindful eating can be a powerful tool for promoting sustainability and reducing our impact on the environment. By paying attention to the food we eat, reducing food waste, and choosing sustainable and ethical food practices, we can promote a healthier and more sustainable food system.
Remember that mindful eating is a journey, and it’s important to be patient and compassionate with yourself along the way!
Embrace a Balanced & Peaceful Relationship with Food.
If you’re looking to develop a healthier relationship with food and transform your eating habits, consider joining our online group coaching program, the Mindful Nutrition Method. Our program is designed to help you cultivate a mindful approach to eating and develop a healthier relationship with food and your body.
Get the 3-part system that will help you discover your balance, enjoy food fully, and nourish your relationship with food to feel confident, balanced, and at peace. You’ll learn the skills and strategies you need to make lasting changes to your health and well-being. Don’t wait to start your journey towards a healthier, happier you.
Join the Mindful Nutrition Method today and discover the transformative power of mindful eating.
WATCH THE FREE MASTERCLASS
Here are some research articles related to mindful eating and sustainability:
Dunn C., Haubenreiser M., Johnson M., Nordby K., Aggarwal S., Mykerezi E., & Thomas C. (2019). Mindful Eating and Living (MEAL): Weight, eating behavior, and psychological outcomes associated with a mindfulness-based intervention for people with obesity. Complementary therapies in medicine, 42, 375-382.
Kristensen N. H., Sabaté J., & Petersen K. E. (2014). Health and environmental implications of US meat consumption and production. Proceedings of the National Academy of Sciences, 111(33), 11996-12001.
Schneider S. L., Lillico H. G., & McKeown C. K. (2019). Mindful eating and reducing food waste: A randomized controlled trial. American Journal of Health Education, 50(2), 71-79.
Sobal J., Bisogni C. A., & Devine C. M. (2006). A conceptual model of food choice and food behavior. International Journal of Environmental Research and Public Health, 3(1), 166-175.
Trenchard L., & Kasser T. (2015). Mindfulness, well-being, and ecological sustainability: The critical importance of viewing the natural world as a commons. Ecopsychology, 7(3), 159-166.
If you purchase an independently reviewed product or service through a link on our website, STYLECASTER may receive an affiliate commission.
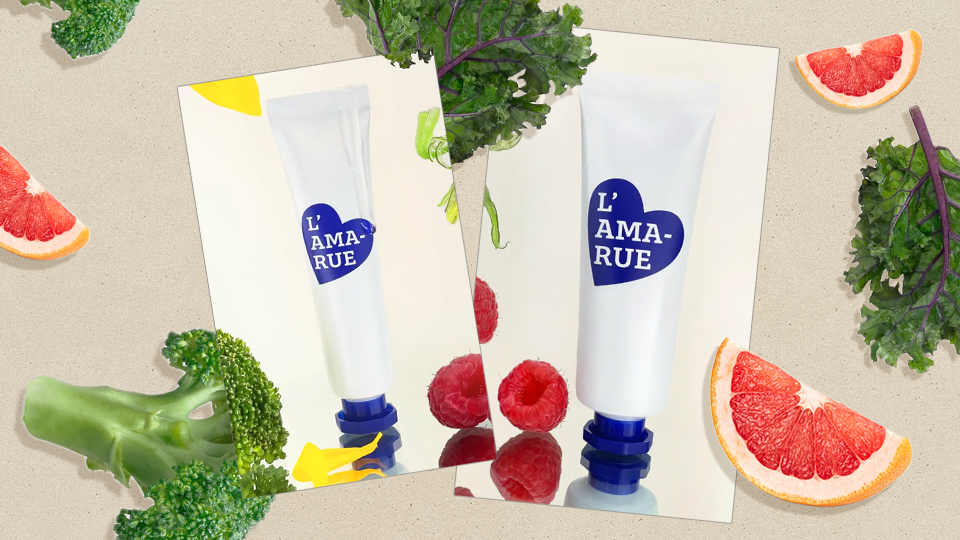
Attention: Fellow shoppers have discovered a legendary skincare combination that will bring “smaller pores, healed dry patches, diminished dark circles, disappearing age spots and reduced scars,” so you might want to drop everything and listen. Straight from the horse’s mouth (A.K.A. a 66 year-old reviewer), L’Amarue’s best-selling eye cream and face cream make for one mighty duo—one that makes your skin look “better than it has in 10-plus years.”
Described by the brand as a go-to essential “that you can rely on for instant skin pick-me-ups and long-term intensive care alike,” the product combination wastes no time in getting to work. The face cream swiftly targets forehead lines, crows feet, dark spots, discoloration and even acne. I typically despise referring to things as “one-size-fits-all,” but this formula can truly be used by users of all ages to lessen varying concerns.
The eye cream is no run-of-the-mill formula, either. It’s been highly approved by those who suffer from eczema and have extremely sensitive eyelids. One person even called it “the best money spent on skin product, ever” after they noticed a difference on fine lines on the third day of use. “Suddenly all the fine lines around my eyes disappeared and my outer corners and under eyes looked 15 years younger (I am 45 years-old),” they wrote.

L’Amarue
L’Amarue is giving you an ample opportunity to test the duo out—it’s currently running a special Mother’s Day promotion, where you can score yourself and the mother figure in your life any of its offerings for 20 percent off with MDAY23.
Considering the winning skincare combination contains a unique inclusion that no other products on the market have, you’ll want to act fast. The eye and face cream duo feature the brand’s patented Heart to Heart complex, which encourages effective communication between your skin cells. Essentially, this complex sinks deep beneath the skin to manage inflammation, prevent and repair signs of aging, stimulate collagen growth and balance oil production both long term and short term.
The brand has a handful of products under its belt, all of which are worth a shot. From it’s body cream that corrects dry, scaly skin to it’s do-it-all balm for cuticles, peeling lips and more, you may find L’Amarue is what your routine’s been missing. Dip your toes in with The Duo for less than $77 (just make sure to use the sale code MDAY23.)

It happens to the best of us – some days we’re really good about taking care of our skin, while other days (and nights!) completing our skin care routine can seem like too much of a chore. If you’re noticing increased skin issues like breakouts, excessive dryness or other signs of irritated skin, one of these common skin care mistakes might be the culprit. Read on to find out whether your habits are causing more harm than good, and what you can do to change them and prevent premature aging, breakouts and more.
Mistake #1: Using Dirty Linens | Mistake #2: Wearing Makeup To Bed | Mistake #3: Skipping SPF | Mistake #4: Ignoring Dehydrated Skin | Mistake #5: Over-Exfoliating | Mistake #6: Using Makeup Wipes | Mistake #7 Not Cleaning Makeup Tools
Most of us use linens every single day (and all night long), and don’t really give them much thought. Your pillowcase, for example, is in contact with your skin for hours on end. This nightly face time results in a buildup of oils, dirt and sweat, not to mention thousands of skin cells! Cotton pillowcases can harbor bacteria that can lead to breakouts and allergies. Experts suggest flipping your pillow over after a night of sleep and then washing the pillowcase every other day. Switching from cotton to other natural fibers like bamboo or silk can also be helpful, but a regular laundry schedule is still a must.
Using dirty face cloths is another mistake that many make. Use a fresh one daily to avoid reintroducing yesterday’s dirt when you’re trying to cleanse your skin. Seems simple, but it’s worth repeating.
After a long day or night out, it can be tempting to hit the sheets without washing your makeup off, but this skin care step is a non-negotiable. Your skin produces oil and sebum naturally throughout the day. When it combines with makeup, dirt or bacteria that have been sitting in pores for hours at a time, there’s a major potential for breakouts. Clogged pores, a dull complexion and increased blackheads are just some of the concerns you might experience when you go to bed without washing your face. Skin renews itself while you sleep, and when you leave makeup on, you are preventing that from happening.
The best way to avoid these skin concerns is to do a double cleanse before calling it a night. An oil-based cleanser is best for breaking up and removing makeup. Follow that with a second cleansing using your favorite formula, which goes to work deep within pores to eliminate impurities and any trace remnants of makeup after the initial cleansing. It will only take a couple of minutes, and then you can apply your serums and drift off to sleep without guilt weighing on your mind – or dirt and oil clogging your pores and weighing on your skin.
Try our Calm Skin Chamomile Cleanser to remove the impurities of the day from your skin. Infused with chamomile, arnica and rosemary, this calming cream cleanser is perfect for sensitive skin prone to redness and makes a great second step in a double cleanse.
If you’re fighting the appearance of breakouts, our Clear Skin Probiotic Cleanser is the best choice to remove excess sebum from your complexion. It’s a clarifying cream-gel cleanser that treats oily and problem skin with cucumber and tea tree oil. Sweet almond milk and yogurt reduce the visible signs of problem skin without stripping the skin of moisture. In other words, it can help your skin recover from past “mistakes.”
It’s no secret that sun exposure and UV rays have the potential to cause a number of skin issues, including melanoma, fine lines, wrinkles, sagging skin and dark spots. Wearing sunscreen is essential for protecting the skin against harmful UV rays, and daily protection is crucial to the health of your skin.
Sunscreen helps to keep the skin protected from the dangers of sun exposure, including sunburn, sun damage and melanoma. It’s also beneficial in minimizing the premature aging effects of UV rays, such as fine lines, wrinkles, sagging and rough skin.
There are different types of sunscreens, most notably chemical and mineral. Both protect your skin from the sun’s powerful rays, but they provide that protection in different ways. Chemical sunscreens penetrate the skin, absorb sunlight and convert it to heat before releasing it. Mineral sunscreens sit on top of the skin’s surface and block sunlight – reflecting the UV rays before they reach the skin’s surface. Personal preference and skin type can be factors in choosing an SPF, but ultimately the goal is the same: to protect the skin.
If adding another step to your morning routine feels like too much work, save a step by using a moisturizer that contains an SPF, like Lilikoi Daily Defense Moisturizer SPF 40, an all-in-one lightweight daily moisturizer.
Signs of dehydrated skin include itchy patches, undereye circles, dullness and fine lines. Unlike “dry skin,” which is a skin type (caused by a natural lack of oils), dehydrated skin is a condition caused by a lack of water. Dehydrated skin occurs when your body loses more water than it is taking in — for example, from not replenishing liquids after an intense workout or a long day outside in a warm climate. Really, dehydration can happen in any circumstance when not enough water is being consumed. A minimum of eight cups a day is a good baseline. And no, coffee doesn’t count! (But herbal tea does).
To determine whether you are experiencing dry skin or dehydrated skin, pinch the skin on the back of your hand. If the skin fails to snap back, your skin could be dehydrated. Fortunately, reversing dehydration can be accomplished with a few lifestyle changes. Some of them include:
Drinking alcohol in moderation (if at all)
Limiting coffee and other sources of caffeine
Stopping smoking
Exercising regularly
Replenishing fluids after you work out
Getting plenty of sleep
Eating more fruits, vegetables and other plant-based foods
Our Strawberry Rhubarb Hyaluronic Serum is a great option to deeply hydrate both dry and dehydrated skin, leaving it softer and smoother.
Exfoliating your skin keeps the complexion soft and smooth while reducing the look of dullness. Exfoliating helps to remove dead skin cells by breaking the bonds that glue them together, allowing new cells to surface and resulting in the appearance of a “glow.” When done right, exfoliation is one of the most important skin care habits you can adopt.
Too much of a good thing? While some exfoliating is good for the skin, too much can actually cause damage to the skin barrier and strip its moisture. There is a protective layer of oils and fats on the surface of the skin which helps seal moisture and keeps irritants out. When these protective properties are stripped away with excessive exfoliation, the result is a weakened barrier. The Charcoal Exfoliating Gel Cleanser is a great option as it washes away impurities, while leaving the skin balanced.
Everyone’s skin is a little bit different, so you may have to try a few skin care products and routines to figure out what’s best for you – but according to Healthline, most experts advise that you exfoliate two to three times per week – as long as your skin can handle it.
While makeup wipes may seem like a quick and easy way to remove your makeup and other buildup from the day (especially after a late night!) — think twice about taking this shortcut. It can seem tempting to literally wipe the day off in one simple step, especially before bed when exhaustion can overpower common sense (see Mistake #1).
Unfortunately, makeup wipes don’t really clean your skin. What they do instead is smear around whatever makeup, dirt and dead skin is on your face, leaving a greasy residue and clogging pores, or put simply: the exact opposite of what you’re trying to accomplish. It’s a step that can do more harm than good, causing irritation and breakouts. On top of that, many wipes contain preservatives (to keep them fresh and bacteria-free in their warm, moist packages). Some of these preservatives include chemicals that release formaldehyde, as well as solubilizers, surfactants and emulsifiers. And don’t get us started on the impact of disposable wipes on the planet.
According to Diana Felton, MD, state toxicologist with the Hawaii Department of Health: “One group estimates that 20 million pounds of single-use wipes are disposed of every day in the U.S. Many wipes are disposed of in landfills, and despite claims to the contrary, most are not biodegradable and do not rapidly break down, creating too much trash to fit in our landfills.” If you’re reticent to give them up for your skin, do it for the planet!
When was the last time you cleaned your makeup brushes or gave your gua sha or jade roller a good scrub? If it’s been longer than a month, and you’re dealing with breakouts or dull complexion, dirty makeup and skin care tools may be the culprit.
Makeup brushes and sponges absorb oils, dirt and bacteria from the skin with each use. Imagine going weeks or months without giving them a proper cleanse! Dirty makeup brushes have the potential to introduce bacteria and buildup to pores, jeopardizing the overall health of your skin. Wash all makeup brushes and reusable sponges at least once a month – and once a week if you have sensitive or acne-prone skin.
And while we’re on the subject of tools, make sure you use a little spoon or spatula when getting product and makeup out of jars. Scooping creams out with your fingers can introduce bacteria into the mix and on to your skin. It can also shorten the shelf life of the product. And clean hands are a must. Always wash your hands thoroughly before applying anything to your face or body. Another simple skin care habit that can go a long way.
Watch Lead Skin Care Trainer Natalie Pergar walk you through more common skin care mistakes and how to fix them.
Recognize your own habits on this list? Visit your favorite Eminence Organics Spa Partner for more advice on avoiding skin care mistakes and creating the best skin care routine for you.
This article was originally written in January 2020.
Let’s face it, breaking out in the same areas over and over again is frustrating. At the end of the day, all breakouts are technically caused by the same thing—a combination of excess oil and dead skin cells builds up inside the pores, causing them to become clogged. This creates a more hospitable environment for bacteria, which can cause inflammation that leads to a full-on blemish.
With that said, the true nature of acne is complex, and it can be really difficult to pinpoint exactly what triggers it. Yes, some people are just more prone to it than others, but there can be all kinds of different triggers. Over the last 30 years, I’ve seen more clients for acne than any other skin condition, and it’s definitely taught me a thing or two about those triggers. While no two people are exactly alike when it comes to their acne, I’ve been able to observe certain patterns and correlations.
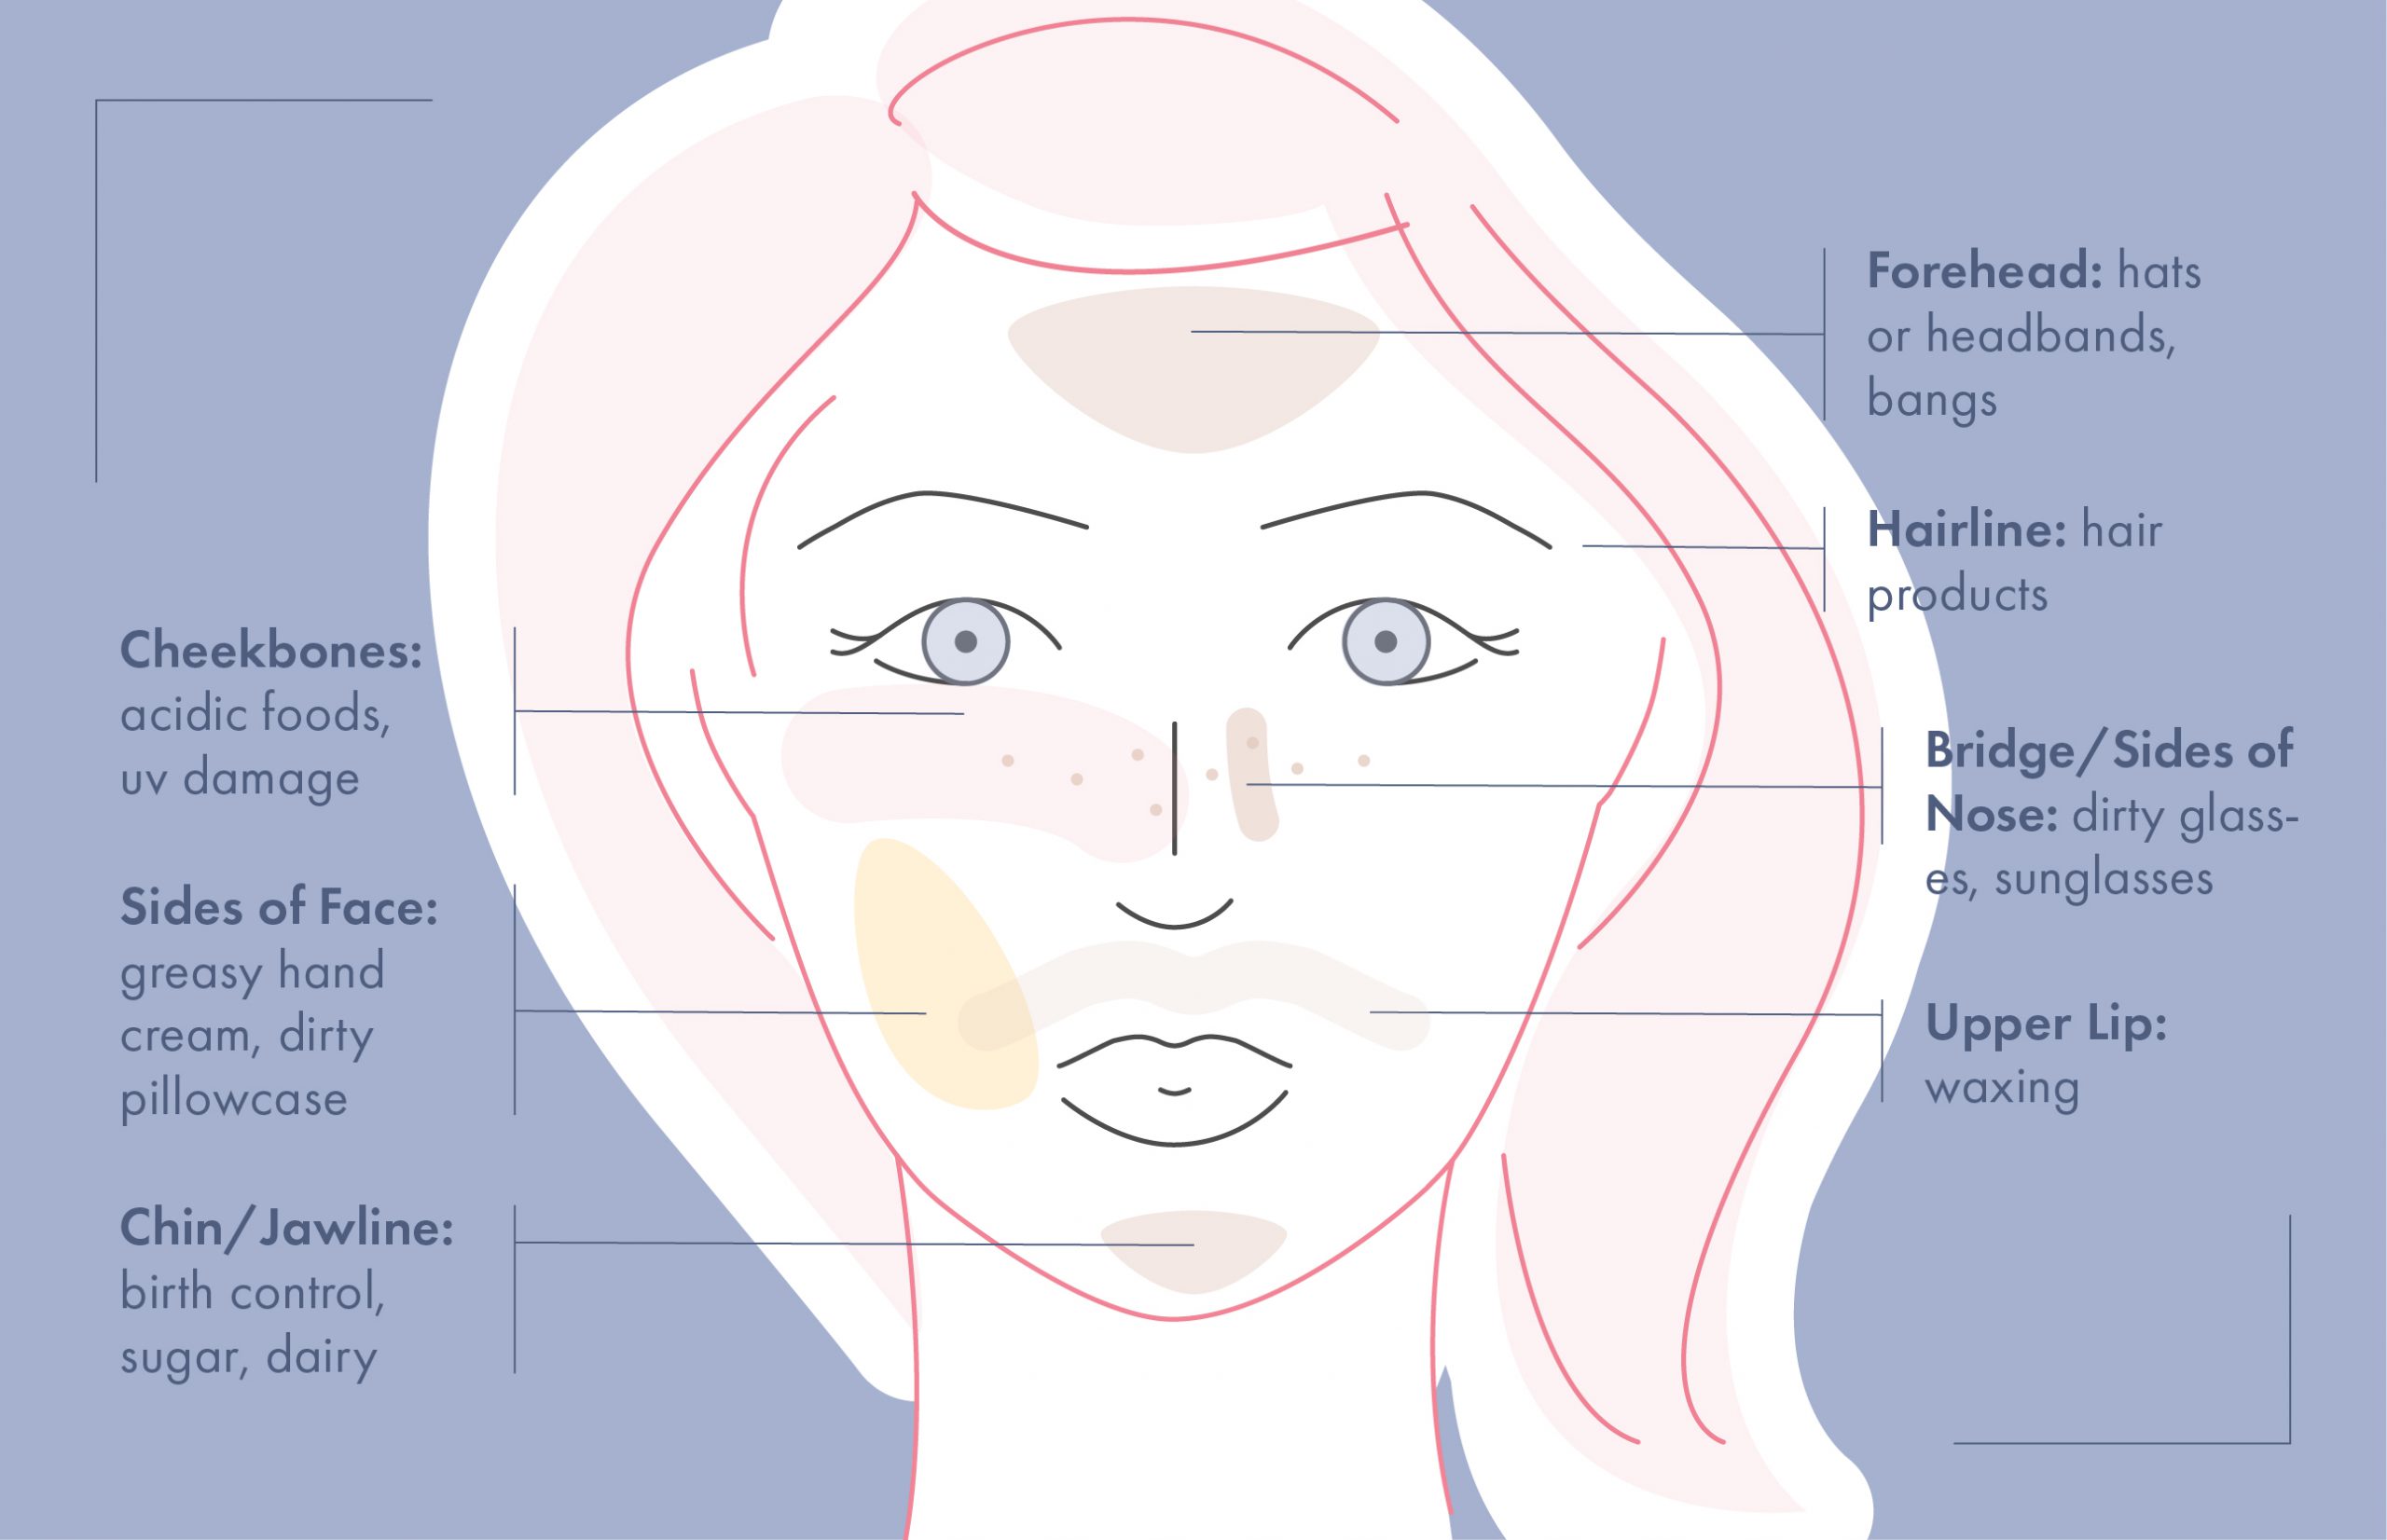
In this post, I’ll share my own version of “facemapping” based on common acne triggers I’ve seen throughout my career. The location of your breakouts might just be telling you something, all you have to do is listen!
This may come as no surprise, but if you’re always breaking out along your chin and jawline, hormonal fluctuations are probably the culprit. The chin and jawline are where people most commonly experience cystic breakouts (you know, those hard, painful bumps under the skin that never come to a head).
While the link between food and acne is somewhat tenuous, I’ve seen with my own eyes that certain food groups can be a trigger for some people. Specifically, there seems to be a link between cystic acne and certain types of dairy, particularly skim milk. Because sugar can spike glucose levels, it’s also possible for it to be a contributing factor.
If you suspect a link between your hormonal acne and the foods you eat, the only way forward is experimentation. Again, not everyone is going to be the same. Some people may be able to handle moderate amounts of dairy, while some people may find their breakouts triggered by even a small amount. The same goes for sugar! My advice is to cut out one food group at a time and to cut each group out for three weeks while observing breakout activity.
If you tend to only get cystic breakouts during the week leading up to your period, try adjusting your skincare routine a little.
If hormonal acne on your chin and along your jawline is constant, check out these eight tips for prevention. Anyone who experiences consistent hormonal breakouts needs Anti Bump Solution in their kit—it’s non-drying and can be used as a spot treatment for individual cysts, or it can be used all over the chin as a preventative serum. Finally, if you’re still not seeing any improvement from an at-home skincare routine, I highly recommend seeing a dermatologist. Hormonal acne is tricky, and they’ll be able to recommend prescriptions to address the hormones themselves.
The first thing I ask someone with clogged pores and pimples on the sides of their face is “Do you use hand cream before bed?”. It may seem like an odd question, but I used to see this ALL the time back when I was treating clients at my spa. Basically, people were slathering on thick, greasy hand cream before bed. On its own, that wasn’t an issue, but some people put their faces in their hands when they sleep. This caused the hand cream to transfer, and the heavy ingredients ended up clogging their pores.
Another possible issue is dirty pillowcases. If you’re acne-prone and have oily skin, switching your pillowcase out regularly is super important. Otherwise, oils and bacteria from your face quickly accumulate on the fabric and can transfer back onto your skin while you sleep.
If you use a heavy hand cream at night, stop using it to see if there’s any improvement in your breakouts. You can try switching to something with a lighter, lotion-like texture. If you really struggle with dry hands and need to use something thick, try lightweight cotton gloves to keep your hands off your face. Bonus, this will help lock in your hand cream for even more moisturized hands!
As for pillowcases, I recommend switching them out weekly.
This is kind of a strange one, but hear me out. When I see someone with redness in their cheeks accompanied by breakouts, I’ll often advise them to cut down on acidic foods like tomato or citrus fruits. The cheeks contain a lot of blood vessels, and acidic foods can dilate them causing blood to rush to the area. People with acne already have very active skin metabolically speaking, so extra stimulation can make it worse. This is the same concept behind people with active acne should avoid very active professional treatments like microneedling. (This is what happened to my friend Heather when she started experiencing sudden breakouts.)
You don’t need to give up acidic foods altogether, just try cutting down on them and seeing if it helps. If you really like spicy foods, I would also suggest avoiding these in excess. People with lots of redness in their cheeks are often prone to rosacea, so be sure to check out my tips for how to manage rosacea and calm redness.
If you’re always breaking out on your forehead, consider your choice of headwear. Hats are a great way to keep your skin protected from the sun while outdoors, but they can also trap dirt, sweat, and bacteria, leading to clogged pores and breakouts. The same goes for sweatbands.
Another reason could be your hairstyle. If you have bangs that regularly touch your forehead, oil from your hair could be transferred onto your skin.
Protecting your skin from UV damage should be your number one priority, so I wouldn’t recommend giving up hats altogether. Just try not to wear them every day for extended periods, and be sure to wash them regularly. Before putting your hat on, you can also swipe on a toner like Rapid Response Detox Toner. This toner reduces oil activity and discourages bacteria that can cause breakouts.
As for bangs, be sure to wash them every day and avoid hair products in this area.
If you already have clogged pores that are giving you a bumpy forehead and need to get rid of them, try incorporating a salicylic acid serum a few nights a week to help clear this up.
If you consistently break out along your hairline, I strongly suggest taking a second look at the hair products you use. These products slip around throughout the day, and they often end up accumulating along the hairline. Since these products are formulated for hair, not skin, it’s not unusual for them to contain ingredients that can clog our pores. Additionally, ingredients that are often used in skincare at low percentages without issue might be used in haircare products at much higher percentages, at which point they do start to become a problem for skin.
Fun fact, when I was a teenager I struggled with horrible back acne before switching my conditioner.
To figure out if a hair product really is the culprit, you would ideally stop using it for at least two to three weeks to see if your breakouts improve. If this helps, try switching to an alternative. If it’s a hair product you really love and feel you can’t live without, try being more conscious of how you apply it and avoid getting too close to your hairline. Also, be sure to wash your hairline area really thoroughly when you wash your face at night—it’s one people often overlook.
Whether you wear prescription glasses or use sunglasses (an important habit for protecting your vision and preventing eye wrinkles), they sit on a part of the face where sweat and oil accumulate fast. All that sweat and oil being trapped and rubbed around by your glasses is the perfect recipe for a breakout.
If this is something you struggle with, try applying a thin layer of Daytime Blemish Gel to the bridge of the nose before you head out for the day. I created this product to act as a seal for blemishes, keeping bacteria and debris off the affected area. It contains salicylic acid to help keep pores clear and tea tree oil to discourage bacteria.
Be sure to clean your glasses daily as well as this will help prevent buildup.
Finally, the upper lip. This is an area where many people practice hair removal. Whether it’s waxing, shaving, or threading, hair removal causes friction which can lead to irritation and bumps or breakouts.
One of my favorite tricks is using Rapid Response Detox Masque to soothe the area right after hair removal. It’s really hydrating and cooling, but it also has antibacterial properties that help prevent breakouts by keeping pores clean. Bonus tip, store it in the fridge for a while for an extra cooling effect.
Speaking of hair removal, here’s my foolproof plan for preventing ingrown hairs from shaving or waxing.
I hope you found this helpful! Determining what’s causing your breakouts really can be tricky. Although the location of your acne can’t always tell you what’s causing it, it can provide clues as to what may be triggering it or making it worse. I’ve seen these triggers cause problems in specific areas of the face over and over again throughout the years, so I hope you learned something that resonated with you.
Next up, 11 common reasons you’re experiencing adult acne.
Celebrity Esthetician & Skincare ExpertAs an esthetician trained in cosmetic chemistry, Renée Rouleau has spent 30 years researching skin, educating her audience, and building an award-winning line of products. Her hands-on experience as an esthetician and trusted skin care expert has created a real-world solution — products that are formulated for nine different types of skin so your face will get exactly what it needs to look and feel its best. Trusted by celebrities, editors, bloggers, and skincare obsessives around the globe, her vast real-world knowledge and constant research are why Marie Claire calls her “the most passionate skin practitioner we know.”

by Caitlin H,
Apr 17, 2023

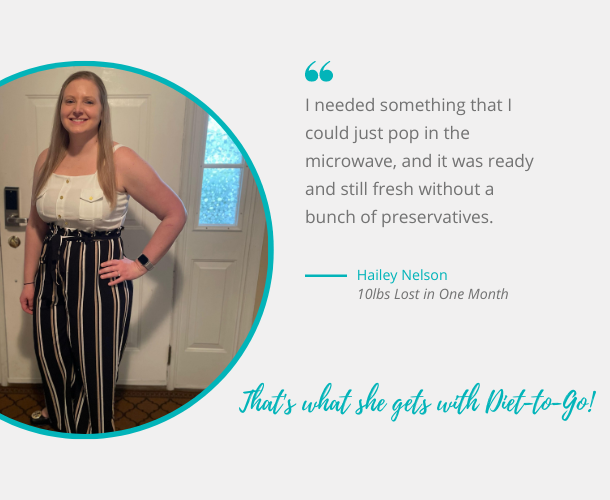
Name: Hailey Nelson
Hometown: Hatfield, PA
Age: 32
Occupation: Financial Analyst
Meal Plan: Keto-Carb30
Favorite Meal: Southwest Hamburger
Start Date: mid-February
Starting weight: 211
Height: 5’5”
Pounds Lost: 10 pounds
Activity Level: Daily 30-minute strength training workouts and treadmill walks
When I get a craving, my go-to trick is: I have a 90-calorie coconut chew I enjoy when I get a sweet tooth.
Hailey’s 32nd birthday weekend in February was filled with the kinds of things most people like to do on their birthdays — dinner and drink outings, celebrations with friends, and enjoying time with her fiancé.
But after that weekend, Hailey stepped onto the scale and quickly realized she had gained 5 pounds over those few days alone.
“I was also getting bored with everything I’d been eating,” Hailey said. “Most nights, I ate frozen dinners or chicken and rice. I was getting frustrated with my weight and the lack of quality food.”
At 5 feet, 5 inches tall, and 211 pounds, Hailey decided it was time to make a change.
“I don’t like to cook at all, so I know that’s not an option for me,” Hailey said. “I Googled things out there and found Diet-to-Go. It really piqued my interest.
Hailey, a financial analyst who works from home, said she has struggled with weight her entire life, all the way back to her elementary school days.
“I remember getting picked on for being one of the bigger kids,” Hailey said. “I really struggled with it.”
Hailey said her weight started to improve slightly in high school and that in college she was at her smallest following a challenging breakup.
“But I didn’t do it in a healthy way. I would go to the gym for hours and only eat one meal a day,” she said. “It wasn’t sustainable.”
Hailey said she started to gain weight again after she graduated and spent the next decade yo-yo dieting, trying different programs — none of which made a lasting impact. It was the desire to finally do it right that led her to order her first meal plan from Diet-to-Go’s Keto-Carb30 menu.
“I love how it’s delivered weekly and how everything is fresh,” she said. “I like the variety. I liked that the success stories on the website were real people like me.”
Hailey lost 10 pounds in one month and aims to lose about 50 total to reach her goal weight of around 160. She said she focuses on taking small steps and setting 10-pound weight loss goals to stay on track.
“It helps me be more patient by breaking it into smaller chunks,” she said. “I hate restarting — losing 10-20 pounds and then gaining it all back. I’m not going to keep doing that. Breaking it into chunks helps me remember, ‘Ok, you can’t stop. You have to keep going, or else you’ll have to restart again.’”
Hailey also incorporates fitness into her daily life. She and her fiancé converted their garage into a gym, allowing Hailey to do a 30-minute strength training workout during her lunch break.
“After work, I get on the treadmill and walk 2-3 miles while watching my favorite TV show,” she said. “I know it’s important to do since I sit all day at work — to get those 10,000 steps a day.”
Hailey said she plans on staying motivated with the help of her fiance and knowing she’s headed on a couple of vacations in early summer.
“I’ll be in a bathing suit, so that’s a big motivator for me to get as close to my goal weight as possible ahead of those trips,” she said.
She added that the convenience of Diet-to-Go will play the most significant role in getting her there.
“I needed something that I could just pop in the microwave, and it was ready and still fresh without a bunch of preservatives,” Hailey said.
And that’s exactly what she gets with Diet-to-Go.
Hailey said she plans on switching to Diet-to-Go’s most popular plan, Balance, to move closer to her goal. The Balance Menu focuses on delivering restaurant-quality, delicious meals controlled for portion size and calories. The meals are heart-healthy and crafted by chefs to ensure mouth-watering meals customers love.
“When I look at myself, I don’t feel obese. I don’t struggle with daily activities,” Hailey said. “But I also don’t enjoy exercise as some people do. And I know if I eat right, that’s when it will work.”
————————————————————————————

Author: Caitlin H
Diet-to-Go Community Manager
Caitlin is the Diet-to-Go community manager and an avid runner. She is passionate about engaging with others online and maintaining a healthy, active lifestyle. She believes moderation is key, and people will have the most weight loss success if they engage in common-sense healthy eating and fitness.
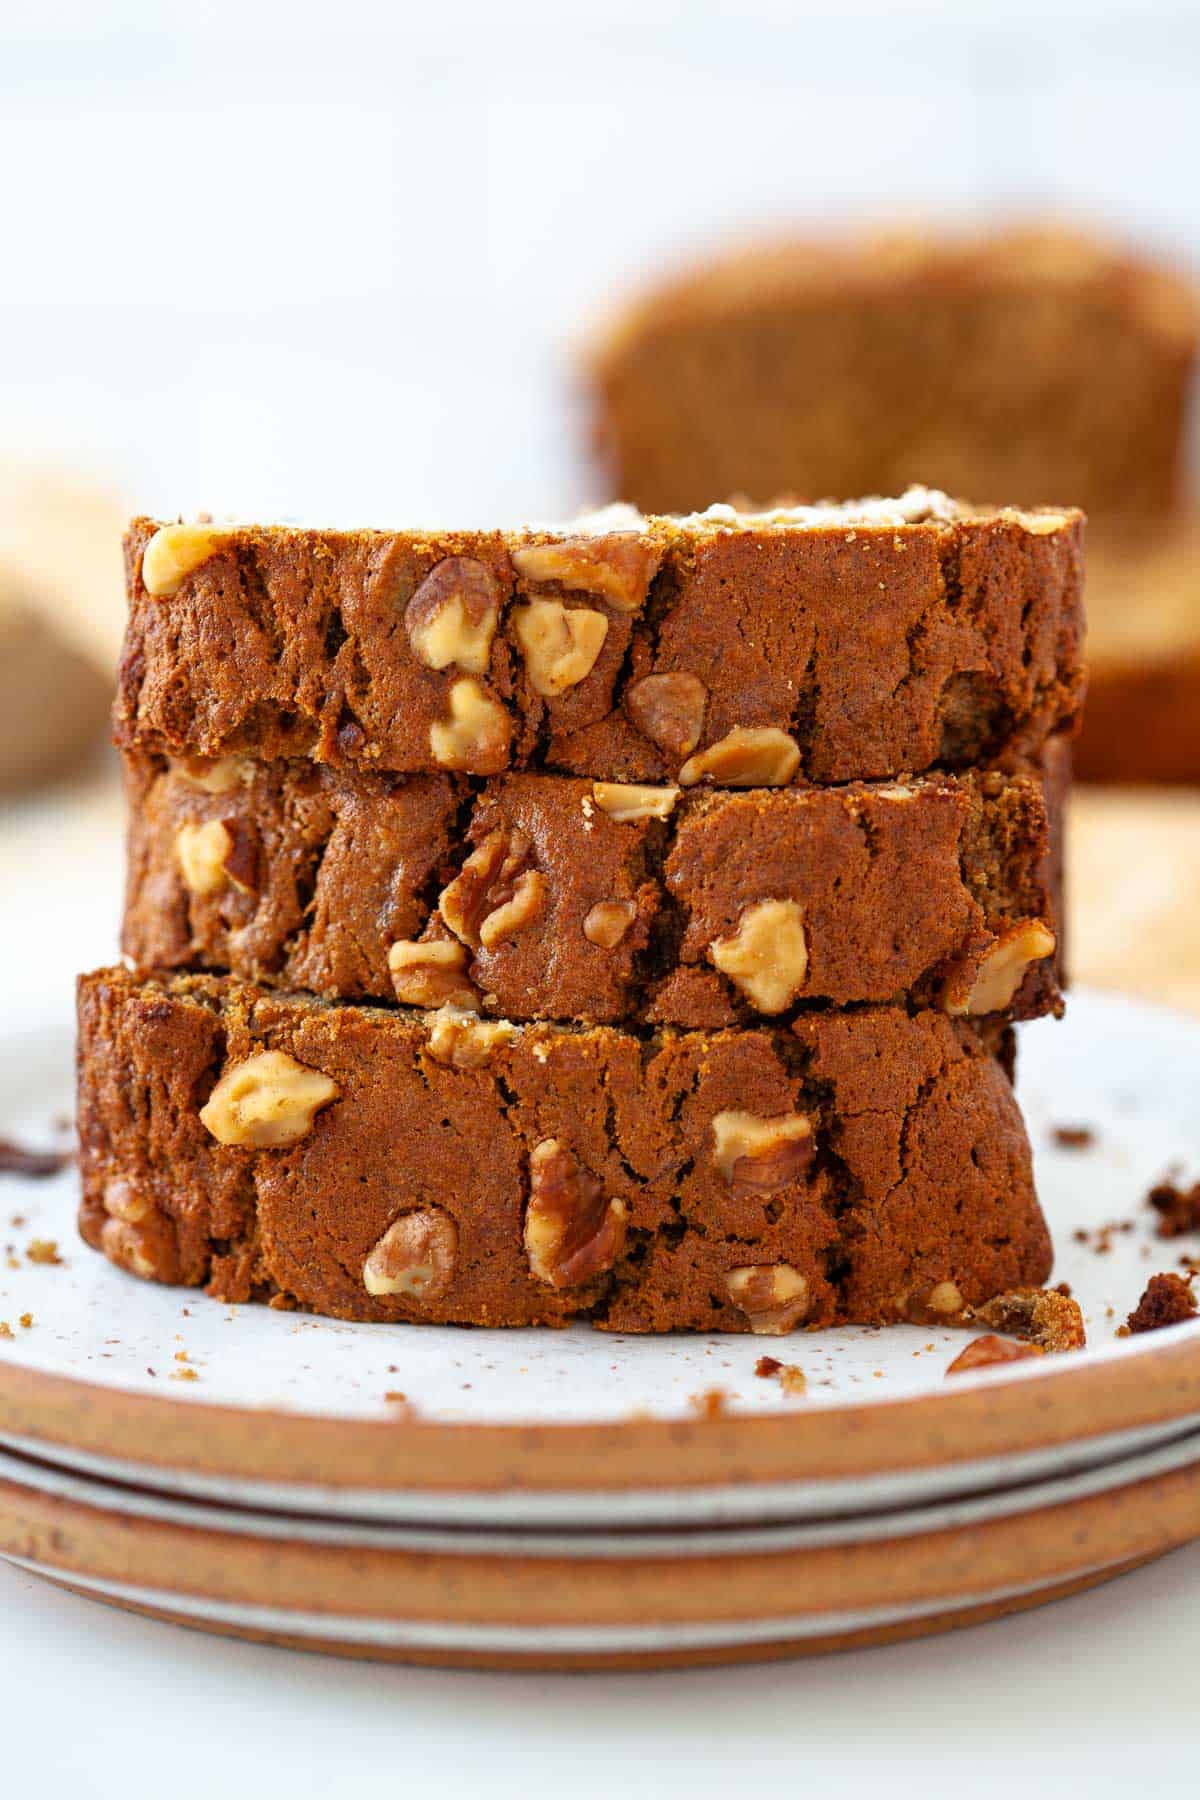


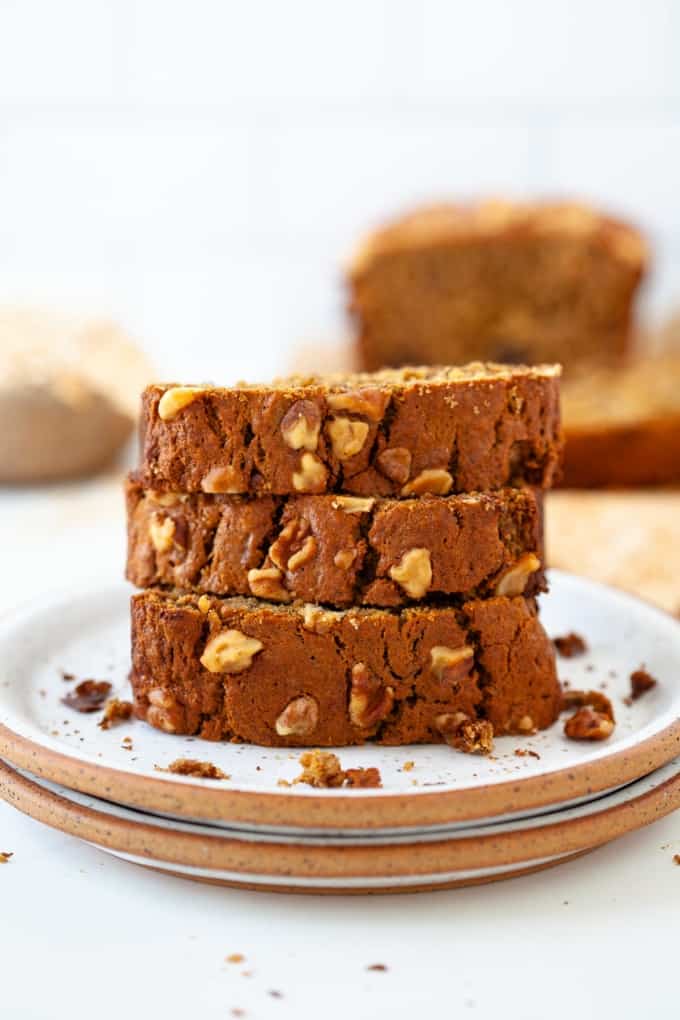
Looking for a quick and easy gluten-free banana bread recipe? This one-bowl oat flour banana bread is ready in just 10 minutes! Made with ripe bananas and nutty oat flour, this moist and delicious bread is a healthy and satisfying treat.
I absolutely love this oat flour banana bread recipe because it’s a delicious alternative to traditional banana bread and is perfect for those with a gluten allergy or sensitivity.
If you do have celiac disease (gluten allergy) be sure to look for oat flour or oats that are certified gluten-free to avoid any potential cross-contamination (sometimes oats are manufactured in facilities that manufacture wheat as well).
I also love how easy and quick this recipe is to make. With just one bowl and 10 minutes of prep time, I can whip up a batch of this delicious bread in no time.
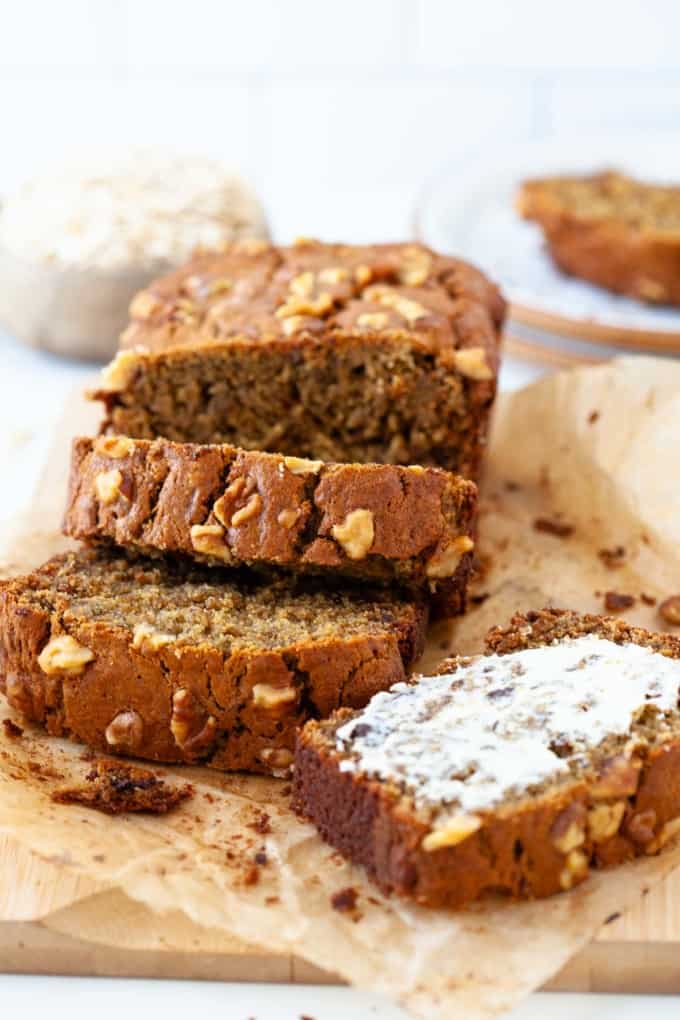
The combination of ripe bananas and oat flour gives this bread a wonderful moist texture and nutty flavor that is hard to resist.
It’s perfect for a quick breakfast, snack, or even dessert (with chocolate chips added, of course!)
Baking with oat flour can be a little tricky because you can’t substitute all purpose flour with a 1:1 ratio (at least you shouldn’t!) because oat flour is lighter in weight.
So you’ll actually want to use more oat flour than all-purpose flour when substituting (or use less wet ingredients).
And if you can’t find oat flour at the grocery store, you can make your own at home using rolled oats. This takes extra time but can save you money!
Lucky for you, I tested this recipe a handful of times to get the best texture – moist, dense, sweet, and a crunchy exterior.
I’m seriously SO happy with how it turned out – I hope you enjoy it as much as I have been!
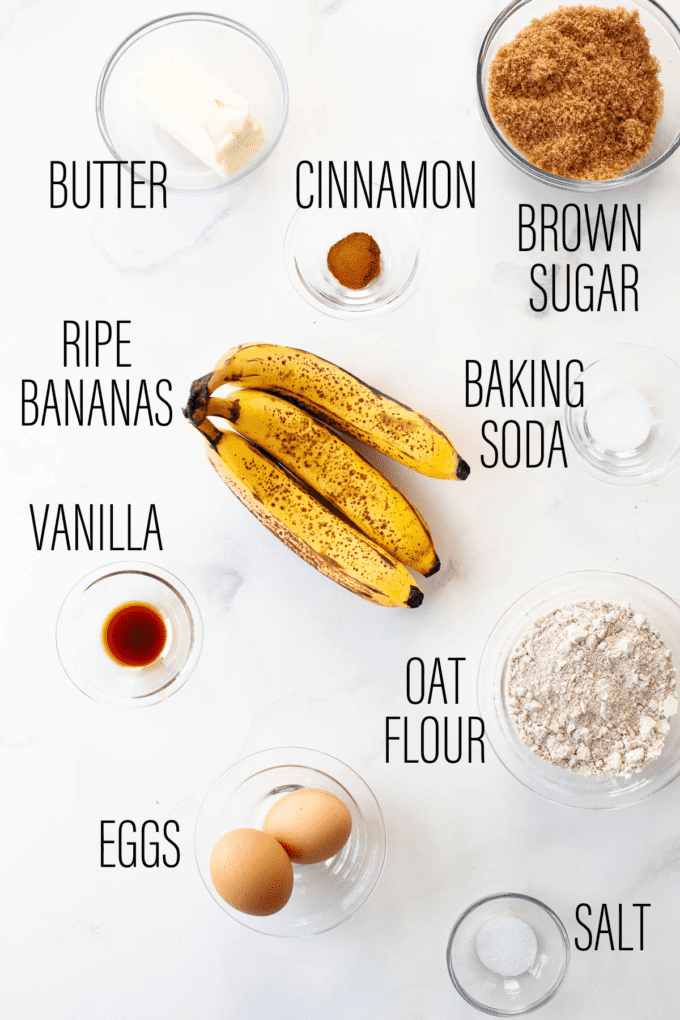
Notes on Ingredients
butter: either melted or softened to room temperature. If you don’t have butter on hand, you can substitute it with an equal amount of coconut oil!
brown sugar: If you don’t have brown sugar, you can use an equal amount of granulated white sugar or coconut sugar. Keep in mind that brown sugar adds a rich, caramel flavor to the bread that you may miss if you use white sugar!
eggs: To bind the bread. If you’re vegan or allergic to eggs, you can use 2 flax eggs (2 tablespoons ground flaxseed mixed with 5 tablespoons of water) instead.
vanilla: For sweetness! If you don’t have vanilla extract, you can use an equal amount of almond extract or skip it altogether.
bananas: You’ll need 3 large or 4 medium very ripe bananas for this recipe. The riper the bananas, the sweeter and more flavorful the bread will be.
oat flour: This recipe calls for 2 cups of oat flour, which you can make by blending rolled oats in a food processor until they turn into a fine powder.
baking soda: helps the bread rise and become fluffy.
cinnamon: adds a warm, cozy flavor to the bread. If you’re not a fan of cinnamon, you can skip it or substitute it with an equal amount of nutmeg or ginger.
salt: helps enhance the flavors in the bread
chocolate chips and/or walnuts: For additional texture and sweetness! You can skip them altogether or substitute them with your favorite nuts, dried fruits, or seeds. Some good options include pecans, almonds, raisins, or pumpkin seeds.
Equipment You’ll Need (affiliate link – if you make a purchase I receive a small commission)
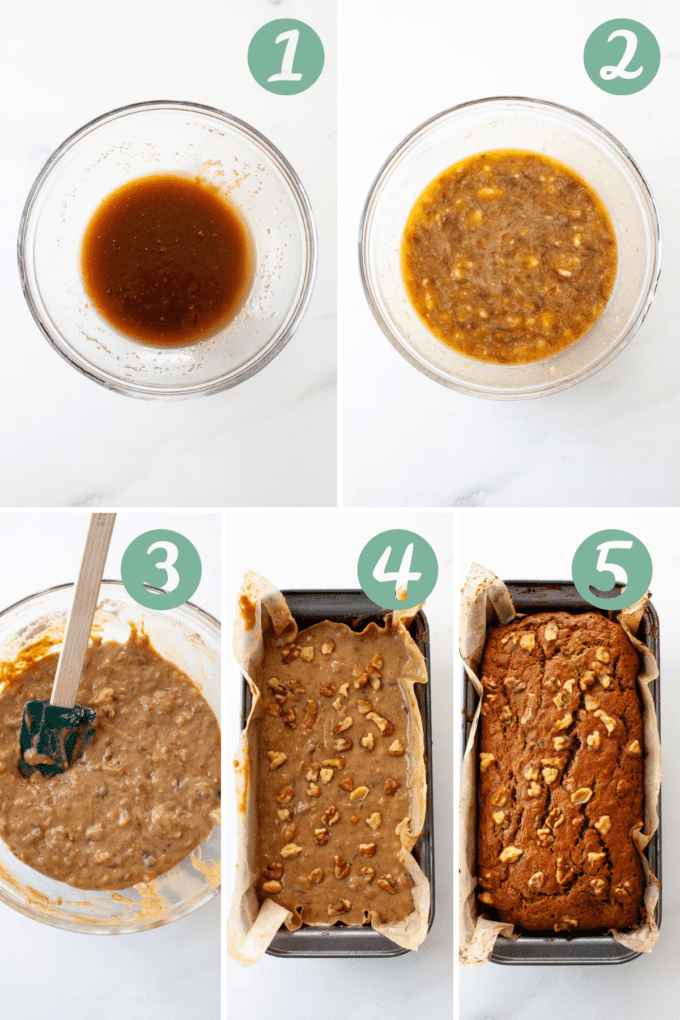
Preheat the oven to 350°F and prepare an 8×4-inch loaf pan by spraying it with cooking spray and lining it with parchment paper.
Mix the butter and sugar. In a large mixing bowl, whisk together the melted or softened butter and brown sugar until combined.
Add the rest of the wet ingredients. Whisk in eggs and vanilla until the mixture is smooth.
Mash in the bananas. Using the end of a whisk or a fork, mash the ripe bananas into the bowl, leaving them as chunky or smooth as you prefer.
Add the dry ingredients. Add oat flour, baking soda, cinnamon, and salt to the bowl and mix with a spatula until just combined. Fold in the optional chocolate chips and/or walnuts.
Pour the batter into the prepared loaf pan, smooth the top, and bake until a toothpick inserted into the center comes out clean, about 55-65 minutes. Let the bread cool in the pan for 5-10 minutes before transferring it onto a wire rack to cool completely before slicing.
Expert Tips
Use browned bananas! This recipe calls for very ripe bananas, which will be sweeter and more flavorful. If your bananas aren’t quite ripe enough, you can speed up the process by placing them in a paper bag with an apple or a ripe tomato for a day or two. You can also try baking them in the oven to soften them (see FAQs below).
Don’t overmix. Overmixing the batter can result in tough, dense bread. To avoid this, mix the dry ingredients into the wet ingredients with a spatula until just combined.
The baking time can vary depending on the ripeness of your bananas, so start checking for doneness at 50 minutes and then every 5 minutes after that. Use a cake tester or toothpick inserted into the center of the bread to check if it’s done – it should come out clean when it’s ready.
Use a smaller loaf pan (8×4-inch). This will help the bread to rise more than if you use a 9×5-inch pan.
For a smooth banana bread, mash the bananas in a separate bowl until no lumps remain and then whisk into the batter.
Yes, you can use regular all-purpose flour but I would suggest adding 1/4 cup milk or almond milk. Oat flour is lighter in weight than AP flour so you can’t use a 1:1 substitution.
Yes, you can use a different type of sweetener, such as granulated sugar. Keep in mind that this will affect the flavor and texture of the bread. The brown sugar adds a little more moisture to the bread, resulting in more caramelization in the crust (crispier crust!) and a darker bread. If using a liquid sweetener like honey or maple syrup, you will need to adjust the amount of flour in the recipe to compensate.
Yes, you can make this recipe vegan by using a plant-based butter substitute, such as vegan margarine or coconut oil, and by replacing the eggs with flax eggs or another egg substitute. To make a flax egg, mix 1 tablespoon of ground flaxseed with 3 tablespoons of water and let it sit for a few minutes until it thickens. Please note, this recipe has not been tested to be vegan so results may vary using egg alternatives.
If you need to quickly ripen bananas for banana bread, you can soften them in the oven. Preheat the oven to 300 degrees F, place bananas on a baking sheet and bake until the peels become blackened and the bananas are soft to touch, about 15-20 minutes.
Fill your high-speed blender or food processor halfway with rolled oats. Blend until oats turn into a powder, about 60 seconds. Store extra flour in an airtight container for up to 3 months. If you have celiac, make sure you’re using certified gluten-free oats to avoid any possible cross-contamination.
Oat Flour Banana Bread leftovers can be stored in an airtight container in the refrigerator for up to 3-4 days or on the counter in an airtight container for up to 3 days. If you want to extend the shelf life of the bread, you can also freeze it for up to 3 months. Wrap the bread tightly in plastic wrap and place it in a freezer bag before storing in the freezer.
Recipes That Pair Well
Veggie Egg Bites
Cozy Lavender Almondmilk Latte
Air Fryer Eggs
For more oats recipe inspiration, check out my other recipes below!
If you like this recipe, please be sure to comment and give it a 5 star rating below. If you make it, share it on Instagram and tag me @karalydonrd and I’ll re-share it with my followers! If you want to save this recipe for later, be sure to pin it on Pinterest!
clock clock iconcutlery cutlery iconflag flag iconfolder folder iconinstagram instagram iconpinterest pinterest iconfacebook facebook iconprint print iconsquares squares iconheart heart iconheart solid heart solid icon
This oat flour banana bread can be prepped in one bowl in just 10 minutes. Super moist and delicious, this gluten-free bread is made with sweet ripe bananas and nutty oat flour!
1/2 cup butter (1 stick), melted or softened to room temperature
3/4 cup packed light brown sugar
2 large eggs
1 teaspoon vanilla
3 large or 4 medium very ripe bananas (about 1 1/4 cups mashed)
2 cups oat flour
1 teaspoon baking soda
1/2 teaspoon cinnamon
1/4 teaspoon salt
Optional: 1/2 cup chocolate chips and/or walnuts
Preheat oven to 350 degrees F. Spray a 8×4-inch loaf pan with cooking spray and line with parchment paper (the spray helps the paper stick).
In a large mixing bowl, whisk together butter and brown sugar until combined
Whisk in eggs and vanilla until mixture is smooth.
Using the end of the whisk or a fork, mash in the banana, leaving it as chunky or smooth as you prefer.
Add flour, baking soda, cinnamon, and salt. Using a spatula, mix in the dry ingredients until just combined.
If using chocolate chips and/or walnuts, fold them into the batter.
Pour batter into the prepared loaf pan. Smooth the top of the batter.
Bake until top is browned and a toothpick inserted into the center comes out clean, about 55-65 minutes. Baking time will vary slightly depending on the ripeness of the bananas you use – start checking at 50 minutes, and every 5 minutes after that.
Set the loaf pan onto a wire rack and let bread cool in the pan for 10 minutes.
Holding the parchment paper sling, lift the loaf out of the pan and onto the cooling rack. Let cool completely before slicing.
For a smooth banana bread, mash the bananas in a separate bowl until no lumps remain and then whisk into the batter.
Leftovers can be stored in an airtight container in the refrigerator for up to 3-4 days or on the counter in an airtight container for up to 3 days. If you want to extend the shelf life of the bread, you can also freeze it for up to 3 months. Wrap the bread tightly in plastic wrap and place it in a freezer bag before storing in the freezer.
Prep Time: 10 minutesCook Time: 60 minutesCategory: BreadMethod: OvenCuisine: American
Keywords: oat flour banana bread, banana bread made with oat flour, gluten free banana bread
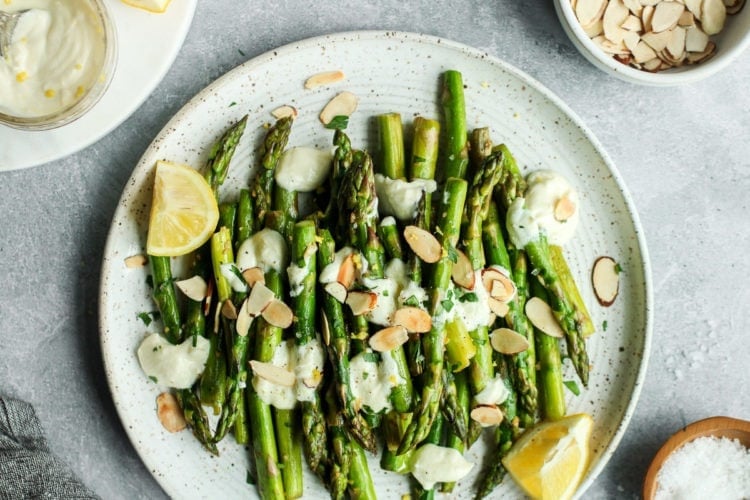
Simple Sautéed Asparagus (With Optional Elevated Toppings)

As a mindfulness-based registered dietitian, I’ve worked with countless individuals struggling with disordered eating, body image issues, and a complicated relationship with food. While there’s no single solution that works for everyone, I’ve found that cultivating mindfulness and self-compassion can be powerful tools for healing and supporting your relationship with food.
Mindful eating is the practice of paying attention to your food and your body in a non-judgmental way. It involves being fully present during meals, savoring each bite, and listening to your body’s signals of hunger and fullness. This approach can help you break free from old patterns of emotional or mindless eating and create a more positive relationship with food.
Self-compassion, on the other hand, is the act of treating yourself with kindness and understanding, particularly during difficult times. For those struggling with food and body image issues, it can be all too easy to fall into self-criticism and negative self-talk. However, practicing self-compassion can help you develop a more positive self-image and build resilience against future challenges.
In this guide, I’ll explore the ways in which mindful eating and self-compassion can work together to help you heal your relationship with food and your body.
Mindful eating can have a wide range of benefits for both physical and mental health. Here are just a few of the ways in which it can help:
Improved digestion: When you eat mindfully, you’re more likely to chew your food thoroughly and eat at a slower pace. This can improve digestion and reduce symptoms such as bloating and indigestion.
Better nutrition: By paying attention to your food and your body’s signals, you’re more likely to make healthier choices and eat in a way that supports your physical and emotional well-being.
Reduced stress: Mindful eating can help you feel more relaxed and centered during meals, which can reduce stress and anxiety.
Increased satisfaction: When you savor each bite and fully experience the flavors and textures of your food, you’re more likely to feel satisfied and content after meals.
Enhanced body awareness: By tuning in to your body’s signals of hunger and fullness, you can develop a deeper understanding of your body’s needs and learn to trust your intuition when it comes to eating.
Self-compassion is an essential component of healing your relationship with food and your body.
The concept of self-compassion was first introduced and established by Dr. Kristin Neff, a professor of psychology at the University of Texas at Austin. In her research, Dr. Neff found that self-compassion is a powerful antidote to self-criticism and negative self-talk, and can be an effective tool for reducing stress, anxiety, and depression. She defined self-compassion as the act of treating oneself with kindness, understanding, and non-judgment during times of difficulty, and outlined three core components of self-compassion: self-kindness, common humanity, and mindfulness. Dr. Neff’s work has been influential in the field of mindfulness and psychology and has inspired countless individuals to develop a more compassionate relationship with themselves.
Reduced shame and guilt: By treating yourself with kindness and understanding, you can reduce feelings of shame and guilt that often accompany disordered eating.
Improved self-image: Practicing self-compassion can help you develop a more positive self-image and increase your self-esteem.
Greater resilience: When you’re kind to yourself during difficult times, you build resilience and are better able to cope with future challenges.
Enhanced self-awareness: By noticing your thoughts and feelings without judgment, you can develop a greater sense of self-awareness and learn to recognize and address negative patterns.
When speaking about self-compassion as it relates to our relationship with food, I think of one of my MNM students, Kelsey.
Kelsey used self-compassion as a tool inside the Mindful Nutrition Method to support her transformation and relationship with food. She shared:
“I just feel so much better. I really feel like I am at this point in my life, the healthiest that I’ve ever been. And I used to define health by the number on the scale or how I looked, my weight, and that is not how I define it anymore at all.
It’s — do I have the mental clarity? Do I have the energy to show up in the best way that I can every single day? Can I fulfill the goals that I want to have every single day? Can I work towards creating a better world for myself and my friends and my family and for everybody?
And I feel like I am so much more in tune with what I need, what I need to nourish myself both externally, how does my body look and feel, but also like internally of giving myself the time to really recharge and show up in a way in the world that I’ve always wanted to show up, but I didn’t realize that I could achieve that by just looking inside of myself and being in tune with myself.
So much has changed as far as how I view my health, how I want to take care of myself. It’s much more holistic. It was so much more on external factors and now looking at myself as a whole human being, my health as both physical, mental, emotional, spiritual, all of it. And that’s something I’ve never done before with myself or my health.”
Self-compassion goes a long way when meeting yourself where you’re at with your food experience and creating a new experience around food!
Here are some tips for incorporating mindful eating and self-compassion into your daily life:
Practice mindful breathing: Before meals, take a few deep breaths to center yourself and bring your attention to the present moment.
Eat without distractions: Avoid multitasking during meals and focus solely on your food and your body.
Use all your senses: Pay attention to the colors, smells, textures, and flavors of your food, and savor each bite. Try The Rasin Activity guided meditation.
Notice your thoughts and feelings: When negative thoughts or feelings arise during meals, notice them without judgment and try to let them pass without getting caught up in them.
Practice self-compassion: When you’re struggling with food or body image issues, treat yourself with kindness and understanding. Remember that everyone has struggles, and you’re not alone.
Build a support network: Seek out friends, family members, or professionals who can provide you with emotional support and guidance as you navigate your journey toward healing.
Seek professional help if necessary: If you’re struggling with disordered eating or body image issues, consider seeking the help of a mental health professional or a registered dietitian who specializes in mindful eating and self-compassion.
Mindful eating and self-compassion can be powerful tools for healing your relationship with food and your body. By practicing mindfulness and self-compassion, you can reduce stress, improve your digestion and nutrition, and develop a deeper understanding of your body’s needs.
Remember that healing is a journey, and it’s important to be patient and compassionate with yourself along the way. With practice and support, you can develop a healthier and more positive relationship with food and your body.
Embrace a Balanced & Peaceful Relationship with Food.
If you’re looking to develop a healthier relationship with food and transform your eating habits, consider joining our online group coaching program, the Mindful Nutrition Method. Our program is designed to help you cultivate a mindful approach to eating and develop a healthier relationship with food and your body.
Get the 3-part system that will help you discover your balance, enjoy food fully, and nourish your relationship with food to feel confident, balanced, and at peace. You’ll learn the skills and strategies you need to make lasting changes to your health and well-being. Don’t wait to start your journey towards a healthier, happier you.

If you purchase an independently reviewed product or service through a link on our website, STYLECASTER may receive an affiliate commission.
The members of BTS are known for their flawless skin, which has fans constantly wondering what the heck they use to get complexions that can only be compared to perfect, smooth, unblemished objects—like glass, mochi, milk and porcelain. Of course, the group has the occasional beauty brand partnership it promotes, but what about the products the members actually use in their everyday lives?
Thanks to Jimin’s video with Vogue, us ARMYs no longer have to wonder. “There’s one thing I always take with me when I travel,” he says in the video. He reaches for Mediheal’s Tea Tree Care Solution Essential Mask and adds, “Seriously. This is not a commercial. Not a paid commercial. My money, my purchase. I can often get dry in the hotel. So I always bring face masks.”
 Amazon")
Photo: Mediheal.
BTS has collaborated with Mediheal in the past, so it’s not surprising that the face mask of his choice comes from the K-beauty brand. But let’s get to the bottom of why Jimin loves this sheet mask in particular and how it helps calm and hydrate his skin when he travels around the globe.
Tea tree oil controls oil production, chamomile relieves stressed skin and centella asiatica strengthens tired skin, according to the brand. Jet-setting can certainly aggravate your skin. It usually manifests itself in dehydration (dry skin) and sometimes even irritated skin (perhaps it’s redness or blemishes). Knowing how these ingredients can benefit your complexion, it makes total sense why Jimin always has this face mask on hand when he’s hopping from one city to the next.
Lucky for you (and me), the Tea Tree Care Solution Essential Mask comes in a pack of 10 for $26 on Amazon. The set just so happens to be on sale right now for just under $20. That means each mask costs only $2. You can save even more by selecting the Subscribe & Save option on the product page. Doing so enables regular deliveries to ensure you never run out of this skin savior.
You heard our Baby Mochi! Add this pack of 10 Mediheal face masks to your cart so that your skin stays moisturized and soothed wherever you go. ARMYs are quick to sell out BTS-approved products, which means you should jump on this discount, stat (I know I am).
RELATED: This $10 Skin-Tightening Chin Mask Went Viral on TikTok & Sold Out 3 Times—Here’s Where to Buy It
The three key ingredients join forces to “improve the restorative process of your skin to control acne breakouts, red spots, and redness on the skin,” per the brand. “This face sheet mask contains several rich ingredients that create a moisture barrier over the skin to prevent moisture loss. This moisturizing layer strengthens the skin and prevents dryness while soothing redness and irritation on sensitive skin.”
On top of that, the product smooths texture and reduces the appearance of pores. It also balances sebum production, so that you have a healthy glow rather than a shiny layer of excess oil.
To get skin like Chim Chim’s, apply the step-1 maskand keep it there for 15 to 20 minutes. It’s made from a self-adhesive soft bamboo cellulose material so that it sits comfortably on your face. Next, remove the mask and lightly tap the leftover essence into your skin. And finally, apply the step-2 ampoule all over your face in an even layer. That’s it!
Go, go (*wink, wink*) and get this Mediheal face mask set while it’s still on sale for under $20 at Amazon. $2 a sheet mask is such a steal!