Author: admin

  • 3 Surprising Ways Caring for Your Vision Can Helps Prevent Eye Wrinkles

    3 Surprising Ways Caring for Your Vision Can Helps Prevent Eye Wrinkles

    According to the Vision Council, there are 165.5 million adults in the United States who wear prescription eyeglasses, while an estimated 223.5 million Americans wear non-prescription sunglasses. Like everything else we cherish in our lives, it’s important to make sure we take care of our eyes and, of course, our skin! Because the skin around the eyes is one of the most delicate areas on our bodies, eye wrinkles are often one of the first signs of aging. I’ve always said that preventing signs of aging requires more than just a solid skincare routine—it’s also about lifestyle. Keep reading for some surprising ways maintaining proper eye health can also keep the skin around your eyes looking younger. 

    1. Get Your Eyes Checked Regularly

    It’s best practice to get your eyes checked annually to make sure you get the most up-to-date prescription. Your eyesight can change from year-to-year, especially as you get older. Having a routine exam can help identify potential problems, and allow you to catch some common issues early, including cataracts or glaucoma, and treat them effectively. 

    Do you find yourself squinting when scrolling through your cell phone? What about when watching TV? This movement isn’t good for the skin around your eyes. Because it’s a repetitive movement, squinting contributes to fine lines and eye wrinkles. That’s why having up-to-date lenses can prevent unnecessary stress on the delicate skin around the eyes over time. 

    Another great way to keep fine lines at bay is to use an exfoliating under-eye serum one night a week. This will remove dry, crepe-y skin and allow the ingredients in your eye cream to penetrate more effectively.

    2. Invest in High-Quality Sunglasses to Protect From UV Light

    UV rays are the #1 cause of premature skin aging and can cause wrinkles and fine lines to form. The skin around and underneath your eyes is especially susceptible to this UV damage because it’s more sensitive and thin compared to the skin on the rest of your face. Because of this, it’s critical to double down on your efforts to preserve your skin health. Not only with generous amounts of sunscreen but also with a high-quality pair of sunglasses.  

    Here are a few pointers to keep in mind when looking for a pair of sunglasses to make sure you have the best protection:

    Remember, not all sunglasses are created equal. Make sure your pair has a label that says 100% UV protection. Some labels might say UV 400, which is 100% protection. (Cheaper sunglasses may not offer that complete UV protection promise.)Take your sunglasses to a local optical store where they can measure the level of UV protection with their photometers.If you have an older pair of sunglasses, check the lenses for scratches as that can provide a point of entry for UV rays to hit your face and eye area.Look for sunglasses that have polarized lenses; this can significantly reduce glare which causes occasional discomfort and squinting.

    3. Minimize Blue Light Exposure to Prevent “Digital Aging”

    I’ve written about blue light before, and its effects on our lives can’t be overemphasized. We’re all guilty of staring at our screens for hours on end, whether it’s for work or leisure. This can cause eye strain and fatigue, which can also lead to more unnecessary squinting. As far as skin is concerned, blue light has been shown to exacerbate under-eye darkness, hyperpigmentation, and fine lines and wrinkles. If you want some added protection for your eyes, you can look into buying a blue light-blocking screen protector for your mobile device. This can help ease eye fatigue when staring at your phone and reduce the amount of blue light exposure you get on a daily basis.

    It’s important to remember, however, that most of our blue light exposure comes from the sun. I suggest using an antioxidant eye cream (as well as a broad-spectrum sunscreen) to combat the potential onset of aging from blue light. This eye cream contains vitamin C, which can improve the look of “tired eyes” and other negative effects associated with blue light. Using it regularly will keep you looking refreshed and more awake, especially if your job has you in online meetings all day! 

    I believe that taking care of yourself is the best way to live life fully. By getting your eyes regularly checked out by professionals, you’re not only improving your sight but also taking essential preventative measures against premature skin aging. You only have one set of eyes, and your skin will always be along for the ride of life. I hope these insights help you understand why this small area of skin deserves a little extra tender love and care.

    Up next, read this if you feel like your eye cream isn’t working.

  • 10 Different Types of Yoga to Master Your Body and Mind

    10 Different Types of Yoga to Master Your Body and Mind

    by Caitlin H,

    Oct 17, 2022

    Yoga

    Controlling both your mind and body are two things that can work wonders toward improving your overall health and weight loss efforts.  And yoga is a highly effective way to get that control. Yoga combines breathing and meditation (mind) with movement (body) to boost various elements of your health, including flexibility, endurance, strength, inner peace and well-being.

    Approximately 350 million people practice yoga regularly, making it one of the world’s most popular forms of fitness. And all those minds and bodies focused on one specific type of exercise means growing varieties and forms of the practice.

    In other words, there’s something for everyone in the yoga world. With that in mind, we rounded up 10 types of yoga you can try out for mediation, fitness, spirituality and, of course, fun!


    1) Life Force Energy Yoga


    “Kundalini” or “Life Force Energy” yoga incorporates chanting, singing, breathwork and meditation with body movement. The aim is to reduce negative thinking and stress and is excellent for those who enjoy exploring their spirituality.


    2) Forceful Yoga


    “Hatha” yoga — literally translated to “forceful” yoga — explores the more physical side of yoga and is one of the more traditional types that many beginners enjoy. If you try this kind of yoga, your main objective is to do it consistently and combine it with breathing techniques, mediation and concentration.


    3) Pose Yoga


    If you’re someone who thrives on routine, pose — or “Ashtanga” — yoga is for you. This style typically involves a class where you’ll learn to master specific yoga poses before progressing to the next one. Instructors often combine it with spirituality techniques and offer hands-on adjustments to students as they practice each pose.


    4) Aerial Yoga


    Yoga meets acrobatics in this beautiful yoga form that has continued to rise in popularity in recent years. You’ll use silky hammocks attached to the ceiling to hold various yoga poses. This can be especially helpful to assist your body with getting into challenging poses you may not be able to do otherwise. Adding hammocks also means you can make this class as easy or as challenging as you want.


    5) Yin Yoga


    Yin Yoga has roots in martial arts and aims to improve circulation and flexibility to improve joints and muscle strength. It’s a slower style that involves holding poses for 1-5 minutes. If you’re an athlete, someone who exercises regularly or live with joint or muscle pain, you can benefit from this yoga type.


    6) Hot Yoga

    Hot yoga comes in various styles and is not for the faint of heart. It is a more rigorous style where you’ll perform many types of sitting and standing in a hot, humid studio. Combining the heat with the poses raises your heart rate and strengthens muscles simultaneously. It’s excellent for burning fat, but you should probably avoid it if you have certain health conditions, like heat intolerance, heart disease or have experience a heat-related illness. As with all exercises, check with your doctor first.


    7) Power Yoga


    Core work, plenty of movement and even dance are possible components of a power yoga routine — which is practiced hot or regular. An instructor has a lot of freedom to adapt a power yoga class, making this an incredibly engaging yoga type that involves varying movements and routines. Power yoga is an excellent workout for burning calories and is less spiritual than other yoga types.


    8) Restorative Yoga


    If ever there was a sleepy, slow yoga form, it’s restorative. This yoga practice involves using props to support and roll over the body with lots of breaks to lay on the mat with your eyes closed. Instructors will often play soft music and guide you through various meditations while using the props to help you relax into poses. Restorative yoga is excellent if you need to lower your stress levels or want to build something simple and low-key into your rest days.


    9) Acro Yoga


    If you want to try something challenging (but fun!) with a partner, head to an acro yoga class. Acro yoga is set in an interactive environment and involves developing communication skills with a partner while you work to master various poses as a team. With each move, the “base” partner builds core and lower body strength, while the “flyer” partner builds upper body strength and flexibility.


    10) Goat Yoga


    Suppose you’re the kind of person who likes to step outside the box and try something especially unique. In that case, you’re definitely going to want to give goat yoga a shot. Goat yoga may sound silly, but it’s a ton of fun. You can expect to practice yoga while these furry, friendly creatures wander around you. It’s excellent for reducing stress and anxiety, mood enhancement, improving sleep and breathing and generally boosting your positivity.


    ————————————————————————————


    Author: Caitlin H
    Diet-to-Go Community Manager

    Caitlin is the Diet-to-Go community manager and an avid runner. She is passionate about engaging with others online and maintaining a healthy, active lifestyle. She believes moderation is key, and people will have the most weight loss success if they engage in common-sense healthy eating and fitness.


    Exercise Tips

  • Baked BBQ Salmon | Kara Lydon

    Baked BBQ Salmon | Kara Lydon

    A quick and easy weeknight sheet pan meal, this Baked BBQ Salmon is perfect for when we’re craving BBQ but want minimal clean up.

    bbq salmon. flaked. green beans. sweet potato. lemon slice. on grey plate. sprigs of cilantro.

    If you’re a fan of sheet pan dinners for their ease and minimal clean-up, you’re going to love this Baked BBQ Salmon!

    Ready in just 40 minutes, this is a perfect weeknight meal to add to your dinner rotation!

    The salmon is cooked until it’s buttery and flaky – no overcooked salmon here! Perfectly paired with spiced sweet potatoes and crunchy green beans, it’s the perfect meal for when you’re craving BBQ vibes. 

    And as an added bonus – this recipe boasts omega-3 fatty acids! They’re helpful for heart, brain, and cardiovascular health, and are found in fatty fish like salmon. 

    Ingredients You’ll Need

    ingredients. on marble countertop. labeled.

    Notes on Ingredients

    Salmon: Fattier cuts (aka not wild or sockeye) will work best here for texture and flavor. I find it easiest to buy pre-cut filets to save time and ensure everything is evenly cooked. 

    BBQ Sauce: Use your favorite variety or brand! I used Kansas City style BBQ sauce – think thick, sweet, and tangy!

    Spices: I chose chili powder and smoked paprika for extra spice and smoky BBQ flavor. 

    Sweet Potato and Green Beans: To add some veg and some starch. You could swap for other starches and veggies, like white potatoes, broccoli, Brussels sprouts, snap peas, carrots, squash, and more. 

    Equipment You’ll Need

    Sheet Pan

    (affiliate links – if you make a purchase I receive a small commission)

    How to Make Baked BBQ Salmon

    brush salmon. coat sweet potatoes. put sweet potatoes on pan. coat green beans. add to pan. add salmon in middle of pan. cook.

    Step 1: Preheat oven to 425 degrees F. Line a baking sheet with parchment paper. Brush salmon with BBQ sauce on all sides. Set aside.

    Step 2: In a medium bowl, add sweet potato wedges, 2 tablespoons olive oil, chili powder and smoked paprika. Season with salt and pepper, to taste. Toss together to evenly coat.

    Step 3: Spread sweet potato onto baking sheet.

    Step 4: Toss green beans in the same bowl with remaining 1 tablespoon olive oil and season with salt and pepper, to taste. Toss to evenly coat.

    Step 5: Spread out onto baking sheet, saving room in the middle for the salmon. Bake at 425 degrees F for 15 minutes.

    Step 6: Lower oven to 300 degrees F. Add salmon onto baking sheet.  

    Step 7: Cook until salmon is flaky and reaches an internal temperature of 135 degrees F (for medium salmon), about 20 minutes.

    Expert Tips

    The USDA safe internal cooking temperature recommendation for fish is 145°F but I like to cook my salmon to medium consistency (which is the standard texture you’d get at a restaurant unless you specify otherwise). To achieve medium salmon, I like to cook my fish until it reaches a temperature of 135 degrees F. You can also gauge the doneness of your fish by inserting a fork into the the thickest piece of the fish and seeing if it easily flakes. If it does, it’s likely done!

    close up. bbq salmon. saucy. flaked. cilantro. lemon wedge.

    Recipe FAQ

    What’s the best temperature to bake salmon?

    I prefer baking my salmon at 300 or 325 degrees F. The lower temperature takes a bit longer, but it ensures the salmon cooks slowly, does not dry out, and gets that perfect flaky texture. You can go up to 350F, or even 425F, but you’ll want to cook it for less time. 

    How long should you bake the salmon? 

    At 300 degrees F, with a 6 oz filet like I used, it will take about 20 minutes, but this depends on the size of your filet. If you plan to roast your salmon whole, without cutting into filets, it will take longer (25-35 minutes depending on the thickness of your piece of fish). As I noted above, it will take less time at higher temps. Wild salmon, which I did not use here, has less fat, so if you choose sockeye or a similar variety, you’ll want to take the cook time down as well.

    If you want to be sure, use a meat thermometer! The USDA recommends cooking salmon to 145 degrees F. 

    How do you keep salmon from getting too dry?

    Beware of over-cooking! Though the USDA recommends cooking salmon to 145 degrees F, I find the best texture is found at 135 degrees F (for medium salmon), but this is totally up to you. If you don’t have an instant thermometer, try breaking the salmon apart with your fork. When done, it should separate (or flake) very easily with light pressure, and the center should no longer appear raw. 

    I’d also suggest choosing fattier cuts, as it will retain more moisture and be harder to overcook. Adding sauce, like BBQ here, will also help bring back the soft, moist texture you’re looking for!

    For more tips on cooking salmon, check out my Slow Cooked Salmon and my Air Fryer Salmon!

    two plates bbq salmon. flaked. green beans. sweet potato. lemon slice. sprigs of cilantro. striped napkin. extra bbq sauce.

    Storage and Preparation

    You can marinate the salmon up to 24 hours ahead of time for even more BBQ flavor. If you’re trying to plan ahead, I love to cut and prep my veggies the day before, too. 

    Once cooked, salmon will last 3-4 days in the fridge. Personally, I like to eat it cold once it’s been in the fridge. If you choose to reheat, it may dry out a bit. Baked salmon can last in the freezer for 4-6 months, but the texture and flavor may change. Make sure to let it cool completely and wrap it tightly and store in an airtight container to seal in as much moisture as possible. 

    Recipes That Pair Well

    For more cookout inspiration, check out my other recipes below!

    If you like this recipe, please be sure to comment and give it a 5 star rating below. If you make it, share it on Instagram and tag me @karalydonrd and I’ll re-share it with my followers! If you want to save this recipe for later, be sureto pin it on Pinterest!

    This recipe was retested, reshot and revamped to bring you the most delicious (and most beautiful) dish! The original post was published June 2019.

    Print

    clock clock iconcutlery cutlery iconflag flag iconfolder folder iconinstagram instagram iconpinterest pinterest iconfacebook facebook iconprint print iconsquares squares iconheart heart iconheart solid heart solid icon

    Description

    A quick and easy weeknight sheet pan meal, this Baked BBQ Salmon is perfect for when we’re craving BBQ but want minimal clean up.

    1 lb. salmon, cut into filets
    1/4 cup BBQ sauce
    1 large (or 2 small) sweet potato, cut into wedges (about 1720 wedges)
    3 tablespoons olive oil, divided
    1/4 teaspoon chili powder
    1/4 teaspoon smoked paprika
    Salt and pepper, to taste
    1 bunch green beans (about 11 ounces), trimmed

    Preheat oven to 425 degrees F. Line a baking sheet with parchment paper.
    Brush salmon with BBQ sauce on all sides. Set aside.
    In a medium bowl, add sweet potato wedges, 2 tablespoons olive oil, chili powder and smoked paprika. Season with salt and pepper, to taste. Toss together to evenly coat.
    Spread sweet potato onto baking sheet.
    Toss green beans in the same bowl with remaining 1 tablespoon olive oil and season with salt and pepper, to taste. Toss to evenly coat.
    Spread out onto baking sheet, saving room in the middle for the salmon. Bake at 425 degrees F for 15 minutes.
    Lower oven to 300 degrees F.
    Add salmon onto baking sheet and continue cooking until salmon is flaky and reaches an internal temperature of 135 degrees F (for medium salmon), about 20 minutes.*
    Evenly portion out salmon, sweet potato wedges and green beans.

    Notes

    Cooking time will depend on the thickness of the fish. Thicker pieces may require a longer cooking time.
    The USDA safe internal cooking temperature recommendation for fish is 145°F.
    If you don’t cut salmon into filets before cooking in the oven, it will take longer to cook.

    Prep Time: 5 minutesCook Time: 35 minutesCategory: DinnerMethod: Sheet PanCuisine: Barbecue

    Keywords: baked bbq salmon, baked barbecue salmon, bbq salmon sheet pan dinner,

  • Herb Roasted Acorn Squash with Parmesan (Savory and Simple)

    Herb Roasted Acorn Squash with Parmesan (Savory and Simple)

    Herb Roasted Acorn Squash with Parmesan (Savory and Simple) – The Real Food Dietitians


    Privacy & Cookies Policy


  • The Disadvantages of Dieting – Nutrition Stripped®

    The Disadvantages of Dieting – Nutrition Stripped®

    What are the disadvantages of dieting and why should you ditch dieting for good? Keep reading to learn more.  

    There’s always a new diet, detox, or food trend that everyone seems to be trying. But is it always a good idea to join in? Whether rooted in nutrition or geared towards quick weight loss, these trends always involve two things – restrictions, and rules. 

    As soon as restrictions and rules come into play, a slew of disadvantages come along with them. Such as feeling out of control around food and experiencing heightened food guilt or stress, just to name a couple. In the end, dieting is the root cause of it all. If you’re wondering whether or not it’s finally time to stop dieting for good, this article is for you. Understanding the disadvantages and consequences of dieting can help you to say no to the next detox or trend that comes your way.

    What Do We Mean When We Say Dieting?

    It’s important to note what exactly we mean when we say dieting. What we are not referring to here is a medically recommended diet. Such as a low sodium diet for hypertension, a low FODMAP diet for IBS, or a plant-focussed diet for high cholesterol. 

    What we are referring to are strict, extreme diets that tell you to avoid, remove, or restrict anything from your diet outside of the context of a medical recommendation. They often do so while promising extreme, life-changing effects as a result. Such as fast weight loss or extreme boosts in energy. Additionally, they’ll often have a time stamp associated with them. You only have to follow their recommendations or protocol for 10 days, 30 days, or 3 months. Afterward, you’re promised incredible results with minimal commitment. 

    If you find yourself continually following these types of diets, keep reading to learn about the disadvantages of diets before you decide to get started.

    6 Disadvantages of Dieting 

    The following six outcomes are what we see most often as registered dietitians in the nutrition coaching realm. Individuals come to us having dieted for years and are frequently experiencing all six of these symptoms listed below. 

    Causes an “All-in” and “All-out” relationship with Food

    Another way of saying “all-in” and “all-out”, is “on the bandwagon” and, “off the bandwagon”. Diets function in a cyclical way. You’re either on a diet or off of one. Unfortunately, they don’t prepare you for what normal life looks like after the diet is over. As a result, you go right back to your prior habits (i.e. “all-out”). Until undoubtedly, you decide you’d like to make a change and try another diet. Cue the pendulum swing from one end of the spectrum to the other.

    This creates an imbalance with food and is arguably the biggest disadvantage of dieting. It makes it impossible to do both, to enjoy food and nourish yourself with food. It makes you feel like you’re either “being good”, or “being bad”, with no in-between. 

    Leads to Extreme Cravings

    What happens when you really want your favorite ice cream that’s in the freezer, but you tell yourself you can’t have any? You want it even more. And not only that, you crave it. It almost seems to take over your thoughts and all of a sudden becomes the most important thing on your mind, right? 

    This brings us to the second disadvantage of dieting, extreme cravings. When you inherently want something or enjoy something, it isn’t beneficial to abruptly restrict or remove it from your life. When you do so, your mindset immediately shifts to lack. You can’t help but think about what you’re missing out on, or how good it would feel to have what you no longer can have. Over time, this manifests as a craving. 

    That ice cream in the freezer sounds so incredible, so you absolutely must have it. As a result, you physically have to have a mental argument with yourself to prevent yourself from, “giving in”, or “losing willpower”. If this sounds familiar, you’ve certainly experienced this disadvantage of dieting before. 

    Results in a Loss of Control Around Food 

    After those cravings kick in, the loss of control comes next. 

    You’re on a diet and you’re out with friends on a Friday night. You know you’re, “not supposed” to have pizza, yet, there’s some pizza at the party. Next thing you know, you’ve had three slices. At the end of the night, you’re home and thinking to yourself, “What’s wrong with me? I have absolutely no control when I’m around pizza.”. Is it true that you have no control? Absolutely not. It’s simply the diet causing this sensation.

    Another disadvantage of dieting is that it not only causes a lack mindset, it also causes a scarcity mindset. Because dieting has told you time and time again that pizza is, “bad”, “not allowed”, and, “off-limits”, whenever you have access to it, it seems like it’s your only opportunity. It’s the one chance you have to eat pizza and, “get away with it”. 

    So, in turn, you eat more than you really want, eat past your satiety cues, and appear to lose control. The following day, you feel guilty, stressed, and overwhelmed, so you tell yourself you’re, “getting back into it”, or “doing better” today. It brings you right back to that cycle we started with.

    Only Allows for Short-term Success 

    So what’s the draw? If we know diets cause a loss of control around food, give us extreme cravings and make us swing back and forth between extreme habits, why are people still following them? 

    Short-term, quick results. Diets temporarily work because of how extreme they are. As long as you follow their rules, you’ll see some results. And what happens when you do? You’re hooked. You have proof that it works, right? But very soon after, you find yourself at the “all-out” and of the spectrum, yearning to get back to the “all-in” end in order to get those results back. And the cycle continues. 

    This disadvantage of dieting is that the success you achieve is never maintainable or sustainable. It’s short-lived and somewhat addicting. It leaves you wanting more so you’ll always come back for more and try again. 

    Diminishes Natural Body Cues 

    When we’re constantly following someone else’s rules, it gets pretty difficult to discern what our own body truly wants or needs. Our bodies are built to communicate with us, to tell us what we like or dislike, and tell us when we’re hungry or when we’re full. But diets tell us otherwise. They tell us we’re supposed to eat a certain number of meals per day that contain a specific number of calories that can only be eaten at certain times. Cue the confusion! 

    New clients almost never know what true hunger or satiety feels like. They’re almost always struggling to simply understand what they enjoy versus what they believe they, “should” be eating. This is another example of a disadvantage to dieting. When we have a balanced, sustainable relationship with food, we work with the body and its cues, not against it. Diets, on the other hand, will tell you to fight those cues and ignore them.  

    Makes Food Difficult and Time Consuming

    When you’re on a diet, or simply used to being on a diet often, food starts to be complicated. It takes up so much of your time and your thoughts. You’re constantly trying to recall the rules, remember what you ate that day or how much you had last night. You might even try and write it all down to make it easier on yourself. 

    Food becomes a controlling part of your life. It starts to dictate your actions and maybe even your social choices. This is what the “all-in” of the spectrum looks like. 

    Food is meant to be enjoyed, and it’s meant to be a source of nourishment. It’s not meant to be a daunting, overwhelming part of your life. If you’ve experienced this disadvantage of dieting before, you know it’s a viable reason to never go back. 

    The Takeaway

    When you have a balanced, sustainable relationship with food that does not include dieting, you don’t have to experience any of these disadvantages. You’re able to eat food because you want to eat it, while also feeling in control of your choices and your actions. You’re able to experience social situations with ease. You even feel confident listening to your body’s cues and enjoying food for the sake of enjoying it! 

    If you’re looking for a sign to stop dieting and start building lasting habits, this is most certainly it.  

    Do You Want to Experience More Balance with your Food Choices?

    Then start by finding your balanced eating type!

    Take this 45-second free quiz to find out which balanced eating archetype you are, and what your unique type needs to maintain balance with the way you nourish yourself. That way, you can finally be free from food and diet obsession, maintain a balanced weight, and cultivate a positive relationship with food and your body. 

    Take The Free Quiz Now

  • CeraVe’s $15 Anti-Aging Moisturizer Works Like La Mer—& It’s On Sale

    CeraVe’s $15 Anti-Aging Moisturizer Works Like La Mer—& It’s On Sale

    If you purchase an independently reviewed product or service through a link on our website, STYLECASTER may receive an affiliate commission.

    If you’re a skincare fanatic like us, then you know all about La Mer’s best-selling Crème de la Mer moisturizer. Big celeb names like Kim Kardashian and Chrissy Teigen adore this product. What’s the catch, then? We’re sad to say that this cult-favorite cream might wreak havoc on your bank account, because it costs a whopping $350. Who knew a jar of moisturizer could cost that much?

    We would never leave you hanging, so the good news is that there’s a more budget-friendly alternative that’s brought to you by TikTok’s favorite skincare brand, CeraVe. The Skin Renewing Night Cream stays true to its name in that it strengthens and refreshes your skin overnight. Shoppers say it’s so effective, it’s even better than the $350 competitor. 

    “I normally don’t write a review but I have to for this one,” wrote one shopper who previously used La Mer, and other high-end skincare products for years. “It is the best I have ever used.”

    It’s no wonder why it has earned a spot on Amazon as the #1 best seller in facial night creams. You can head to Amazon now to grab this night creamnow—it’s actually on sale for 17% off, but only if you’re a Prime member. Sign up for an Amazon Prime membership here.

    RELATED: 4 Solid Dupes For La Mer’s The Concentrate Serum That Are (Almost) Just As Good 

    CeraVe Skin Renewing Night Cream

    Courtesy of Amazon.

    CeraVe Skin Renewing Night Cream

    You might be wondering what a $22 (now on sale for $14) moisturizer has that a $350 one lacks. 

    To start, CeraVe is known for incorporating ceramides into all of its offerings. The three essential ceramides help keep your natural skin barrier healthy and replenish lipids typically lost when we all age. That, on top of the anti-aging properties in this night cream, makes all the difference. It’s an added bonus that redness-relieving peptides are also packed into the ingredients list. These also work to minimize the appearance of fine lines and wrinkles and ensure your skin maintains that youthful bounce to it.

    As if those ingredients aren’t enough, the hyaluronic acid included will retain your skin’s moisture while the niacinamide also calms the skin. These superstar ingredients continuously get released throughout the entire night with the help of CeraVe’s patented MVE Delivery Technology, so it’s like lush waves soothing your face over and over again. 

    This is all to say that your tired skin will look a whole lot better in the morning with just a swipe of this cream the night before. 

    Now this formula may sound super rich in ingredients and texture, but it’s still fragrance free, non-comedogenic, and non-irritating. Translation: this moisturizer is also suitable for sensitive skin and it won’t clog your pores. 

    CeraVe’s Skin Renewing Night Cream isn’t a #1 best seller on Amazon for no reason. It has thousands of raving reviews and ratings to back it up.

    “It is thick and has that ‘lock’ function and is safe for sensitive skin at the same time,” wrote one shopper. “Compared to La Mer, at this price, I am very grateful for it. Thank you for saving my skin and my wallet.”

    As you can tell, you don’t need to blow your paycheck in order to get healthy, glowing skin. You can do it all with an amazing drugstore option like CeraVe’s Skin Renewing Night Cream. You and your skin can rest easy knowing that this goop is hard at work during the night, restoring your skin like no other.

    More Prime Early Access Deals 2022 to Shop:

    StyleCaster newsletter


  • Our Commitment to Consumer Driven Skincare Solutions

    Our Commitment to Consumer Driven Skincare Solutions

    At Mario Badescu Skin Care, we take our product quality seriously. While we have many devoted customers who have trusted and relied on our classic formulations for years, we’re always open to feedback. Every message, DM and review informs what we do next. That’s why we’ve decided to be more conscience of using ingredients that work for sensitive skin, while still being just as effective when it comes to acne, anti-aging and other skincare concerns. Our classic products will still be available, but we hope that these new formulations will allow every customer to find the perfect fit for their needs.

    Our Commitment to Good Skin Care

    Please read our official statement below for more information about this renewed commitment to quality skincare solutions:

    Our Commitment

    Mario Badescu Skin Care started in 1967 with Mario Badescu himself mixing products and giving facials in his one room studio in New York City. He quickly gained renown for his custom treatments, from which he developed a product line that included everything from acne solutions to essential, daily care.

    Even after decades of innovation, you’ll find that most of our original formulations remain beloved favorites in the line. For over 55 years, our products have delivered results—and to this day, we see the impact they make in real time, daily. We’re proud to have served three generations so far, and as we look ahead, our mission is to continue developing exactly what you’re looking for. This means that every message, DM, and review informs what we do next. Going forward, we will be more conscience of using ingredients that have been shown to contribute to skin sensitivities. 

    The original, time-tested formulas you know and love—and have been skin-tested by us every day—will always be here for you.  Newer collections will uphold tradition and efficacy while evolving to reflect your feedback: they’re designed with your needs in mind. 

    In short, we know GOOD SKIN IS FOREVER. No matter your current skin phase or where you are in your skin care journey, we’re here to take you through them all.

    Our Commitment to Good Skin Care

    Categories: Did You Know…?, In the Press, Our Commitment, Skin Care |
    Permalink

  • How To Give Yourself A Facial At Home

    How To Give Yourself A Facial At Home

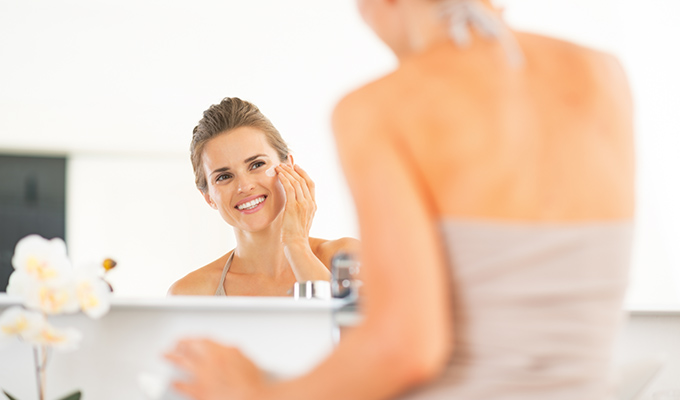
    While your bathroom might not hold a candle to a spa experience, don’t let a lack of fancy spa tools or professional-level skin care products prevent you from embracing your inner esthetician. Giving yourself a decent facial from the comfort of your home is essential to maintain your skin between spa treatments. You can even elevate the experience by setting the scene with candles and indulging in treatments like flash facials.

    Here are a few steps to follow to boost your skin care regime with an at-home facial in between spa visits.

    What Is A Facial? | Why Give Yourself A Facial At Home? | Facial Steps At Home | Facial Contouring | Facial Steps For Acne Prone Skin | Flash Facials

    Woman applying moisturizer

    What Is A Facial?

    Whether you’re a facial fanatic or complete newbie, it’s important to understand what exactly a facial contributes to your beauty routine. An all-inclusive approach to skin care, a facial is a treatment or series of treatments that can target multiple skin ailments. You may be aware that the skin on our face is a map for our body’s needs, and a facial serves as an infographic to point out any nutritional deficiencies or general health conditions that need specific care.

    Now, not all of these facial treatments are safe — or even possible — to achieve on your own.Due to the precision and experience required, extractions should be avoided at all costs. Professional-level chemical peels are also not wise to attempt on your own as they can cause pigment irregularities and even scar your skin permanently when they are misused. Even without these more advanced spa treatments, you can give yourself an hour of skin pampering that will reset your skin. Although nothing will replace the expertise and experience of a professional treatment, an at-home facial by yourself can maintain the health of your skin until your next opportunity to visit your esthetician. If you do want a professional facial peel, we recommend learning more information at your nearest Eminence Organics Spa Partner.

    Why Give Yourself A Facial At Home?

    Experts advise a facial once a month if your skin is frequently problematic, or every time your environment changes or you enter a new climate. Facials are an extension of your other skin maintenance, like exfoliation, dermaplaning or masks. Designate time for them the same way you might pencil in a manicure or tidying your eyebrows.  

    A facial is also a chance for you to disconnect from working at home and relax into leisure time. Simultaneously pamper yourself and tend to your skin’s needs under different circumstances. Whether you’re contending with a lack of work, relationship strain or any psychological anxiety related to the current circumstances, this is a way to decompress and boost morale. Facials should be done at night when your skin is most ready to repair, so think of it as another method to unwind. Your skin also renews every 20 – 30 days, so you’re likely to see results within several weeks of your facial. 

    Facial Steps At Home

    Light some scented candles, put on the most relaxing, meditative music you can find and line up the facial care products you need. First up is a guide to an at-home facial for most skin types. If you have acne-prone skin, please skip forward to the next section designed for you.

    Here is your step-by-step guide for giving yourself a quality facial: 
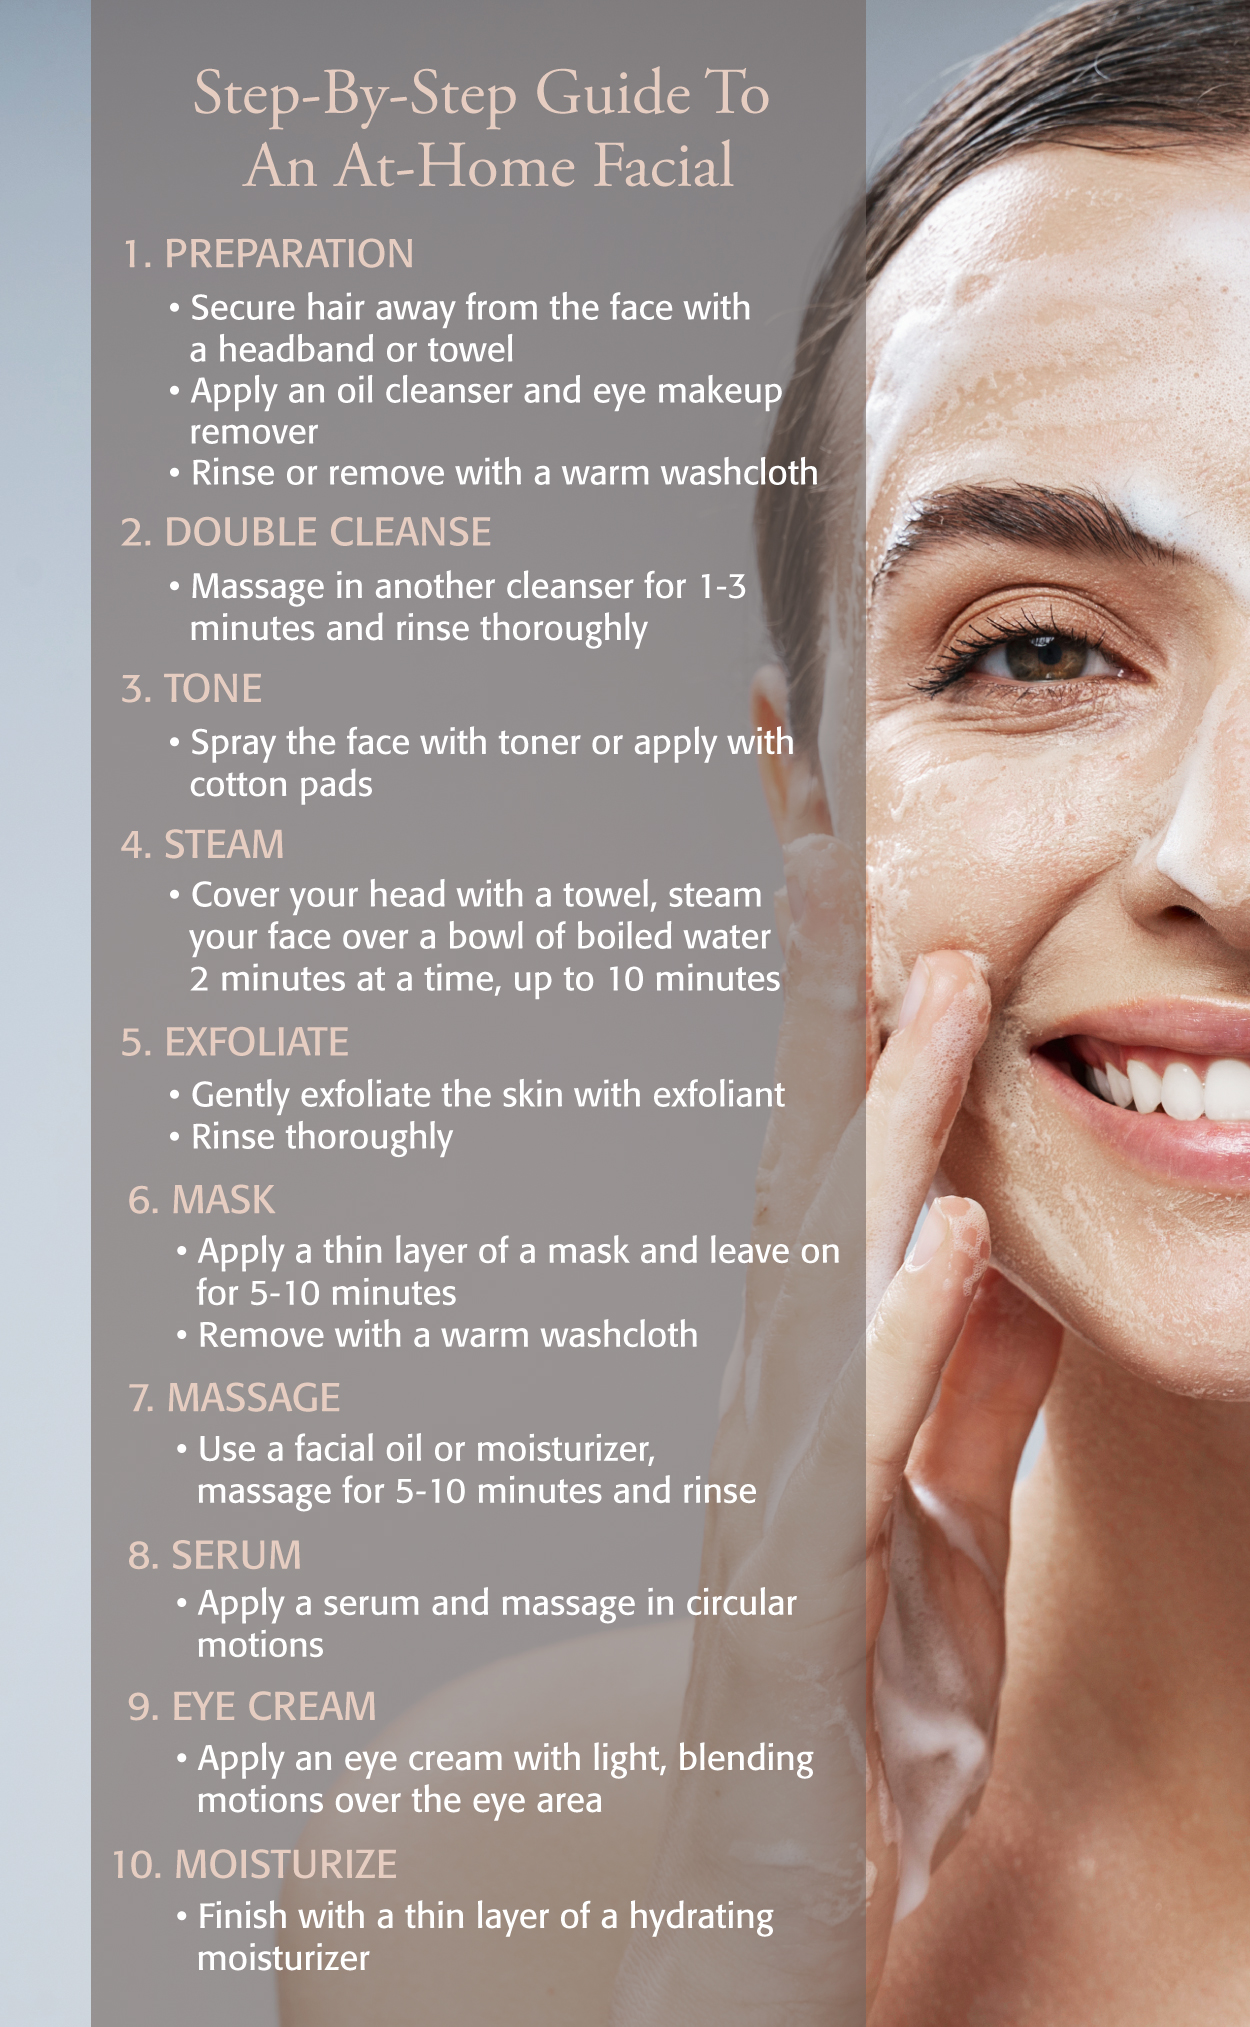
    Eminence Organics Facial At Home Infographic

    Step ​1. Prepare Your Facial Products

    Make sure you pull your hair away from your face and secure it with a headband or towel so you can apply your skin care products easily. Now, it’s time for makeup removal! Start by applying an oil cleanser before rinsing or removing with a warm washcloth. If you’re battling against stubborn eye makeup, in addition to the oil cleanser, you can pour a little eye makeup remover onto a cotton pad and wipe your eyes gently. 

    Step 2. Cleanse 

    After removing your makeup, double-cleanse by massaging a small amount of another cleanser into your face and neck for 1-3 minutes (dilute with water if needed). Not only do facial massages allow your skin to better absorb the product, but they encourage the drain of build-up in your face that causes puffiness. Make sure to push the skin up as you massage to give your face a natural lift. Gently smooth forehead and eye area wrinkles as you go. This will relax the facial muscles. Rinse thoroughly.

    Step 3. Tone

    Next, spray or apply toner with cotton pads. Remember the neck and decolletage (avoid the eye area here), as they are the first areas, other than the face, to show age. Toners are essential to complete the cleansing process and protect the skin from environmental stressors. 

    Step 4. Steam

    If you particularly enjoy facials that get a little steamy, never fear – this is something you can definitely DIY. Pour boiled water into a large bowl and place your skin six inches away while covering your head with a towel to trap the steam. This will open your pores and prepare your skin for exfoliation and absorption. You can steam up to 10 minutes, two minutes at a time.

    Step 5. Exfoliate

    Gently massage an exfoliant into the skin. Be careful not to scrub or drag, particularly around the delicate eye area where the skin is thinner. Massaging an exfoliant onto your skin gently removes dead cells and any remaining dirt or makeup. Rinse thoroughly.

    6. Facial Masking

    It’s masking time! Apply a thin, even layer of your mask (it may be tempting to go thick, but it’s not necessary) and leave on for five to 10 minutes before removing with a damp face cloth. For extra facial benefit, employ your former massaging techniques to maximize absorption and natural lift. Remember to include your neck and decolletage. 

    Step 7. Massage

    To deeply hydrate the skin, reach for your facial oil or moisturizer for another massage. Make sure to avoid acne-prone areas. Gently knead your face for five to 10 minutes before rinsing the product off. 

    Step 8. Apply Serum

    Now to lock in the moisture: Apply a serum that suits your skin and massage into the skin in circular motions. For example, the Citrus & Kale Potent C+E Serum has a potent dose of non-irritating Vitamin C that brightens the appearance of all skin types. You can leave most serums on and follow with a moisturizer (only two steps away!). 

    Step 9. Eye Care

    Next you want to target dark undereye circles, puffiness or fine lines around your eyes. Reach for your favorite eye cream, lightly blending and tapping the product until it’s absorbed. 

    Step 10. Moisturizing

    Take your moisturizer and apply a thin layer to the face, neck and decolletage. And you’re done with your first at-home facial! If you deal with acne, and you’re concerned that any of the steps would trigger further breakouts, up next we’ve gathered some insights on how to give yourself a facial designed for acne. 

    Facial Contouring

    If you’d like to improve the look of puffiness, redness or conditions like rosacea, facial contouring using cold therapy can greatly assist. Cold therapy works by diminishing swollen tissue and broken capillaries to reduce redness and puffiness in the face. To do this at home, all you need are two ice globe tools that you pop in the fridge or freezer before rolling them across your skin to depuff and tighten the appearance of your complexion. 

    Ice globes are freezable wands with one spherical end that can be rolled or massaged on your face or the body. They are typically made from steel or glass and are ideal for lymphatic drainage as it relieves sinus pressure. The technique is easy to do at home.

    Step 1. Place Your Ice Globes In The Freezer

    Place your ice globes in the freezer or fridge until they feel cool. 

    Step 2. Apply Moisturizer

    Apply a lightweight moisturizer, lotion or oil onto your face before using your ice globes to help them glide along the skin. For example, the Mangosteen Gel Moisturizer works easily with all skin types. You don’t need a lot of product, but just enough to allow the globe to slide easily.

    Step 3. Roll The globe To Lift Your Eye Area

    Starting from your under eye area, swoop upwards towards your temple. When you reach your temple, pause to place a small amount of pressure. Swoop up and down approximately six times on each side of the face.

    Step 4: Glide Under And Across The Brow

    Next, you can roll the globe under the brow as well as across the top of the brow. Start by placing the globe near your nose and rolling it outwards across your eyebrow and eyelid towards your temple, pausing at the temple spot again with gentle pressure. You can repeat around six swoops on each side of the face and left side of your face. These actions should depuff and lift the eye area for a more contoured appearance. 

    Step 5. Use Lifting Motions Across Your Brow

    Place the globe from the bride of the nose and roll across the eyelid and eyebrow, pausing at the temple. With each swipe (around six on each side of the face), roll with a lifting motion. Then, you can also glide the globe upwards from the center of your brows to your forehead and then across to your temple in an L-shape. 

    Step 6. Contour Your Chin And Jaw

    To contour your chin and jaw, place the globe from your chin, gliding the globe upwards across your cheekbones, pausing at the temple, at the top of the ear. For the jaw area, pull the globe up from the base of your jaw and upwards towards your temple, placing gentle pressure on the temple. You can even release tension by gliding the tool under your chin and down your neck. 

    Step 7. Cleanse

    Continue with your facial cleansing routine. Lightly exfoliate your face, if needed. Apply your moisturizers and serums as you normally would. 

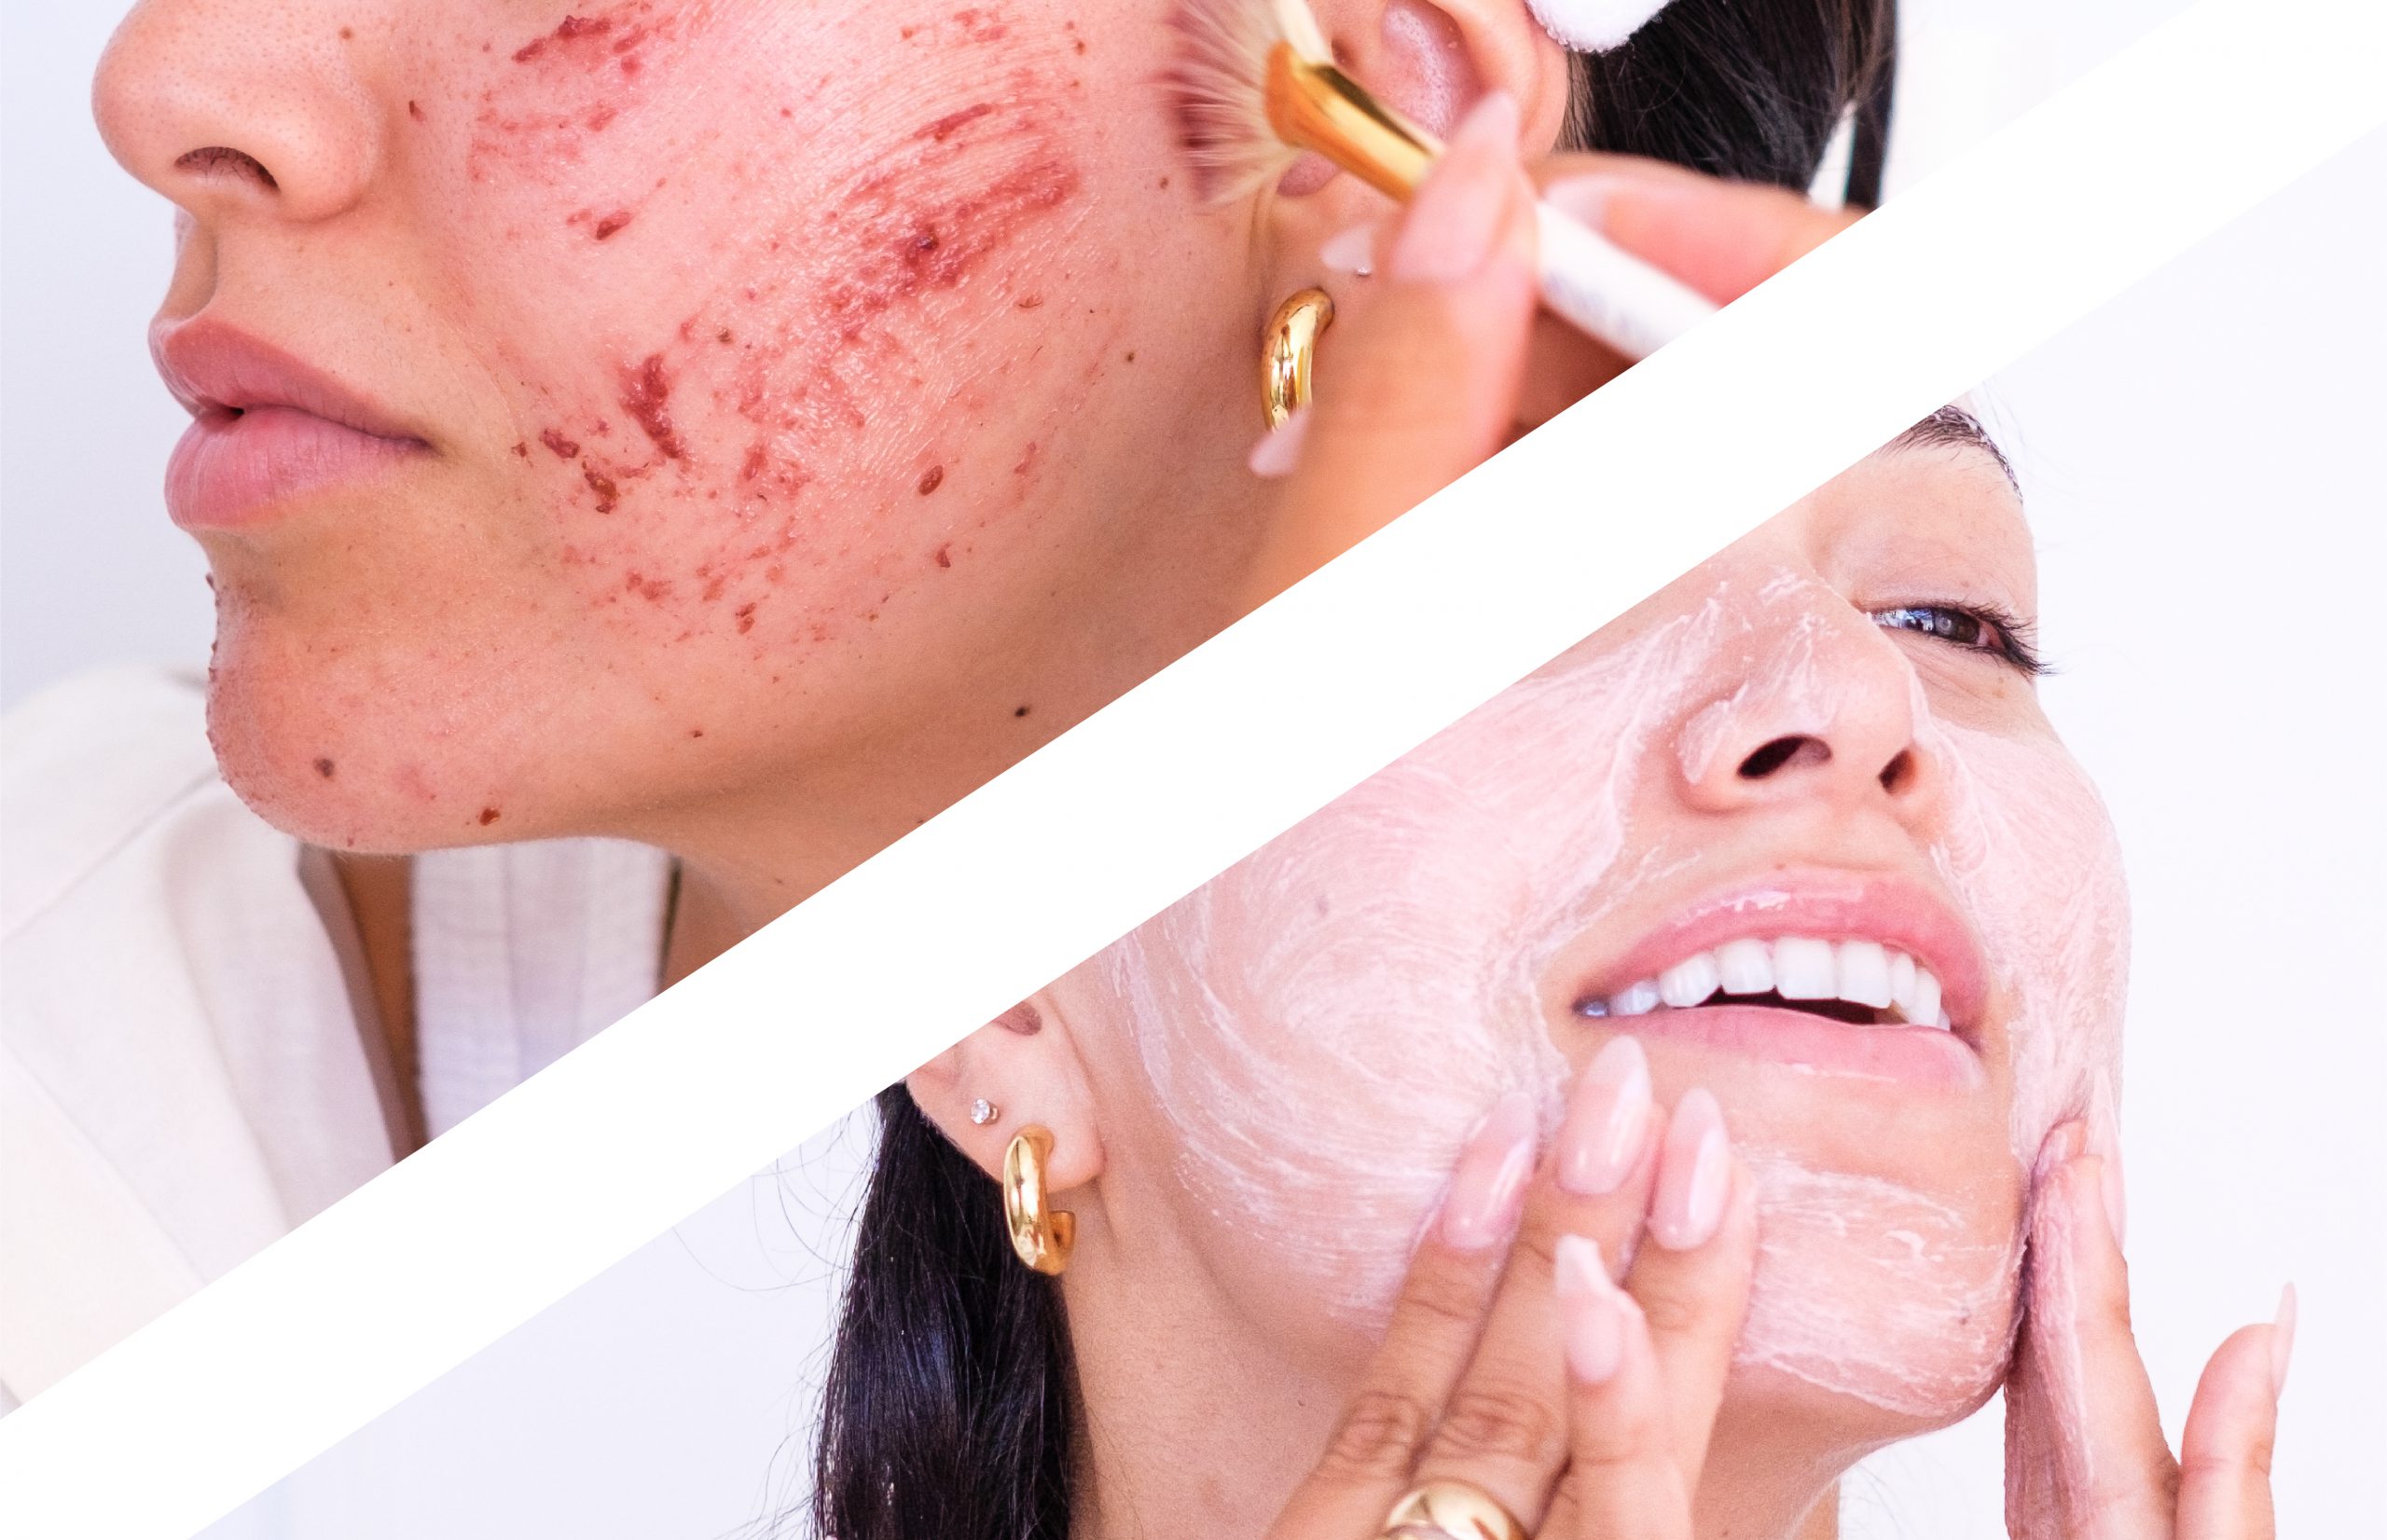
    Facial Steps At Home For Acne Prone Skin

    If problem skin is your specific concern, you may wonder if it’s still possible to give yourself a facial at home. Although you will need to take special care, an at-home facial can still be accomplished in a safe and effective way. Here is our step-by-step facial at home guide: 

    Eminence Organics Facial At Home For Acne Infographic

    Step 1 to 4: Same As Above

    Follow the same first four points in “Facial Steps At Home.” 
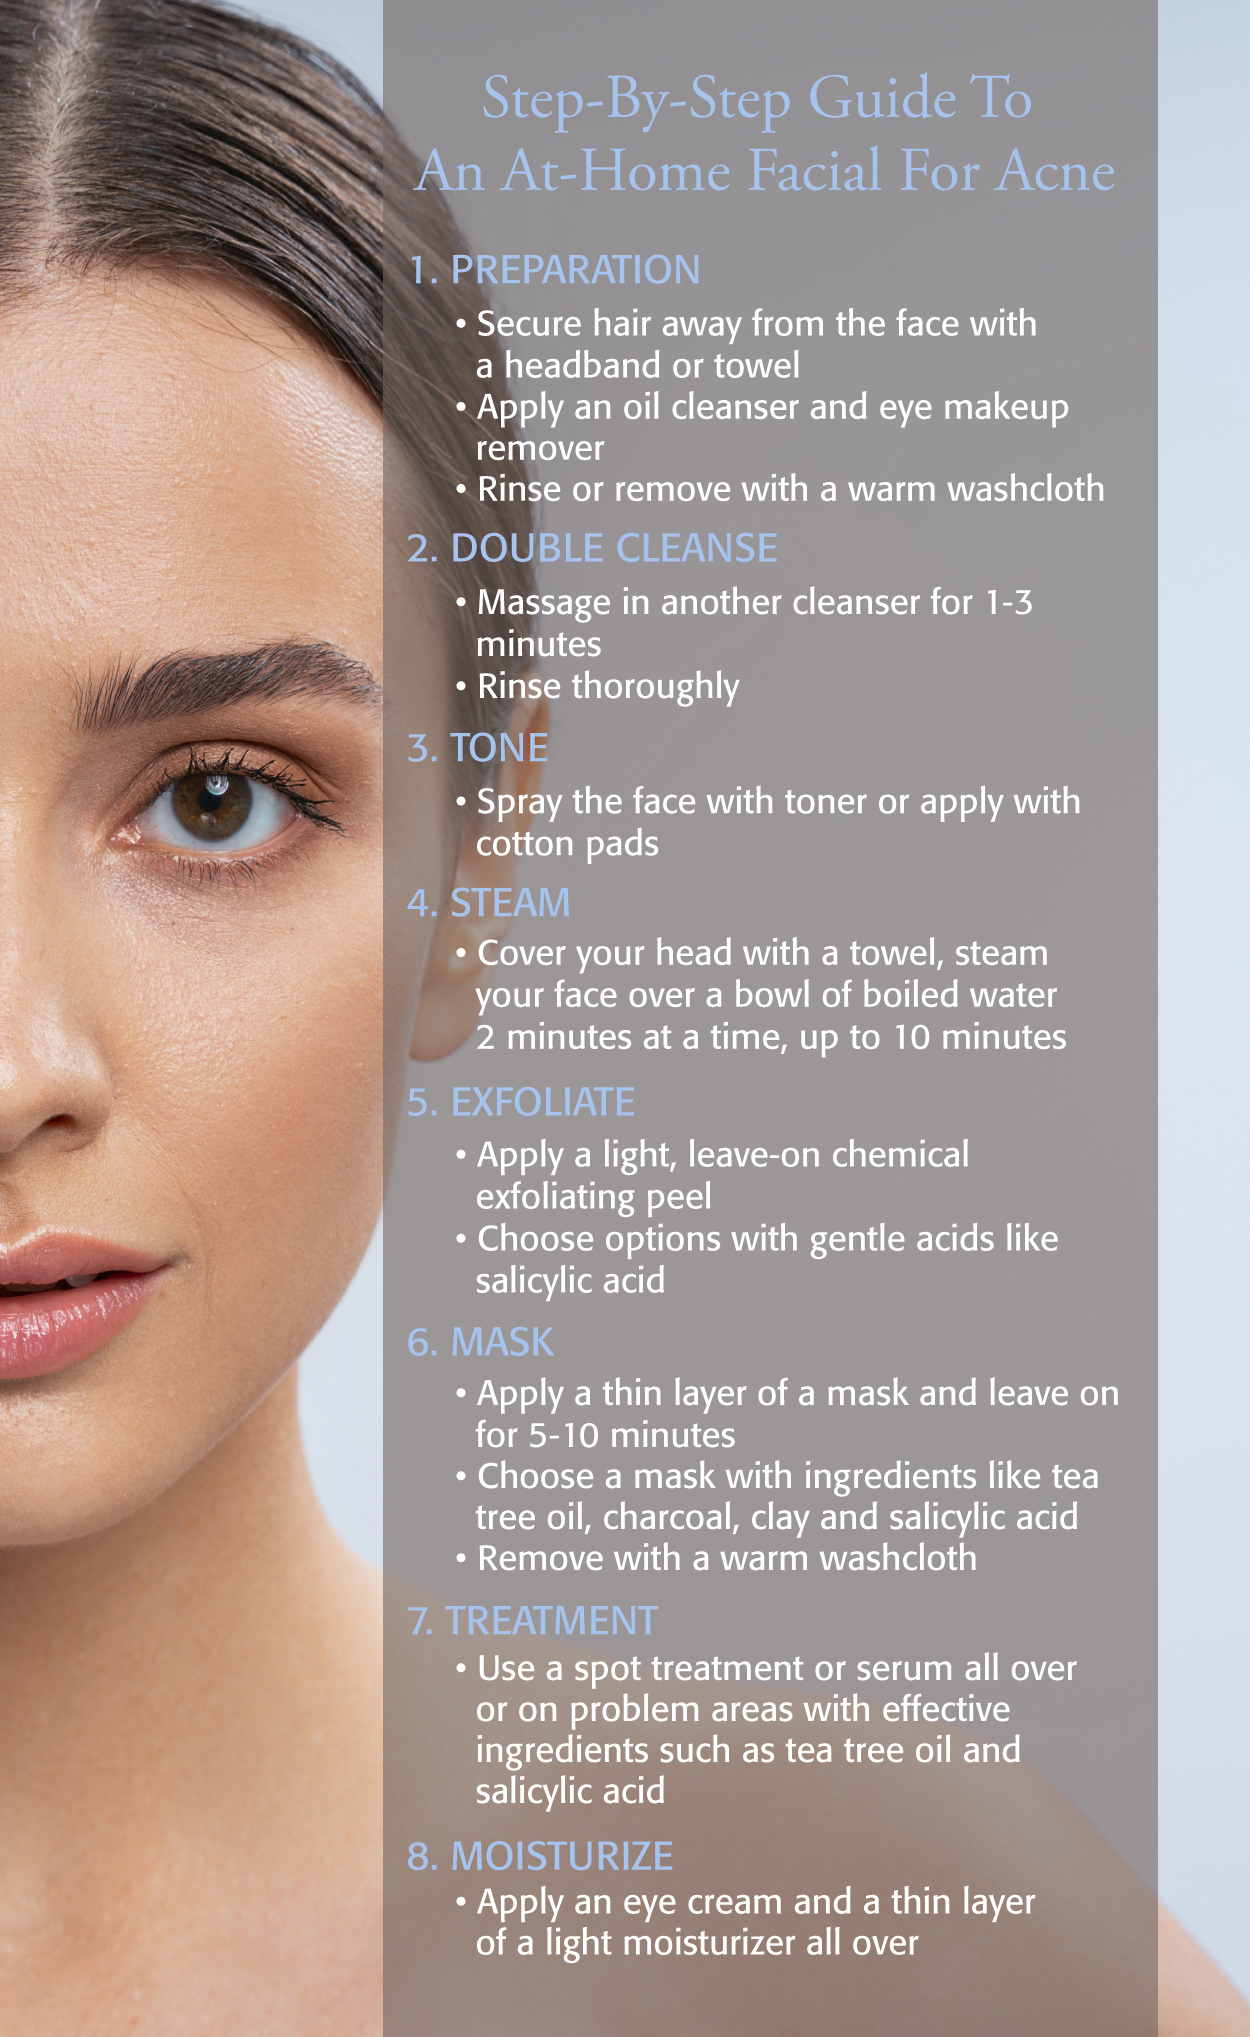
    Step 5. Exfoliation 

    If you’re experiencing active acne breakouts, you’ll want to avoid physical exfoliating scrubs in those areas. You can use a light chemical exfoliating peel that has gentle acids that exfoliate without irritation with natural ingredients like salicylic acid from willow bark.

    Step 6. Mask

    Apply a thin layer of a mask with fingertips to cleansed skin, avoiding the eye area. Dilute with water for easier application. Leave on for five to 10 minutes. Remove with a damp face cloth. Tea tree oil, absorbing charcoal, clay and salicylic acid are going to be the active ingredients to clear your pores and help with those breakouts. 

    Step 7. Serum 

    Treat your skin with a spot treatment or a serum all over that contains acne-fighting ingredients like salicylic acid or tea tree oil.  

    Step 8. Moisturize

    Don’t forget this finishing step, even if you do experience breakouts. Apply eye cream and a thin layer of a light moisturizer to the face, neck and decolletage.

    Even after completing one of these two facials, the pampering is not complete! 

    How To Do A Flash Facial At Home

    Needing to refresh your skin in 10 minutes? We don’t always have a lot of time to dedicate to skin care when we’re rushing around in the morning.

    Flash facials embrace multi-purpose products that provide visible results and benefits in a short period of time. These quick little facials make for great weekly or daily maintenance in between visits to the spa to help you maintain glowing skin and smoothness. We have two quick yet effective flash facial options for you.

    1. Stone Crop Gel Wash And Stone crop Oxygenating Fizzofoliant™

    Stone Crop Gel Wash is a gentle gel wash for all skin types to cleanse away impurities without drying out the skin. The Stone Crop Oxygenating Fizzofoliant™ is an invigorating powder exfoliant for all skin types. You can find this pairing in the Stone Crop Revitalizing Gift Set, a perfect gift just in time for the Holidays.

    Here is a flash facial application you can try at home:

    Step 1. Mix

    Mix 1:1:1 ratios of water, Stone Crop Gel Wash and the Stone Crop Oxygenating Fizzofoliant™.

    Step 2. Apply

    Apply the mixture to your skin with a fan brush for an even application.

    Step 3. Massage

    Use your fingertips to apply gentle circular movements over the face, neck and décolletage. Do this for 2-3 minutes. For oilier skin types, you may want to also leave it on for an additional 2 minutes.  

    Step 4. Remove

    Remove by rinsing thoroughly with water and patting your face dry.

    Step 5. Complete Routine

    For a complete facial, continue with additional Eminence Organics products, such as an essence, toner, serum, moisturizer and SPF. 

    2. Mangosteen Daily Resurfacing Cleanser And Strawberry Rhubarb Dermafoliant

    Our Lead Skin Care Trainer, Natalie Pergar, has unpacked the benefits of a flash facial in this In The Mix video using the Mangosteen Daily Resurfacing Cleanser and the Strawberry Rhubarb Dermafoliant.

    Step 1. Take a chickpea-size amount of the cleanser into your palm.Step 2. Pour 2-3 shakes of Dermafoliant into your palm.Step 3. Add a little water into your hands and rub them together.Step 4. Apply on the skin using micro-circle movements. Start with the forehead and move to the temple and then to the jawline, neck and chest. Step 5. Remove by rinsing thoroughly with water and patting your face dry.  

    This article was originally written in April 2020.

  • Fluide vs. Cream: What’s the Difference Between Them?

    Fluide vs. Cream: What’s the Difference Between Them?

    Sign Up Now & Receive 10% Off Your First Purchase

    About 60% of the human body is made up of water. Even more astonishing, water makes up 90% of blood plasma. Water is essential for life, but it also has a significant impact on the health of your skin. Staying hydrated helps flush toxins from the body while boosting blood flow to the skin. It helps improve skin tone, prevents premature aging, and keeps the skin from getting dry and itchy.

    Even if you stay hydrated by drinking water, however, your skin could probably use a boost of extra moisture to keep it soft and supple. This is where moisturizers come in. Moisturizers are available in different textures like creams or fluides.

    Keeping your skin hydrated is essential but choosing the right product can be a challenge. Here we’ll discuss the difference between hydration and moisturization. Understanding the difference will allow you to know whether a fluide or cream moisturizer is best for your skin.

    Hydration vs. Moisturization

    While the words hydration and moisturization are often used interchangeably in the skincare industry, there is a difference between the two. Both products help make sure the skin gets the water it needs to prevent dehydration and fight aging and environmental damage. The difference can be found in the way they go about achieving these goals.

    The term hydration refers to the water content in the cells. Water causes the cells to swell, helping the skin maintain its supple plumpness. When water leeches out of the skin cells, they become dehydrated which leads to dull skin tone. A topical hydrator, called a humectant, infuses the skin cells with water in addition to boosting its ability to absorb moisture as well as essential nutrients.

    Moisturizing, by comparison, is about trapping water in the skin. It’s about building and protecting the skin’s natural protective barrier to prevent water loss. It also helps keep your skin soft and smooth. Nourishing ingredients, called emollients, are used prevent water loss and maintain a healthy barrier.

    Which One Do You Need?

    All skin types require both hydration and moisturization, though one may take priority over the other for certain skin types.

    For example, if you have dry skin (skin that lacks oil), rebalancing both hydration and lipids is important. A good moisturizer can help prevent trans epidermal water loss. It can restore the skin’s healthy barrier and plumpness. If your skin is dehydrated (lacking water), however, focusing on humectants is more likely to be beneficial. Your skin cells need to absorb more water. As a reminder, any skin type can suffer from dehydration, while balancing lipids will vary by skin type.

    If you struggle with dull complexion or the visible signs of aging, your skin is likely battling dehydration. When the skin cells lack water, they lose volume and essentially shrivel which can exacerbate the appearance of fine lines and wrinkles in addition to affecting your complexion.

    Yon-Ka Fluide vs. Cream

    Whether you’re concerned about hydration or moisturization (or both), Yon-Ka Paris offers a wide variety of products catered to different skin types. Two of the most popular products in this category are fluides and creams.

    Yon-Ka fluides are lightweight with a thinner texture than creams. Fluides focus more on hydration, less on moisturization and adding lipids to the skin. Therefore, they are rich in humectants, less in emollients. They’re a great choice for combination skin as well as oily skin types because it’s very light and non-greasy. Yon-Ka creams are heavier than fluides, making them ideal for dry and/or mature skin. They also work well for protection against cold, dry weather. Creams address both hydration and moisturization. They are more equally focused on treating the skin with humectants and emollients.

    Check out some of Yon-Ka’s most popular fluides and creams…

    Hydra No. 1 Fluide – Ideal for oily, dehydrated skin, this lightweight moisturizer helps mattify the skin. It contains micro- and macro- hyaluronic acid to build hydration levels over time as well as silica to control excess sebum production.
    Alpha-Fluide – This renewing anti-wrinkle day emulsion is lightweight and easily absorbed into the skin to smooth, hydrate, and protect. It is supplemented with vitamin E and rice bran oil to protect against environmental damage as well as AHAs for renewing.
    Nude Perfect Fluide – If you struggle with the clarity of your skin, this blur cream is just what you need. It features an ultra-lightweight formula that instantly smooths the appearance of pores, skin imperfections, fine lines, and wrinkles to promote perfect looking skin.
    Advanced Optimizer Crème – This firming, anti-aging cream lifts and tightens the skin while delivering a strengthening effect to protect against the progression of skin damage related to aging. Milk proteins and shea butter deliver intense nourishment for long-lasting suppleness.
    Hydra No. 1 Crème – This intense moisturizing cream is enriched with two forms of hyaluronic acid to prevent water loss in dry, dehydrated skin. It contains soothing shea butter and hazelnut oil to combat dryness and restore the skin’s’ natural youthful radiance.
    Excellence Code Crème – A multi-functional cream for mature, hormonally fatigued skin that needs revitalization. It contains three proprietary, botanical complexes to fortify the moisture barrier, effectively firm and smooth skin, and enhance overall radiance.

    No matter your skin type, Yon-Ka Paris offers a wide range of moisturizers including fluides and creams.

    As you start shopping, keep in mind that fluides and serums are not the same thing. Though packaged similarly in pumps, serums are even thinner than fluides which enables them to penetrate the skin to deliver the benefits of specific active ingredients. Serums are meant to be applied underneath your favorite Yon-Ka moisturizer.

    Yon-Ka Paris

    The promise of infinite rejuvenation | Celebrating its 65th anniversary, Yon-Ka Paris offers French-made, luxurious, plant cell active-based skincare regimens. Quintessence, Yon-Ka’s essential oil Complex, delivers the very unique olfactive and therapeutic experience that discerning consumers and passionate professionals have been raving about since 1954. Thanks to its research and expertise in phyto-aromatic therapy, Yon-Ka Paris develops sensorial skincare products and protocols with scientifically proven efficacy. Today, Yon-Ka Paris collaborates with licensed Beauty and Wellness professionals in 5000+ locations Worldwide to deliver the perfect alchemy of age-defying results and pure wellness.

  • Fade Dark Spots and Hyperpigmentation Faster With This 2-Step Method

    Fade Dark Spots and Hyperpigmentation Faster With This 2-Step Method

    Storytime: My late husband, Florian, used to have a big brown spot on the side of his face. It was likely from sun damage, and as a practicing esthetician, I had a bit of a personal vendetta against this brown spot. We would be sitting on the couch at night, watching TV, and he would allow me to dab on either exfoliating acids, a vitamin C serum, or a prescription brightening cream with hydroquinone. While these certainly helped, the most significant difference I ever saw in that brown spot was always right after he shaved his face with a razor. The simple act of gliding a razor over the face would literally lighten it up about 30% instantly! The brown spot looked so much lighter, and of course, this esthetician was happy! (And for a guy who didn’t care too much about his skin, he was impressed, too.)

    In my 30+ years as an esthetician, this was just one of many examples that proved how important physical exfoliation is when it comes to fading hyperpigmentation. In this post, I’ll explain the two-step exfoliation process, why it works, and how you can use it to fade stubborn dark spots on your face.

    What Is the 2-Step Exfoliation Method?

    The two steps are simple; the first is chemical exfoliation (like exfoliating acids), and the second is physical exfoliation (like facial scrubs). 

    Many people overlook physical exfoliants because they have a bad rap, but I firmly believe in the benefits of a facial scrub! And using both chemical and physical exfoliants in tandem is critical if you want to fade hyperpigmentation on your face. 

    While acids and scrubs both exfoliate the skin, they do so using different mechanisms. Acids lower the skin’s pH to dissolve the keratin or “glue” keeping dry, dead, and discolored cells stuck to the skin’s surface. Physical scrubs, on the other hand, actually lift those loosened cells away to reveal the bright, new cells underneath. By using both, you’ll get a more complete exfoliation. 

    This two-step exfoliation method is so good for fading the look of hyperpigmentation (whether from sun damage, hormones, or post-breakouts marks) that I often use it in my professional facials as well. Every single one of my facials starts with a chemical peel to loosen and dissolve dead skin cells, but to truly remove those cells, I follow up with a physical exfoliant. 

    How to Fade Dark Spots and Hyperpigmentation at Home

    Before incorporating the two-step exfoliation method at home, you’ll need to decide which products to use. For your chemical exfoliant, I recommend using either a chemical peel or exfoliating acid serum for your skin type. For your physical exfoliant, the key is finding a well-formulated facial scrub that will be gentle on the skin. Look for one with perfectly round, biodegradable beads—not the abrasive seed and shell granules that are so often used. 

    Because I’ve seen such great results from the two-step exfoliation method in professional facials, I created products to mimic these results at home. Our best-selling Triple Berry Smoothing Peel is a chemical peel that gives professional results at home and works for all skin types. I also just launched the Triple Berry Smoothing Scrub as a companion product. It’s a gentle, antioxidant-rich scrub that brightens and smoothes the skin with every use. 

    How to Use Triple Berry Peel and Scrub Together

    Before using the peel and the scrub together, use each one individually to make sure both products agree with your skin. New products should always be introduced one at a time, This way if you happen to have a reaction, you can pinpoint the cause. 

    Start by introducing the peel. Then, wait 2-3 days before trying the scrub. If all goes well, you can use them together! 

    Here’s how. Apply the peel and leave it on for 5-10 minutes, as desired. Rinse it off with cool water. Then, on slightly damp skin, apply a nickel-sized amount of the scrub. Gently massage it over your skin in circular motions, focusing on areas of pigmentation. After rinsing off the scrub, you can make it an at-home facial by using a hydrating mask, or you can just proceed with your regular skincare routine.  

    If you have sensitive skin, you can split these steps up by using the scrub the day after doing the peel.

    Other Ways to Incorporate 2-Step Exfoliation Into Your Routine

    While using the peel and scrub at the same time is a great way to jump-start a brighter, more even-toned complexion, it shouldn’t be done more than once a week. That said, you can still practice the 2-step exfoliation method in other parts of your routine to fade dark spots.

    I recommend most people exfoliate 2-4 nights a week depending on their skin’s needs—those more prone to clogged pores and breakouts typically need more frequent exfoliation. On exfoliation nights, you’ll want to use your exfoliating acid serum. However, to ensure you’re properly removing the dead cells that are being loosened by your serum, substitute in a facial scrub on one of these nights for physical exfoliation. If you have oily skin that’s prone to clogged pores (like Skin Type 1 or Skin Type 3), you can sneak in an extra physical exfoliation by using a scrub as one of your morning cleanses. 

    There you have it—a two-step exfoliation method that does wonders for stubborn hyperpigmentation! Trust me, I’ve seen the results with my own eyes, and they speak for themselves. If you have hyperpigmentation from sun damage, past breakouts, or conditions like melasma, using both chemical and physical exfoliants is your best bet!

    Up next, here’s everything you need to know about using exfoliating acids.

Padişahbet Giriş
Padişahbet Güncel Giriş
Crypto Casino
new online casino
Padişahbet