Author: admin

  • How To Stop Dieting – Nutrition Stripped®

    How To Stop Dieting – Nutrition Stripped®

    Are you constantly yo-yo dieting? Where you’re always trying the newest diet or trend? Keep reading to learn how to stop dieting for good.

    It’s so easy to get caught up in the diet cycle. They’re satisfying because they allow for little to no ambiguity, and they’re addicting because they give you quick, fast results. But unfortunately, the results never last. As soon as you reach the last day of your diet, you go, “back to normal”, and find yourself right back at square one. 

    This constant cycle can be exceptionally frustrating and feel never-ending. But thankfully, it can be stopped. 

    How to Stop Dieting 

    To learn how to stop dieting, you need to learn sustainable, maintainable habits pertaining to food. You need to ditch the short-term, diet mindset and learn how to find balance. Keep reading to learn how you can get started. 

    5 Steps to Take to Stop Dieting for Good

    Take these 5 steps to stop dieting and build a balanced relationship with food. Each step will teach you how to reshape your relationship with food so you no longer need to rely on diets or detoxes. Instead, you’ll have the confidence you need to trust your own eating habits and learn how to stop dieting for good. 

    Prioritize Both Nourishment and Enjoyment Consistently

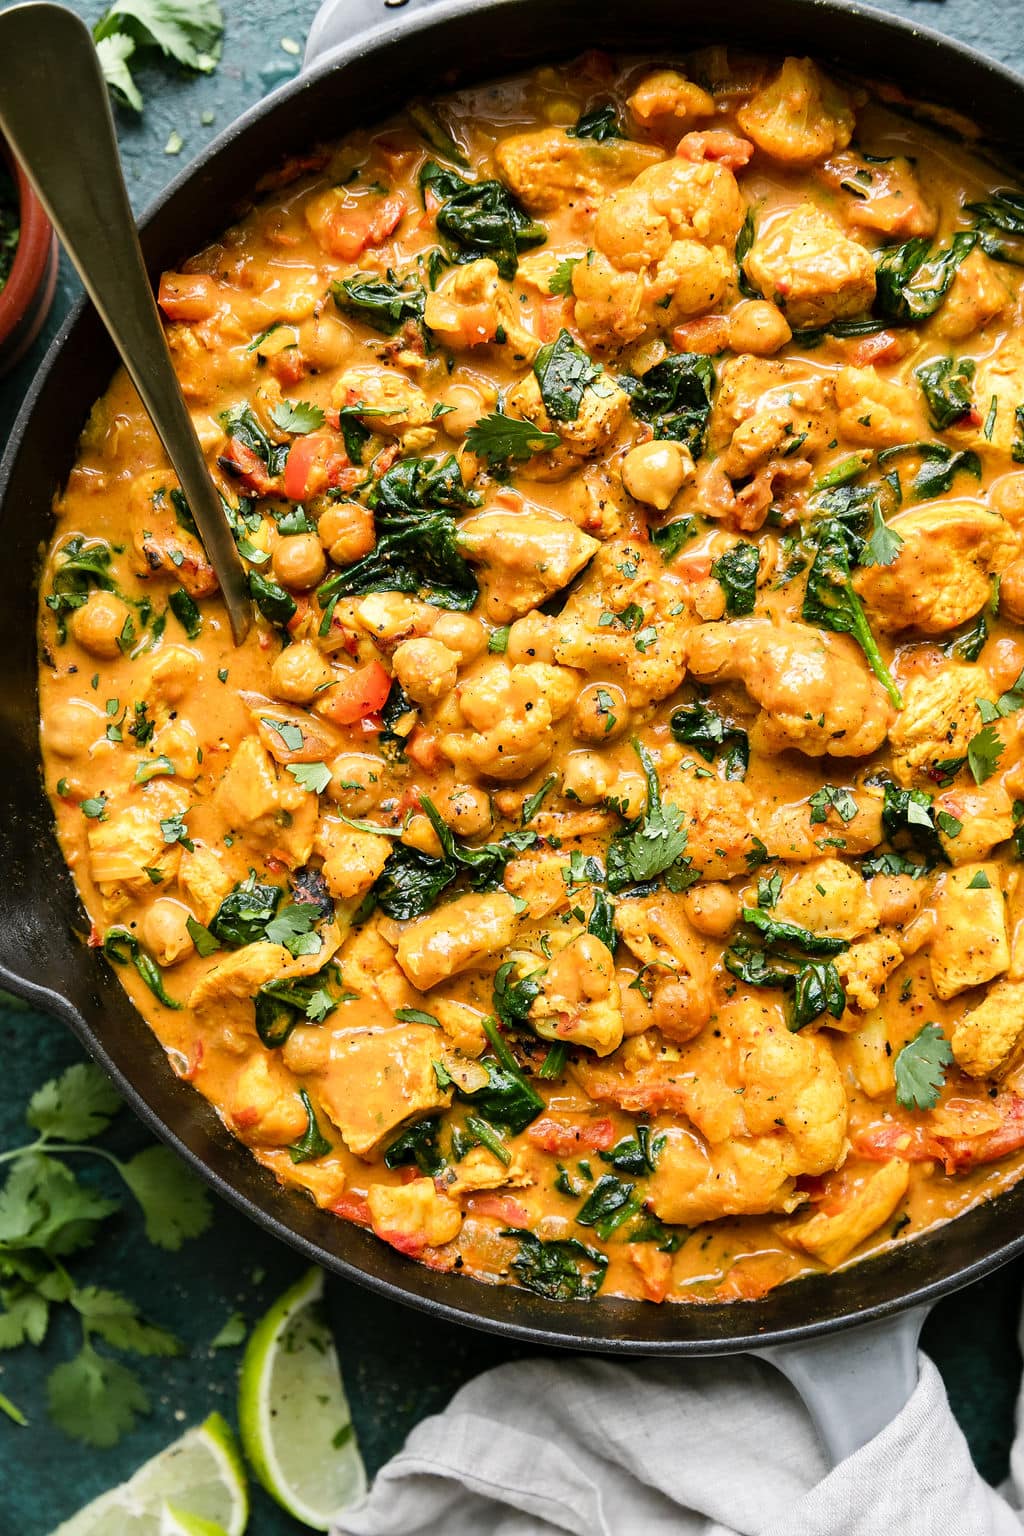
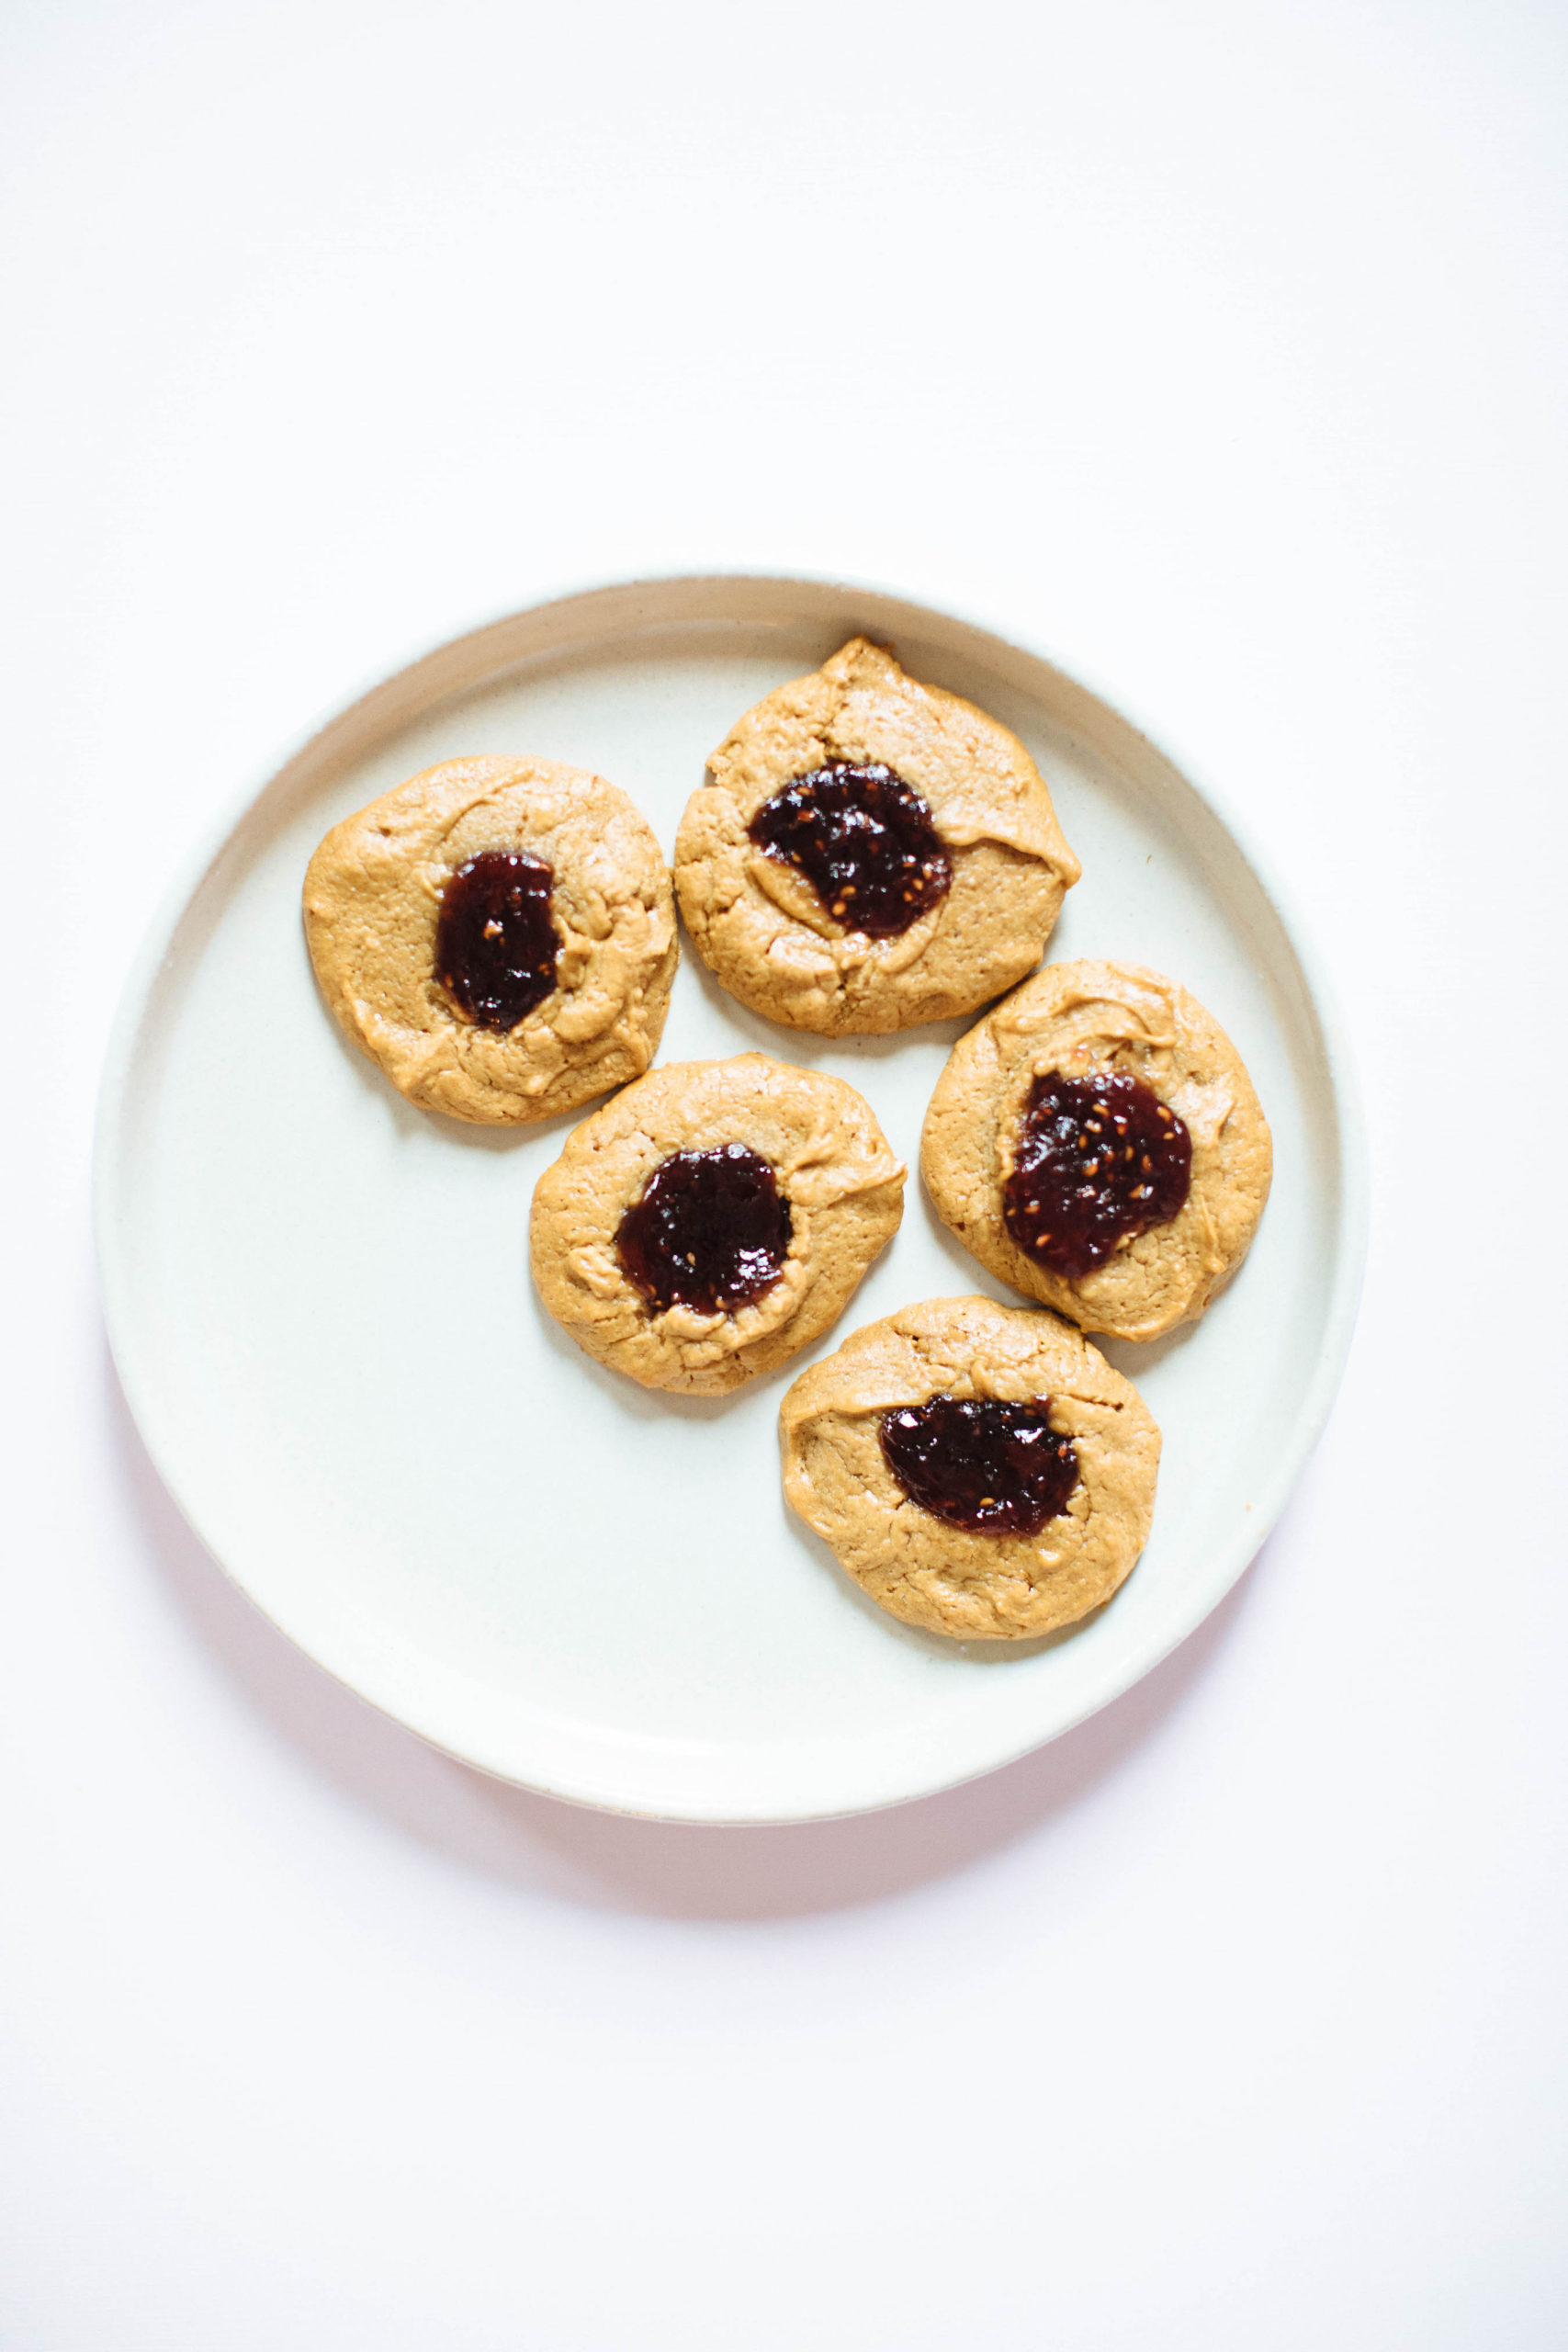
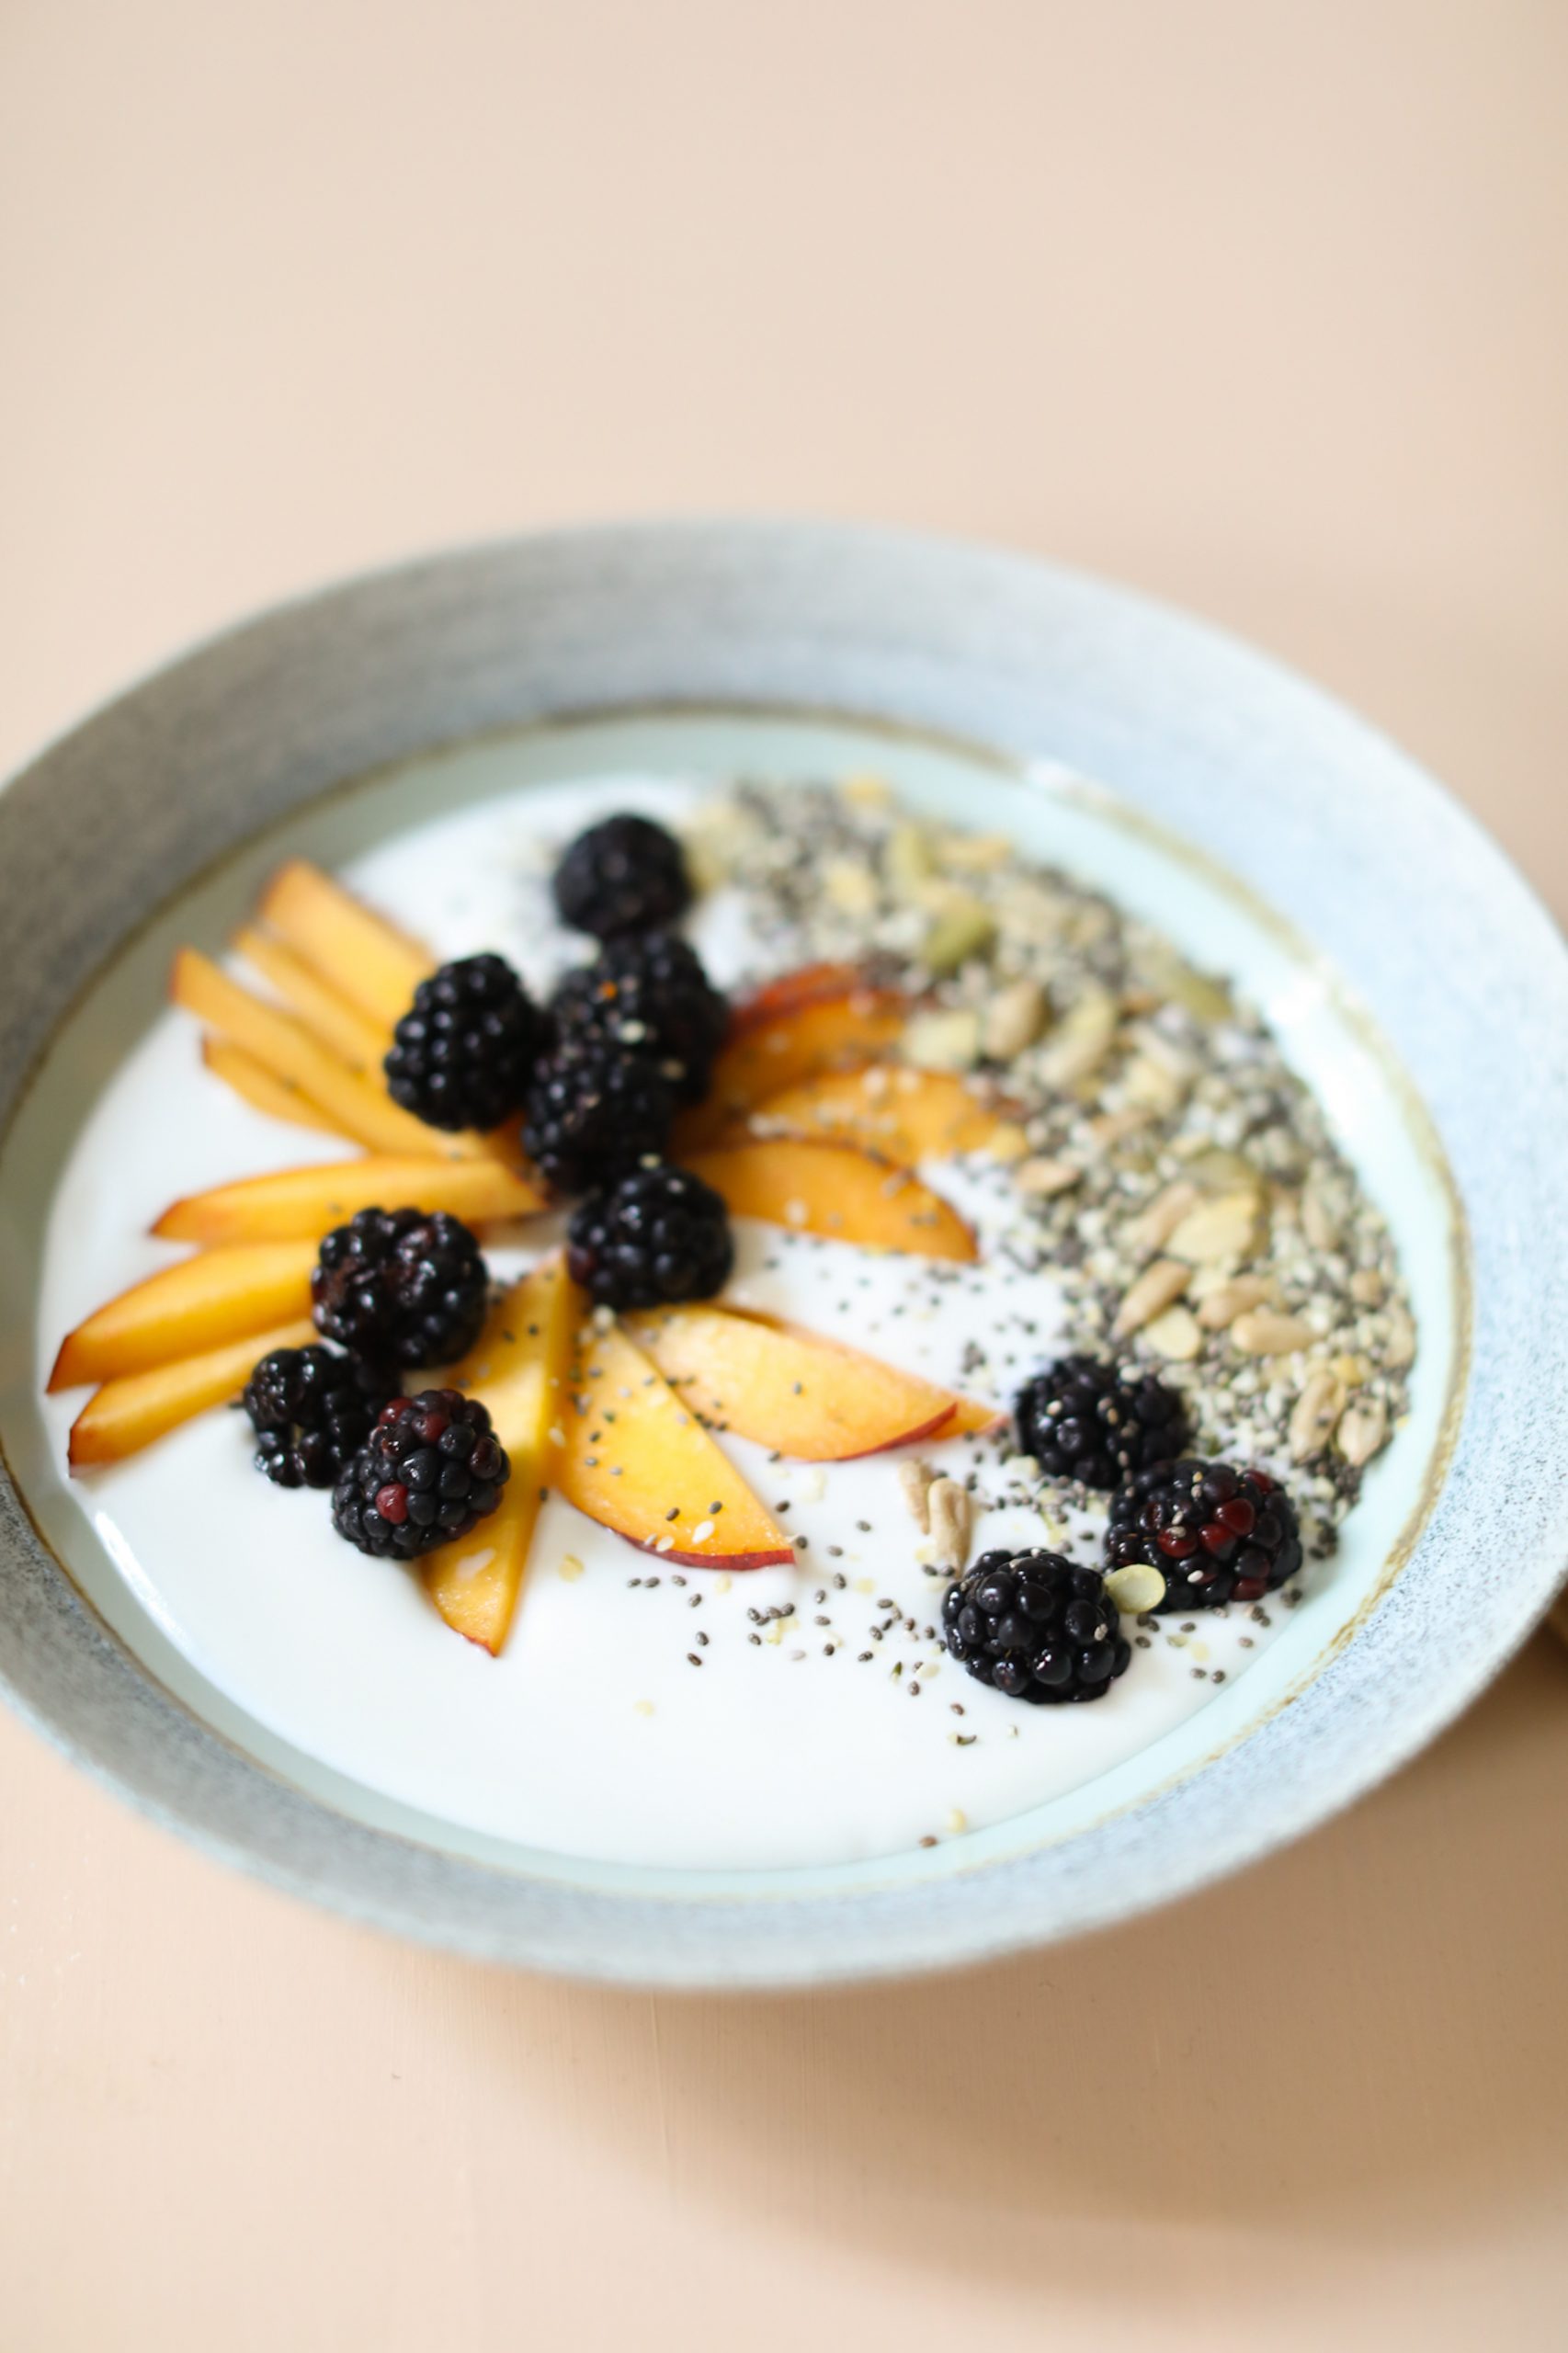
    We need a combination of both nourishment and enjoyment in order to sustain and maintain balanced eating habits. When one is prioritized and the other is restricted, we’re left feeling imbalanced and uneasy. Diets rely on an exaggeration of nutrition information. They take one variable in the equation and zoom in, making it appear to be the only variable of importance. 

    For example, they may overaccentuate nourishment and completely demonize enjoyment. Will you see results quickly? Absolutely. But will you feel mentally at peace, be able to enjoy all parts of your life, and feel free around food? Absolutely not. 

    The same goes for the opposite end of the spectrum. If you decide to ditch diets and begin prioritizing enjoyment over nourishment, the same sentiments will return. You’ll wonder how you ended up so far away from your health and wellness goals, and crave nourishment. This leads to the start-and-stop cycle that diets want you to be in. 

    Instead, prioritize both from the start. Incorporate enjoyment in your nourishment, and vice versa. Do so in a way that feels right and natural to you, rather than forced and restrictive. Finding balance is one of the best ways to learn how to stop dieting.  

    Ditch the Food Rules 

    Food rules and diets go hand in hand. One cannot survive without the other. As soon as you learn to identify and negate food rules, you’re one step closer to leaving the diet cycle behind. Food rules are definitive, exaggerated statements regarding food items. Such as, “I can never eat starchy carbohydrates at night.”, or, “I’m not allowed to have any chocolate in the house.”.

    These rules are almost always created with good intentions. They’re geared towards improving habits and leading a healthy lifestyle. But the problem is that they’re restrictive in nature. And they’re usually restricting things you inherently enjoy, want, or need. 

    Rules like these are always broken, and they can result in an, “off the bandwagon”, type of feeling. Which as we’ve learned, propels us to try again and start the diet back up on Monday. From now on, remove the rules from food, and you’ll start to feel at ease with balance so you no longer feel compelled to diet. 

    Stop Thinking about Food as Good or Bad 

    In the diet realm, food that is nourishing is considered to be good, whereas food that is enjoyment-based is considered to be bad. In reality, this isn’t the case. Food is simply food. It’s either a source of nourishment, a source of enjoyment, or a combination of both. But this type of balance pulls you away from dieting, which diets don’t want you to do. 

    Diets want you to view things through a black-and-white lens. They want you to feel guilty when you don’t do what they tell you to do. This is what keeps you coming back again and again! If you can learn to remove the morality from food, and therefore remove the guilt cycle, you can learn how to stop dieting. 

    Listen to your Hunger and Satiety Cues Consistently 

    Consistency is the key to this tip. Your hunger and satiety cues should be the primary tool you use to determine how much you eat and when you eat. Diets, on the other hand, will tell you that there’s a specific, strict schedule you should be following.

    Whenever you try to abide by one of these schedules, it eventually stops working. Maybe life gets in the way and you can’t make it work, or maybe you simply can’t deny yourself food anylonger. Whatever the cause, you’re then left confused and wondering how much and when you’re supposed to eat.

    Instead of following a schedule, tap into your personal cues. What does hunger feel like to you? What about satiety? When do you feel it? How often do you feel it? The more you get to know your cues and start to abide by them, the closer you are to learning how to stop dieting. 

    Stop Following Fad Diets and Trends

    The newest diet or trend will always sound enticing. It will sound like it’s going to completely change your life and solve all of your problems. It’s marketing! It’s supposed to sound like that! 

    If you continue to jump ship and hop on the latest fad diet every time a new one comes out, you’ll never be able to ditch the diet cycle. Instead of continuing on this trajectory, start to become confident in your own capabilities. Lean into evidence-based nutrition, mindful eating, and a balanced relationship with food so you can nourish your body with ease. Once you have this confidence, you’ll never feel compelled to try another diet again. 

    The Takeaway

    Diets are created to keep you coming back and wanting more. They give you a taste of the end result you’re looking for, but then take it away just as quickly. If you follow these 5 steps we’ve just reviewed together, you’ll have the knowledge and confidence to stay away from diets for good. 

    Do You Want to Experience More Balance with your Food Choices?

    Then find your balanced eating type!

    Take this 45-second free quiz to find out which balanced eating archetype you are, and what your unique type needs to maintain balance with the way you nourish yourself. That way, you can finally be free from food and diet obsession, maintain a balanced weight, and cultivate a positive relationship with food and your body. 

    Take The Free Quiz Now

  • Valentine’s Day Beauty Gifts 2023: Pat McGrath Labs, ColourPop & More

    Valentine’s Day Beauty Gifts 2023: Pat McGrath Labs, ColourPop & More

    I may be single but I have a list of things I want for Valentine’s Day. We deserve gifts too, right? I have my eyes on Adore Me’s new lingerie collection, Rellery’s heart necklaces and Lego flowers (so cool!), to start. Valentine’s Day beauty gifts are also a must-have, especially when they come in the cutest heart-shaped packaging. This year, there are more and more V-day collections from our favorite brands and even some exclusive colors.

    These are the kinds of gifts you can buy yourself, your friends as a little Galentine’s Day moment, your sibling — really, anyone in your life. Wrap it in a pink scarf and pop a ribbon on it and you have a pretty affordable gift. Of course, you don’t have to give these gifts to anyone but yourself. I’ll be shopping and watching rom-coms on Netflix. Join me and grab some of these cute new products, below.

    colourpop heart blush

    ColourPop.

    ColourPop Pressed Powder Blush

    In the last few years, ColourPop has rolled out these heart-shaped blushes and they sell out right away. Grab your fave shade now and it’ll make you smile months from now.

    replica fragrance

    Maison Margiela.

    Maison Margiela ‘REPLICA’ On A Date

    This new floral fragrance is literally called On a Date so it’s perfect for the romantic holiday. It has notes of black currant liquor accord, Isparta rose petal and patchouli so it’s a light — not overpowering — scent.

    refa brush

    ReFa.

    ReFa Heart Brush (Rose Gold)

    Upgrade your brush to this adorable heart-shaped one that promises to detangle and adds sheen for low stress brushing.

    pat mcgrath labs

    Pat McGrath Labs.

    Pat McGrath Labs Love Collection MTHRSHP Eye Shadow Palette

    Dame Pat McGrath’s limited-edition Valentine’s Day collection is not to be missed, including this palette you’ll wear all year long.


     Give Yourself These Valentines Day Beauty Gifts — You Deserve It

    AppleDoll.

    AppleDoll True Love Blush

    This creamy blush’s heart shape is just for fun — it’ll look great on your no matter the occasion.

    chanel fragrance

    Chanel.

    Chanel Chance Eau Tendre 3.4 fl. oz. Eau de Toilette Twist and Spray Set

    What’s more iconic than Chanel’s floral-fruity fragrance? This set gets you a full size and a chic travel spray.


    kaja

    Kaja.

    Kaja Jelly Charm Glazed Lip Stain & Blush With Keychain

    If you don’t want to spend a lot but want to make a big impact, how about this adorable lip and blush stain with attached charms?

    Ilia natura

    Natura.

    Natura Ilía Eau De Parfum

    With top notes of red fruits, pink pomelo, orange blossom and bergamot, this floral fragrance has a subtle fruity vibe. Its heart notes are white flowers, Muguet, jasmine, gardenia, freesia and rose, with base notes of vanilla, Tonka fava, amber and musk.


    sunday riley pink drink firming resurfacing essence Give Yourself These Valentines Day Beauty Gifts — You Deserve It

    Sunday Riley.

    Sunday Riley Pink Drink Firming Resurfacing Essence

    This peptide-infused essence works to firms and resurface skin, while fermented honey and botanical extracts balance the skin’s natural microbiome. Plus, it’s a pretty pink color.


    VALDÉ

    VALDÉ.

    Valdé Armor + Refillable Lip Set

    Valdé’s Vessel (which holds the refillable lipstick, balm and liquid formulas) is basically a piece of art and you’ll have it forever. This set lets you choose your lippie, plus comes with engraving.

    Lush bath bomb

    Lush.

    Lush Black Rose Bath Bomb

    Give the Wednesday Addams in your life a darker take on the holiday with this black bath bomb that features scents of rose and lemon oils.

    COLOUR INFUSION LIPSTICK

    ISAMAYA.

    Isamaya Lips Colour Infusion Lipstick

    Yes, this is a $95 penis-shaped lipstick but it will definitely be your most unique beauty product. The collection is the creation of cult-fave makeup artist Isamaya Ffrench.


    StyleCaster Shopping Newsletter Sign Up

  • Mushrooms: The Best Adaptogen Ingredient For Skin Care

    Mushrooms: The Best Adaptogen Ingredient For Skin Care

    Say hello to the “it” ingredient for health, wellness and beauty: mushrooms. These adaptogenic ingredients have been used in Chinese and Ayurvedic medicine for thousands of years and are making the rounds as skin care superstars. Celebrated for their ability to improve overall skin health and youthfulness, it’s no wonder they’re topping every beauty guru’s list. Read on to discover why mushrooms are about to become your favorite skin care ingredient. 

    What Is An Adaptogen? | Mushroom Benefits For Skin | How To Add Mushrooms To Your Skin Care

    What Is An Adaptogen?

    To appreciate the beauty benefits of mushrooms, you must first have a handle on the function of adaptogens. In short, an adaptogen is a mushroom, plant, herb or root that helps the body adapt (hence, the name) to changes in its emotional and physical state. N.V. Lazarev, a Soviet pharmacologist, first coined the term in 1947 when he noticed how these herbs and botanical extracts could regulate and normalize the body’s physiological response to stress. Adaptogens are key to helping us cope with stress and bringing balance to the body and skin.

    Mushroom Benefits For Skin

    Stress plays a significant role in skin health: It increases inflammation, contributes to premature aging and can trigger hormonal imbalance. Stressors include environmental pollution, sun damage and our fast-paced lifestyles, which can all wreak havoc on our skin and health. Signs of stress in our skin appear in the form of dry patches, wrinkles and fine lines or dullness.

    As adaptogens, mushrooms help mitigate your skin’s response to stress; they identify where your body is imbalanced and coax it back to baseline. In skin care, they also assist in distributing active ingredients to where they’re needed most, helping your skin stay strong, hydrated and healthy. Here is a closer look at two of our favorite fungi: snow mushroom and reishi mushroom.

    Snow Mushroom

    Snow mushroom (or tremella fuciformis) is a tropical mushroom that is often found growing on hardwood logs after heavy rainfall. This gelatinous ’shroom has been used for thousands of years for its ability to provide deep and long-lasting hydration. In fact, Tang dynasty concubine Yang Guifei, one of China’s four great beauties, credited the snow mushroom with maintaining her flawless porcelain complexion.

    Infographic: Snow Mushroom Skin Care Benefits

    Deeply HydratesToday, snow mushroom is used in skin care for its impressive hydrating properties. Known as a “super-humectant,” it functions similarly to hyaluronic acid, the gold standard in skin hydration. Snow mushroom’s gelatinous structure, combined with its high levels of polysaccharides, helps this ingredient draw moisture deep into the skin. While this mushroom holds 500 times its weight in water (compared to hyaluronic acid’s 1000), its small particles can penetrate the skin more easily, providing more potent hydration. 

    Here’s a closer look at snow mushroom’s amazing hydrating qualities:

    Enhances Skin Strength And ElasticityIn addition to attracting moisture, snow mushroom excels at keeping it in place. Eminence Organics International Educator Brian Goodwin likens it to creating a rain cloud in your skin: It forms a naturally flexible film that traps in water and prevents it from escaping. This restores dry skin to its optimally hydrated state, enabling it to better carry out key functions that keep it strong, supple and elastic.

    Aids In Natural Collagen ProductionSnow mushroom also aids in the natural production of collagen, a structural protein that gives skin density and volume. Its antioxidant properties defend the skin against environmental stressors, which helps to reduce the visible signs of aging. As a result, the skin remains looking plump and wrinkle-free for longer.

    Reishi Mushroom

    Reishi mushroom is perhaps the best-known adaptogen. This fan-shaped mushroom is incredibly rare and was once reserved for use by emperors and empresses. Known as the “mushroom of immortality,” it has been used in Chinese medicine for thousands of years for its purported effects on longevity. The reishi mushroom has a bitter, woody taste and was traditionally steeped in tea or served as an extract. Today, it is harvested on tree stumps over several months before being included in health supplements, tea and coffee blends and now, skin care. 

    Reishi’s superpowers come from its more than 400 bio-active compounds that boost overall health and immunity. Rachel Gargiulo, a certified nutrition consultant, tells Well+Good: “Reishi mushrooms are great for stimulating the immune system and liver function, producing an anti-inflammatory effect on the body.” In skin care, the “king of mushrooms” is used for its regenerative, antioxidant and anti-inflammatory properties.

    Infographic: Reishi Mushroom Skin Care Benefits

    Boosts Skin Cell TurnoverEfficient skin cell turnover is one of the precursors to a healthy and youthful complexion. Through this process, dead skin cells are shed and young, healthy cells rise to the skin’s surface. However, skin cell turnover slows with age: By 50, it can take as long as 45-90 days for your skin to fully turnover, causing it to become drier, thinner and more pigmented. Enter, reishi mushroom. With its regenerative properties, this fungus boosts skin cell turnover rate, improving the skin’s overall texture and brightness.

    An Antioxidant And Anti-InflammatoryThis mushroom is also a powerful antioxidant and anti-inflammatory. Environmental stress from pollution, blue light and UV rays exposes the skin to free radicals which damage its structural proteins, trigger inflammation and cause it to age prematurely. With its adaptogenic properties, reishi mushroom regulates levels of the stress hormone cortisol and minimizes inflammation. Its antioxidant capacity helps shield the skin from the drying and aging effects of free radical damage, keeping the complexion young and healthy-looking for longer.

    Supports Skin’s Moisture BarrierReishi mushroom contains a high concentration of polysaccharides, beneficial sugars that are responsible for the skin’s natural ability to hydrate and retain water. By maintaining healthy hydration levels, this fungus supports the skin’s protective lipid barrier. A strong barrier is necessary for the skin to keep in essential moisture (making it soft and supple) and keep out potential irritants (which trigger inflammation and premature aging).

    How To Add Mushrooms To Your Skin Care

    Ready to add mushrooms to your skin care routine? You can experience the restorative powers of snow mushroom and reishi mushroom with our Pure Forest Collection. This luxe collection harnesses the power of potent ingredients sourced from nature to restore your skin’s glow and improve its overall appearance.


    Birtch Water Purifying Essence

    The Birch Water Purifying Essence is a lightweight essence that replenishes moisture, restores elasticity and minimizes redness due to dryness. Purifying birch water leaves the skin looking toned, while snow mushroom and reishi mushroom deeply hydrate for a supple and plump complexion. Together, these results-oriented ingredients improve barrier function, allowing your skin to better absorb and retain the benefits of the subsequent products. 

    Eminence Organics Birch Water Purifying Essence

    To use, dispense a small amount of essence in your hands or on a cotton pad. Pat onto cleansed and toned skin. Leave on and follow with your favorite serum, oil or concentrate. 

    Snow Mushroom & Reishi Masque

    The Snow Mushroom & Reishi Masque tightens and de-puffs the look of the skin to reveal a smooth, radiant-looking complexion. Snow mushroom and reishi mushroom deliver intense hydration and minimize the look of puffiness and improve the look of hydration. Paracress extract tightens and firms the look of the skin for a youthful-looking appearance, particularly along the jaw and neck.  

    Eminence Organics Snow Mushroom & Reishi Masque

    To use, mix a small amount of product in your hand with a few drops of water and apply evenly over the entire face and neck. Allow to dry for five to 10 minutes then rinse thoroughly with lukewarm water. Use one to two times per week for tighter and smoother-looking skin.

    Snow Mushroom Moisture Cloud Eye Cream

    Dubbed “moisture cloud” for its unique, fluffy texture, the Snow Mushroom Moisture Cloud Eye Cream deeply hydrates and revitalizes the eye area. Snow mushroom and reishi mushroom plump, hydrate and de-puff while botanical peptides from quinoa seed smooth roughness and minimize the look of undereye bags and puffiness. The result: A bright and youthful-looking eye area. To use, apply to the entire eye area twice daily, patting gently with fingertips until fully absorbed. Leave on.

    Eminence Organics Snow Mushroom Moisture Cloud Eye Cream

    Experience the luxurious products in The Pure Forest Collection at your favorite Eminence Organics Spa Partner. 

    This article was originally written in September 2019.

  • Should You Get Laser Hair Removal? Estheticians Weigh In

    Should You Get Laser Hair Removal? Estheticians Weigh In

    For those who choose to remove their body hair, it can sometimes seem like there’s no such thing as a perfect option. Shaving can lead to bumpy, irritated skin (razor burn, anyone?), not to mention it’s time-consuming. Waxing is more efficient, but requires a certain amount of hair re-growth and, for some people, can lead to pesky ingrown hairs that leave discoloration behind.

    For those who struggle with both these options, laser hair removal can offer a solution. While it’s not without its own drawbacks, it can eliminate many of the issues associated with traditional hair removal and give people the results they’re looking for. In this post, I’ll answer all your pressing questions about laser hair removal with the help of Madalaina Conti, a New York-based, licensed esthetician specializing in laser hair removal, inflammatory skin conditions, and integrated wellness. I’ll also share my own experience with laser hair removal—let’s dive in!

    How Does Laser Hair Removal Work?

    According to Madalaina, there are a few different types of lasers for hair removal. The most common are Alexandrite and Nd:YAG. 

    Alexandrite lasers basically work by picking up the contrast between the pigment in the hair versus the skin, meaning they work best on people with fair skin and dark hair (light brown to black). For the same reason, Alexandrite lasers aren’t suitable for darker skin tones (this would be Fitzpatrick skin types 4-6).

    Nd:YAG lasers, on the other hand, work by passing light energy directly under the follicle. The light energy turns into heat, which weakens the follicle and causes the hair shaft to detach and shed. Over time, the absence or weakening of the follicle reduces hair growth. Since Nd:YAG lasers don’t rely on contrast, they’re a great option for those with darker skin tones.

    (Fun Fact: Dr. Fitzpatrick created his eponymous scale to help dermatologists gauge a patient’s risk for skin cancer, but he was also the one to get Tretinoin FDA-approved for wrinkles and anti-aging. When I first started my career, I was lucky enough to meet him and witness this process firsthand!)

    Does Laser Hair Removal Work on Blonde Hair?

    If your hair is white, grey, or very light blonde, laser hair removal may not be a good option for you. Both Alexandrite and Nd:YAG lasers are ultimately attracted to the pigment in the hair, and this is how the energy source gets directed. If there is little to no pigment in the hair, the lasers will have a much harder time targeting it successfully. 

    There have been advancements that make it easier to target blonde or light hair. One is laser dyeing, which involves artificially dyeing the hair to “trick” the laser. Another is long pulse lasers, which may be safer for those with blonde hair. Even with these options, keep in mind that laser hair removal often isn’t as effective for light hair as it is for darker hair. Be sure to consult with your provider before committing, and make sure they’re being upfront about reasonable expectations.

    How Many Sessions of Laser Hair Removal Are Needed?

    “In my experience,” says Madalaina, “this can vary pretty drastically depending on the device and the client. More classic machines usually require eight or more sessions, and I find machines like mine that use a blend require around six for best results.” She added that the treatments are usually spaced four to six weeks apart for the face, underarms, or bikini, while the rest of the body typically requires six to eight weeks of downtime in between. This is to ensure that the area being targeted is at the right stage of hair growth. Otherwise, treatments aren’t as effective.

    Are Touch-Ups Required?

    Madalaina notes that touch-ups will depend on the client’s hair type as well as the device used. It’s also a matter of preference and depends on how fastidious someone wants to be. Madalaina says most clients only require one or two touchups per year, but some prefer to come in more often. “The great thing about shaving versus waxing is that you can shave in between and it won’t mess up the hair growth cycle,” she says. “This means you can stay smooth between appointments and don’t have to go through the awkward growth stage required with waxing.” 

    Does Laser Remove ALL Hair? What Are Realistic Expectations?

    The short answer is no. I myself first tried laser hair removal in 2005, and I distinctly remember being told, “You can throw away your razor, you’ll never have to shave again.” This was definitely an over-exaggeration, but these days, practitioners are a lot more upfront about setting realistic expectations. I tried it again three years ago, and I would say it permanently removed about 90% of my hair (which is pretty great!). Now, it’s sometimes referred to as laser hair reduction instead.

    While laser hair removal doesn’t remove 100% of hair, it can be life-changing. It significantly reduces hair growth (meaning most of the hair won’t grow back at all), and the hair that does remain is thinner and very sparse. This makes it a lot more manageable and means that shaving is easier and much less frequent. Another bonus? Aside from virtually stopping ingrown hairs in their tracks, laser hair removal fades old discoloration caused by ingrowns and inflammation. The result is much smoother, brighter skin overall, even after just one session. 

    According to Madalaina, the only way to permanently remove all hair is through electrolysis, which she notes is a painful and tedious process.  

    What’s the Best Time of Year to Get Laser Hair Removal?

    The best time of year for laser hair removal is fall or winter. I always tell my clients that this is the best time of year for professional treatments in general, and the reason is that you’re less likely to get sun exposure. Many treatments make the skin temporarily more photosensitive, and laser hair removal is no exception. The recommendation is usually that you avoid any sun exposure on treated areas two weeks before AND after your appointment. 

    Learn why winter is the best time of year to get rid of brown spots (and how to do it).

    What Are Prep and Aftercare for Laser Hair Removal Like?

    Before Your Appointment

    As I mentioned, preventing sun exposure to the areas you’re getting treated is critical both two weeks before and after your appointment. You’ll also want to check with your provider about discontinuing active products like exfoliating acids and retinol, and topical prescriptions like tretinoin or hydroquinone (Madalaina says this can vary depending on the device). If you’re using Accutane for acne, you’ll want to wait at least a month after your last dose to get laser hair removal. Again, be sure to check with your provider for specific instructions.

    Madalaina adds that you’ll want to shave the areas that are going to be treated the night before your appointment. “This ensures the most effective treatment since we want the light energy to have easy access to the follicle instead of having to waste energy on surface hair growth (which could also burn),” she says. “I find shaving the night before to be the sweet spot because the shave is still fresh, but the skin’s had some time to recover. Shaving too close to your appointment time can sometimes result in extra sensitivity or irritation on the skin.”

    After Your Appointment

    After your treatment, Madalaina says it’s best to avoid any heavy sweating or moisture for about 24 hours. “Skip the intense workout, swim, or sauna to avoid irritation,” she says. If you’re experiencing some discomfort, a brief, cool shower can be used to soothe post-treatment.

    When it comes to laser hair removal aftercare, the most important thing is hydration. I always recommend that clients use something gentle without fragrance or drying alcohol. It’s also best to use something you’ve tried before and know you won’t react badly to. Remember, skin is super raw after being exposed to the heat of a laser, so it needs to be babied. You can use a thick cream like Phytolipid Comfort Creme, which has calming plant extracts as well as moisturizing lipids to help restore the skin barrier. Alternatively, you can use an oil like Pro Remedy Oil, which has a blend of 12 oils rich in omegas and antioxidants. 

    Focus solely on hydration for the first three to four days. After this, you can add shaving or exfoliating to your routine to help slough off dead skin cells and allow hairs that are detaching to shed through the surface. I find physical scrubs really effective for this, but make sure you use a scrub with rounded particles to prevent any tearing or scratching of the skin. 

    How to Find the Right Provider for Your Treatment

    Before booking a treatment, book a consultation. The machines used for laser hair removal are powerful, and used incorrectly (or on the wrong person) they can cause damage. It’s important to find someone skilled who takes the time to answer all your questions.

    “I would recommend looking into the type of laser that best describes your skin and hair type and then doing some research on the laser your prospective provider carries,” says Madalaina. “I always find word of mouth to be the most reliable, so if you can, ask those around you to gauge honest experiences! I also tend to like smaller, more specialized studios vs. larger chains. Lasers are powerful, attention to detail is everything, and you should feel that you are getting a personalized experience. Good providers will always go out of their way to gain in-depth knowledge of your routine and goals to maximize your experience. They’ll walk you through expectations, ensure you are comfortable and will be happy to answer all of your questions! Having a specialized laser or advanced certification is always a plus.” 

    My Experience With (and Honest Review of) Laser Hair Removal

    I got laser hair removal on my underarms and bikini area three years ago, and at that point, I’d been waxing them for 25 years! What I always hated about waxing (other than the pain) was the fact that I had to let everything grow out for a few weeks between waxes. This meant I had about one week of smooth skin, and then I was stuck with stubble for another three or so. There can definitely be some awkward hair growth between the first few treatments of laser hair removal, but as Madalaina pointed out, you can shave. Eventually, that awkward re-growth stops almost altogether. 

    I had ten treatments in total and, as I mentioned, it removed about 90% of my hair. I have a combination of blonde and dark hair in the areas that were treated, so the blonde didn’t really get picked up by the laser. Still, this hair is so thin and light now that I don’t even go for touch-ups, and I barely even have to shave anymore.

    I do want to say that results can still vary greatly person-to-person. There’s a chance I had a leg up since some of my follicles were already shot from so many years of waxing, plus I was 50, and hair growth naturally slows down with age. That said, I’m really happy with the results and definitely prefer it to the waxing I was doing all those years. I’m able to think about it a lot less, and it’s one more thing I don’t have to worry about!

    Next up, if you get regular waxes, read my fail-proof guide to preventing ingrown hairs.

  • These 5 Simple Dietary Swaps Could Lengthen Your Life

    These 5 Simple Dietary Swaps Could Lengthen Your Life

    by Caitlin H,

    Jan 30, 2023

    Youre Never Too Old To Get Healthier

    If the potential of adding years to your life by making small changes appeals to you, listen up.

    Improving the quality of foods you eat daily — even just a little — can extend your life, no matter how old you are. Scientists published these findings in a New England Journal of Medicine study.

    The study analyzed the lifestyle and diet habits of about 74,000 people between the ages of 30 and 75 for more than 20 years. They used scoring systems like the Alternate Healthy Eating Index. The researchers found that anyone can benefit significantly from swapping processed, sugar- and sodium-laden foods with more nutritious options.

    The study also indicated that following the Mediterranean Diet, which leverages wholesome ingredients packed with Omega-3 fatty acids, whole grains and unsaturated fats, led to higher diet scores for participants. The study found that those who continuously had high diet scores were up to 14% less likely to die of external causes than those who had poor diet scores.

    Thankfully, the research also showed that any participant, whether older or younger, reduced mortality likeliness anytime their diet scores improved.

    With those encouraging results in mind, we rounded up five simple diet swaps that can improve your nutritional intake — and maybe even add years to your life!


    1) Seltzer for Soda


    It’s easy to drink a can of soda or pour yourself a glass of juice or lemonade without thinking about what’s actually in it. Unfortunately, those beverages are laden with sugar and unexpected calories that may expand your waistline without you even realizing it.* Instead, fill your fridge with things like flavored seltzers or probiotic waters, which are low- or no-calorie beverages that keep you hydrated without adding excess sugar to your diet.


    2) Nuts for Nacho Chips


    Potato chips, crackers and even cereal are all typical snacks we like to grab handfuls of throughout the day. They may taste great but are typically packed with a ridiculous amount of sodium. Thankfully, you can swap them out for protein-packed nuts. Nuts are also low in saturated fats and come in various tasty options. Plus, they’re the perfect fill-in if it’s that crunchy texture you’re after.


    3) Crops for Cookies


    Fruits and veggies may not seem very exciting. Still, the wide variety of crops available to you makes it possible to satisfy any sweet-tooth craving. Raw fruits and vegetables contain several vitamins, minerals and dietary fibers. They’re as easy to snack on as the cookies in that store-bought package, which are highly processed and laden with sugar and salad and have a meager nutritional value.


    4) Olive Oil for Vegetable Oil


    Both olive oil and vegetable oil are everyday household staples many of us cook with daily. Olive oil is among the least-processed foods and plays a significant role in the heart-healthy Mediterranean diet. Its low-processed status means it typically has more vitamins and antioxidants than its vegetable oil counterpart. Many chefs swear by it, saying it brings out more robust flavors and works better for most cooking scenarios.


    5) Chicken for Hotdogs


    You might be mistaken if you thought you were doing okay on the protein front by heating up some canned meat, ham, bacon or hotdogs for dinner. Most store-bought versions of these typical dinnertime meals are super-processed, and studies have linked them to things like heart disease and cancer. Choose something like chicken, pork chops, fish or turkey instead, which retain their nutritional value and, frankly, taste a lot better, too!
    Pasta with Meatsauce


    BONUS

    6) – Swap your usual diet for a Diet-to-Go menu plan!

    Making simple diet swaps can go a long way toward adding years to your life. If you’re not sure where to begin, we can help! Our meals are controlled for calories, portion size, sodium content and nutrition.  If you’re worried you can’t do without your weekend pancake breakfast, we’ve got you covered. Don’t want to miss out on pasta night? We have so many pasta dishes to choose from. We have simple swaps you can choose to make sure you’re satisfied, while eating foods you love! 
    Check out our menus and get started today! 


    ————————————————————————————


    Author: Caitlin H
    Diet-to-Go Community Manager

    Caitlin is the Diet-to-Go community manager and an avid runner. She is passionate about engaging with others online and maintaining a healthy, active lifestyle. She believes moderation is key, and people will have the most weight loss success if they engage in common-sense healthy eating and fitness.


    Lifestyle/Wellness

  • Instant Pot Sweet and Sour Chicken

    Instant Pot Sweet and Sour Chicken

    This Instant Pot Sweet and Sour Chicken is a set it and forget it meal! Packed with sweet pineapple, bell peppers, and a tangy sweet sauce, this meal is drool-worthy and the perfect weeknight dish to have for quick dinners or easy ready-to-go lunches.

    sweet and sour chicken over a bed of white rice with green onion in a grey speckled bowl with wood chopsticks I love set-it-and-forget-it meals. Because with a toddler running around and endless dishes, cleaning, and laundry to do, it’s nice to be able to throw everything into one pot and let it do the cooking, while I get other things done around the house.

    This Instant Pot Sweet and Sour Chicken requires only 10 minutes of prep and 10 minutes of active cooking time. That’s only 20 minutes of work!

    I don’t know about you but I can get behind a 20-minute meal!

    This meal is super satisfying when paired with rice – the protein and the veggies help to keep you full and satiated.

    With the sweet and tangy pineapple glaze, sautéed veggies and hearty chicken – you’ll be be craving this more than you know!

    Ingredients You’ll Need 

    Instant pot sweet and sour chicken ingredients shown. Chicken thighs in the center surrounded by other ingredients in small bowls. Pineapple chunks, garlic cloves, yellow onion, soy sauce, brown sugar, apple cider vinegar, ketchup, green and red bell pepper, olive oil, pineapple juice, cornstarch

    Notes on Ingredients

    chicken thighs: chicken thighs have a higher fat content which works well with dish since they’re aren’t any other sources of fat. But if you prefer chicken breast, you can easily substitute.

    garlic: adds aromatics to the dish! also nothing better than the smell of garlic (Am I right?!) 

    green and red bell peppers: I love the colors of red and green bell peppers in this dish but you could use orange or yellow bell peppers too. Trader Joes also sells frozen multicolored bell peppers, which you could easily use and would cut down on prep time.

    pineapple chunks: You could use fresh pineapple, frozen, or jarred/canned. I personally used canned / jarred because it tends to be cheaper, and comes with extra juice for later in the recipe! If you use fresh or frozen and don’t have pineapple juice for the cornstarch slurry, just use water instead.

    apple cider vinegar: ACV offers a tangy sour taste that contrasts nicely with the sweetness of the dish! You can substitute with rice wine vinegar.

    ketchup: Adds sweetness and umami to the dish!

    soy sauce: also adds umami flavor!

    brown sugar: adds sweetness, can substitute with coconut sugar or any other sweetener.

    cornstarch: helps thicken the sauce. You could also use arrowroot powder instead.

    garnishes: I love topping this dish with sesame seeds and green onions for an added crunch and flavor.

    Equipment You’ll Need (affiliate links – if you make a purchase I receive a small commission)

    Instant Pot 

    How to Make Instant Pot Sweet and Sour Chicken

    Instant pot sweet and sour chicken how to make step by step process shown. 5 steps. mixing ingredients together and adding to instant pot.

    Saute: In the Instant Pot, add olive oil and set to Sauté. Let oil heat for two minutes. Meanwhile, season chicken with salt and pepper.
    Add chicken and onion and sauté, stirring occasionally, until chicken is slightly browned and onion is softened, about 3-5 minutes. Add garlic and let sauté until fragrant, about one minute.
    Add bell pepper, pineapple chunks and juice, apple cider vinegar, ketchup, soy sauce and brown sugar.
    Pressure cook. Secure lid onto Instant Pot. Close the steam vent (should be on sealing). Set to high pressure for 5 minutes. Allow natural pressure release for 10 minutes.
    After 10 minutes, use quick release valve to release steam. Once pressure is released, open lid and stir.
    Make sauce. In a small bowl, mix together cornstarch and pineapple juice until slurry is formed. Stir cornstarch slurry into chicken mixture.
    Set Instant Pot to sauté, stirring occasionally, until mixture is bubbling and thickened, about 3-5 minutes.
    Let it thicken: Let stand for 5-7 minutes for sauce to continue thickening.
    Serve warm, with rice. Optional: Garnish with sesame seeds and/or green onion.

    Expert Tips

    If you don’t want to dirty a cutting board, simply cut chicken straight into the Instant Pot, using kitchen shears. Just be sure to wash your hands (and the shears) thoroughly afterwards.
    If you don’t have an Instant Pot, you can make this recipe in the slow cooker! Just add all ingredients (except olive oil, corn starch and pineapple juice) to slow cooker and set to low for 7-8 hours or high for 3-4 hours. After chicken is done cooking, add cornstarch slurry to slow cooker to thicken mixture.
    If you can’t get fresh bell peppers or pineapple, frozen or canned work as well!

    Recipe FAQs 

    What if I don’t have an Instant Pot?

    No worries – this dish is made perfectly in the slow cooker or sautéed on a pan (just might take a little longer!). Use all the same ingredients and cook chicken accordingly and sauté vegetables and add in the glaze sauce! Will still be just as good! 

    What if I want to thicken the sauce or it came out too runny? 

    The most common way to thicken it is with starch, such as cornstarch or flour (which we’ve already added!) Another way to thicken the sauce is to cook it for a longer time, allowing some of the liquid to evaporate, so you could try letting it sit for a little longer if it looks too runny.

    Is Sweet and Sour Chicken the same as Orange Chicken? 

    Nope! Both dishes are sweet, however, orange chicken is sweet and tangy rather than sweet and sour. In addition, orange chicken has a brighter feel to the sweetness thanks to the orange juice used to sweeten it.sweet and sour chicken served in grey speckled bowl with white rice and chopsticks

    Storage and Preparation 

    If you have any leftovers, you can store them in the fridge to enjoy later. Just place the sweet and sour chicken in an airtight container and consume within 3 to 4 days. 

    Recipes That Pair Well

    While this is a balanced meal, you can also serve with these other Asian-inspired dishes: 

    Crispy Thai Brussel Sprouts 

    Vegetarian Pad See Ew 

    Green Tea Marinated Salmon with Asian-Inspired Slaw 

    bowl of sweet and sour chicken served with white rice, green onion. hand holding chopsticks

    For more Instant Pot dishes, check out my other recipes below!

    Instant Pot Vegetarian Pho (Vietnamese-Inspired Noodle Soup)

    Instant Pot Jackfruit Tacos

    Instant Pot Cream of Mushroom Soup

    If you like this recipe, please be sure to comment and give it a 5 star rating below. If you make it, share it on Instagram and tag me @karalydonrd and I’ll re-share it with my followers! If you want to save this recipe for later, be sure to pin it on Pinterest! 

    Print

    clock clock iconcutlery cutlery iconflag flag iconfolder folder iconinstagram instagram iconpinterest pinterest iconfacebook facebook iconprint print iconsquares squares iconheart heart iconheart solid heart solid icon

    Description

    This Instant Pot Sweet and Sour Chicken is a set it and forget it meal! Packed with sweet pineapple, bell peppers, and a tangy sweet sauce, this meal is drool-worthy and the perfect weeknight dish to have for quick dinners or easy ready-to-go lunches.

    1 tablespoon olive oil
    2 lbs chicken thighs, cut into 2 to 3-inch pieces
    Salt and pepper
    1/2 yellow onion, diced (about 1/2 cup)
    3 cloves garlic, minced
    1 green bell pepper, diced (about 3/4 cup)
    1 red bell pepper, diced (about 3/4 cup)
    1 cup pineapple chunks, cut into 1/2- to 1-inch pieces (from can or jar, reserve juice – see below)
    1/4 cup apple cider vinegar
    3 tablespoons ketchup
    1 tablespoon soy sauce
    1/4 cup brown sugar
    1/4 cup cornstarch
    1/4 cup reserved pineapple juice
    Rice, for serving
    Optional: sesame seeds and green onion for garnish

    In the Instant Pot, add olive oil and set to Sauté. Let oil heat for two minutes. Meanwhile, season chicken with salt and pepper.
    Add chicken and onion and sauté, stirring occasionally, until chicken is slightly browned and onion is softened, about 3-5 minutes. Add garlic and let sauté until fragrant, about one minute.
    Add bell pepper, pineapple chunks and juice, apple cider vinegar, ketchup, soy sauce and brown sugar.
    Secure lid onto Instant Pot. Close the steam vent (should be on sealing). Set to high pressure for 5 minutes. Allow natural pressure release for 10 minutes.
    After 10 minutes, use quick release valve to release steam.
    Once pressure is released, open lid and stir.
    In a small bowl, mix together cornstarch and pineapple juice until slurry is formed. Stir cornstarch slurry into chicken mixture.
    Set Instant Pot to sauté, stirring occasionally, until mixture is bubbling and thickened, about 3-5 minutes.
    Let stand for 5-7 minutes for sauce to continue thickening.
    Serve warm, with rice.
    Optional: Garnish with sesame seeds and/or green onion.

    Notes

    How to make sweet and sour chicken in the slow cooker:

    Add all ingredients (except olive oil, corn starch and pineapple juice) to slow cooker and set to low for 7-8 hours or high for 3-4 hours. After chicken is done cooking, add cornstarch slurry to slow cooker to thicken mixture.

    Prep Time: 10 minutesCook Time: 35 minutesCategory: DinnerMethod: Instant PotCuisine: Chinese

    Keywords: instant pot sweet sour chicken, sweet sour chicken in instant pot

    This recipe was retested, reshot and revamped to bring you the most delicious recipe! The original post was published in 2020. 

  • Chicken and Chickpea Curry (Easy Weeknight Meal)

    Chicken and Chickpea Curry (Easy Weeknight Meal)

    Chicken and Chickpea Curry (Easy Weeknight Meal) – The Real Food Dietitians


    Privacy & Cookies Policy


  • How To Stop Emotionally Eating

    How To Stop Emotionally Eating

    Looking to finally stop emotionally eating? Keep reading to learn 4 easy tips you can implement today. 

    Emotions and food are so intertwined. Our feelings impact what we want to eat, what we don’t want to eat, as well as how much we eat. To a certain degree, this is completely normal and completely harmless. But sometimes, emotional eating can get a bit out of hand. 

    If you’re unable to control yourself when you’re emotional and around food, there are some quick tips you can implement that will significantly reduce these instances. It’s all about awareness, mindfulness, and intentional action. Let’s get into it!

    What is Emotional Eating? 

    In order to stop emotionally eating, we have to get to know what it really means to emotionally eat. At its core, emotional eating happens when food is used to cope with emotions, as opposed to being used to satisfy hunger. This means you’re using food as a form of comfort, even when you’re not hungry or in need of more energy. It’s often a form of mindless eating. Over time, this can create an imbalanced, confusing relationship with food. 

    What we’re not talking about here is when emotions have a slight impact on your food choices. Maybe you have a certain comfort food you enjoy having when you’re sad, or certain foods you like to enjoy when you’re excited. These scenarios don’t call for any intervention, as long as they’re done mindfully, intentionally, and generally in the presence of physical hunger. 

    Our goal isn’t to completely separate food from emotion, that’s no fun at all! But instead, ensure your emotions are only impacting your eating habits in a positive, balanced way. By learning how to create this relationship, you can learn to stop emotionally eating.   

    4 Tips to Stop Emotionally Eating 

    Here are my top 4 tips to stop emotionally eating. Start with the first one, then slowly but surely make your way through to implement them all!

    Address Emotions Head On

    This is the most important tip. Emotional eating often takes place when emotions and stressors are left unaddressed. In order to stop emotionally eating, we need to address our emotions as they arise.

    Sometimes this is fairly easy. Maybe you’re feeling a little overwhelmed by this week’s workload and you’re finding yourself turning to food for comfort. In this scenario, you really only need to learn how to cope with the temporary stress of work and implement some systems to help you do so. 

    Other times, it takes a bit more work. Some emotions are deep-rooted, and may not be easily addressed on your own. In this case, therapy and counseling can work wonders. Working with someone to help cope with emotions can have a significant positive impact on your relationship with food when emotional eating is taking place.

    If you address difficult emotions as they arise, and work through deep-rooted emotions from your past, you’ll give yourself the opportunity to stop emotionally eating. 

    Implement Intentional Emotion Check-ins 

    In order to be proactive about addressing your emotions, it can be really helpful to implement intentional emotional check-ins. It may sound silly, but this type of proactive action makes it much easier to remain mindful on a daily basis. 

    If you struggle to identify emotions on the regular, try setting a particular time of day where you take a moment to pause and reflect. Ask yourself questions like, “How do I feel right now?”, “How have I felt today?”, and “What can I do to cope with these emotions?”. Simply bringing awareness to your emotions can make a world of a difference. That way you’re less likely to reach for food mindlessly and unintentionally. Over time, you’ll then be able to stop emotionally eating. 

    Reacquaint Yourself with Hunger and Satiety 

    Emotional eating also takes place when we don’t fully know how to decipher or interpret our hunger and satiety cues. These are the cues our body uses to tell us when we’re hungry and when we’re full. If we don’t understand them, it’s much easier to emotionally eat in the absence of hunger. 

    To reacquaint yourself with your hunger and satiety, start by reflecting on it before and after meals. As you’re sitting down to a meal, how do you feel? Do you physically feel hunger? What does it feel like? If not, what does satiety feel like? How do you know that you’re not really hungry?

    That way, the next time you’re reaching for food in the absence of hunger in response to an emotion, you can conduct a quick check-in. That quick check-in will soon become a habit, and you’ll be able to stop emotionally eating.

    Get to Know Your Triggers

    While it is possible to have all heightened emotions cause emotional eating, in my experience, this often isn’t the case. Individuals usually have certain emotional triggers that lead them to emotionally eat. Whether it’s a certain person that makes them feel a certain way, or a particular situation or feeling. 

    Take some time to reflect on the instances when you found yourself emotionally eating. Try and think through the common denomenators. What kind of emotion were you experiencing? Are there any common environments or people involved in these scenarios? 

    Once you’ve identified your possible triggers, you can start to prepare yourself. The next time you find yourself feeling said emotion, you’ll be that much more aware of it and can work to mindfully stop emotionally eating. 

    The Takeaway

    Learning to stop emotional eating takes time, reflection, and mindfulness. Don’t forget to be compassionate with yourself as you’re trying to stop emotionally eating! Remember that you’re only human and change doesn’t take place overnight. 

    Do You Want to Experience More Balance with your Food Choices?

    Then find your balanced eating type!

    Take this 45-second free quiz to find out which balanced eating archetype you are, and what your unique type needs to maintain balance with the way you nourish yourself. That way, you can finally be free from food and diet obsession, maintain a balanced weight, and cultivate a positive relationship with food and your body. 

    Take The Free Quiz Now

  • This Medix 5.5 Retinol Body Cream Leaves Skin ‘Soft, Supple, & Lifted’

    This Medix 5.5 Retinol Body Cream Leaves Skin ‘Soft, Supple, & Lifted’

    If you purchase an independently reviewed product or service through a link on our website, STYLECASTER may receive an affiliate commission.

    If you’re using retinol on your face but not your body, we need to talk. While transforming skin with retinol is mostly left up to the visage, next-level body care is getting yourself a lotion with retinol in it. Vitamin A is my best skin care friend, so I make sure that all of my skin is covered in it. And to remind you to always use your retinol, take note that plenty of shoppers recommend the product below. And since it’s on sale at Amazon
    now’s your time to stock up.

    Medix 5.5’s Retinol Cream
    combines anti-aging ingredients with natural antioxidants to help decrease the look of wrinkles and fine lines, while natural ferulic acid targets sun-damaged skin. This well-reviewed body care product (it’s up to almost 30,000 reviews on Amazon—and counting) quickly transforms skin and brings life back to you. You can also use it on your face if you don’t already have retinol in your skincare routine. Bonus points for the chamomile and botanimoist AMS, which helps increase your skin’s hydration by almost 88 percent. Your skin will feel hydrated and moisturized, on top of feeling oh-so-smooth.

    body cream

    Courtesy of Medix.

    Medix 5.5 Retinol Body Lotion Moisturizer Face & Body Cream

    This Medix 5.5 Retinol Body Lotion Moisturizer Face & Body Cream
    is a great moisturizer for skin that feels crepey, wrinkles, sagging skin and sun damage. It’s vegan and cruelty-free, so it’s not tested on animals.

    Reviewers love and rave about this body lotion
    , claiming that it erases the appearance of crepey skin almost immediately.

    One user said, “In the past two years, the back of my hands had developed crepey dried skin that looked like shiny cracked earth. It was very noticeable. Although I am 63, my face and body look 20 years younger but my crepey hands look at least 10 years older! I wore moisturizing gloves with lotion on at bedtime but not much improvement had shown. I purchased Medix. The first three days I was able to see drastic improvement. A week later my skin had gotten so smooth there was no traces of crepey skin at all. Thank you, Medix! I shall recommend this product to all my friends and family.”

    Grab it while it’s still down to $14 at Amazon.

    StyleCaster Shopping Newsletter Sign Up

  • A Morning Skin Care Routine For Every Skin Type

    A Morning Skin Care Routine For Every Skin Type

    If you believe that breakfast is the most important meal of the day, you already know what you do in the morning counts. Skin care is no different. Thankfully, if you have a jam-packed start to the day, your morning skin routine doesn’t have to be complicated. Instead, discover how easy it is to complete a simple skin care routine tailored for your skin type, all while your first cup of coffee brews.

    Why Do You Need A Morning Skin Care Routine? | 4-Step Morning Routine | For Dry Skin | For Normal Skin | For Oily Skin | For Combination Skin | For Sensitive Skin | For All Skin Types | Esthetician’s Morning Routine

    Why Do You Need A Morning Skin Care Routine?

    An effective morning skin care routine removes dirt or oil that may have settled on the face through the night. It also preps the skin and creates a healthy skin barrier to protect you from any environmental stressors during the day ahead. Stressors include pollution, blue light and UV exposure. You’ll also want to choose products that replenish and strengthen the skin throughout the day. Keep reading to find out our recommended morning skin care routine for each skin type, as well as our esthetician’s must-have products for her morning routine. 

    4-Step Morning Skin Care Routine

    Before we dive into product recommendations for each skin type, here are the foundational four steps to follow.

    Step 1: Cleansing

    Using clean hands, start your morning by cleansing the skin. The best morning cleansers work to remove any dirt (especially anything that has transferred to your face from your pillowcase), sweat, residual makeup or skin care from the night before. You can select from an oil, gel, balm or cream cleanser depending on your skin concerns and skin type. 

    Step 2: Toner

    There are many reasons to use a morning toner. Toners offer replenishing benefits and add a barrier of protection and hydration throughout the day. Depending on your skin, you might choose one that increases hydration, reduces oil or removes dead skin. 

    To use, apply the toner to a cotton pad to the face, lightly sweeping it across the skin. Alternatively, you can spritz your toner directly onto the skin. When selecting a toner, avoid a product with a high alcohol percentage that can irritate or dry out your skin. Instead, look for a toner with soothing ingredients that address your skin’s needs. 

    Step 3: Moisturize

    Seal the deal on your morning routine with a moisturizer to smooth the skin and protect the skin barrier. A strong skin barrier protects the skin from bacteria and other nasties that can lead to breakouts, dryness or irritation. The moisturizer you choose should also align with your skin type. For example, a dryer skin type might opt for a thick cream-based moisturizer that adds hydration, while an oily skin type may prefer a gel-based moisturizer that will hydrate without adding bulk or oil.

    Step 4: SPF

    The final step is applying an SPF to protect your face for the first few hours of the day. Ideally, reapply every few hours to continue to protect your skin from sun damage. Sweat, weather, touching your face, or even using your phone can all contribute to sunscreen losing its efficacy throughout your day. This step is key, even if you’re working inside (the sun’s UV rays can get through windows!) or if the weather is looking cloudy. Sunscreen is the best defense against the aging effects of the sun and using it regularly can lower your risk of skin cancer. According to the American Cancer Society, look for a broad-spectrum sunscreen that can protect you from UVA and UVB rays and aim for one that is at least SPF 30. We recommend reviewing our range of SPF moisturizers and sunscreens found here. 

    Morning Skin Care Routines For Every Skin Type 

    Morning Skin Routine For Dry Skin

    Step 1: Cleanse and rehydrate your skin with the Firm Skin Acai Cleanser.

    Step 2: As a further hydrating layer, follow with the refreshing Neroli Age Corrective Hydrating Mist.

    Step 3: Apply the Coconut Age Corrective Moisturizer to lock in moisture and provide hydration throughout the day.

    Step 4: Use an SPF to shield yourself from harmful UV rays. We love the Tropical Vanilla Day Cream SPF 40 for skin in need of hydration. 

    Morning Skin Routine For Normal Skin

    Step 1: Cleanse with the Stone Crop Gel Wash to remove any buildup, dirt or sweat from the night before.

    Step 2: Follow with the replenishing Stone Crop Hydrating Mist to leave your skin feeling dewy and refreshed.

    Step 3: Apply the Stone Crop Whip Moisturizer for the hydrating benefits of stone crop.

    Step 4: Normal skin will benefit from Lilikoi Daily Defense Moisturizer SPF 40 which improves the look of skin exposed to blue light stress and pollution.

    Morning Skin Routine For Oily Skin

    Step 1: Use a gel-based cleanser such as the Citrus Exfoliating Wash to remove any oil or dirt that has built up overnight.

    Step 2: Spritz with the Lime Refresh Tonique to add a boost of green tea and Vitamin C. These ingredients encourage a more youthful-looking complexion for oily skin. 

    Step 3: Use the lightly moisturizing Strawberry Rhubarb Hyaluronic Hydrator, which provides hydration and leaves a fresh strawberry scent.

    Step 4: Apply an SPF to protect your skin from the sun. The Red Currant Protective Moisturizer SPF 40 protects and mattifies oily skin to keep the shine in check.

    Morning Skin Routine For Combination Skin

    Step 1: Cleanse with the Mangosteen Daily Resurfacing Cleanser to remove any surface buildup.

    Step 2: Follow with the antioxidant-rich Mangosteen Revitalizing Mist.

    Step 3: Finish with the hydrating but lightly moisturizing Mangosteen Gel Moisturizer.

    Step 4: Use an SPF to defend your complexion from harmful UV rays. The Bright Skin Moisturizer SPF 40 balances both dryness and oil while brightening up the appearance of dark spots. 

    Morning Skin Routine for Sensitive Skin

    Step 1: Begin your routine with the Lemon Grass Cleanser to refresh and cleanse the skin.

    Step 2: Spritz with the Hawthorn Tonique. With hawthorn, chamomile and marjoram, this tonique helps the skin look calm.

    Step 3: Apply a layer of Apricot Calendula Nourishing Cream to soften and smooth the skin without the risk of irritation. 

    Step 4: Protect your skin from the sun by applying an SPF daily. Reduce dry patches with a replenishing SPF like our Tropical Vanilla Day Cream SPF 40.

    Morning Skin Care Routine For All Skin Types

    Step 1: Start your routine by cleansing with the Kombucha Microbiome Foaming Cleanser, a cleanser that balances the microbiome and reveals a healthy-looking glow. 

    Step 2: Follow with a spritz of the Neroli Age Corrective Hydrating Mist. Neroli oil provides refreshing and hydrating benefits. 

    Step 3: Moisturize with the replenishing Arctic Berry Peptide Radiance Cream. This cream is formulated to reveal radiant-looking skin with our Peptide Illuminating Complex, an antioxidant-rich combination of yellow plum extract, gardenia and hibiscus seed botanical peptides. 

    Step 4: Use an SPF to block your skin from the sun’s radiation. There are many great options, but with its blue-light protection, the Lilikoi Daily Defense Moisturizer SPF 40 is ideal for all skin types.  

    An Esthetician’s Morning Skin Care Routine

    Our Lead Skin Care Trainer, Natalie Pergar, is ready to pull back the curtain and unveil her own morning skin care routine. Watch Natalie as she discusses her favorite natural products that she uses daily. 

    Do you have any favorite products in your morning routine? We’d love to hear about them. Let us know in the comments below or on our social media.

Padişahbet Giriş
Padişahbet Güncel Giriş
Crypto Casino
new online casino
Padişahbet